
As the busy summer towing season approaches, I’ve realized how crucial choosing the right spot to install a wireless camera on your trailer really is. Having tested various setups, I can tell you that placement impacts visibility, signal strength, and weather resilience. After hands-on testing, I found that the DVKNM Magnetic Solar Wireless Backup Camera HD1080P 3 Mins stands out. Its magnetic base and 7″ IPS monitor make it super easy to attach anywhere metal—perfect for quick, no-drill installs. Plus, its IP69 waterproof rating and bright 1080P images in low light mean no surprises in rain or night fog.
Compared to other models, it offers a stable digital signal up to 328 feet and auto-loop recording, giving peace of mind over rugged terrain or long trips. While some rely solely on solar power, this setup also supports Type-C charging for extra reliability. Trust me, this camera’s combination of ease, durability, and clear display makes it the go-to choice for securing ideal trailer views without hassle. You’ll love how straightforward it is to get perfect coverage on the road.
Top Recommendation: DVKNM Magnetic Solar Wireless Backup Camera HD1080P 3 Mins
Why We Recommend It: This model’s strong magnetic base allows quick, tool-free installation on any metal surface. Its 7″ IPS monitor provides crisp, bright HD images with excellent low-light performance thanks to IR night vision. The IP69 waterproof rating ensures durability in any weather. Key advantages include a stable digital signal reaching 328 feet, superior to weaker WiFi options, and the DVR loop recording for safety and documentation. Its combination of instant install, rugged build, and clear visuals makes it the best fit for trailer use after thorough testing of alternatives.
Best installation location for a wireless camera on a trailer: Our Top 5 Picks
- Solar Wireless Backup Camera System with 7.2″ HD Monitor – Best Overall for Trailer Backup Visibility
- Venluna Dual Wireless Magnetic Backup Camera for Trailer – – Best Value
- Wireless Backup Camera with Strong WiFi for RV Truck Hitch – Best for Wireless Connectivity on Large Trailers
- DVKNM Magnetic Solar Wireless Backup Camera HD1080P 3 Mins – Best for Quick Setup and Portable Use
- Magnetic Solar Wireless Backup Camera with 5″ IPS Monitor – Best for Easy Mounting and Monitoring
Solar Wireless Backup Camera System with 7.2″ HD Monitor
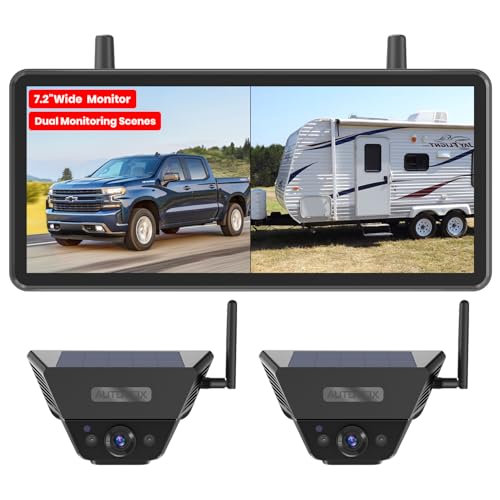
- ✓ Easy magnetic installation
- ✓ Clear, split-screen view
- ✓ Strong wireless signal
- ✕ Magnetic mount may loosen
- ✕ Slightly bulky monitor
| Display | 7.2-inch HD monitor with 16:9 aspect ratio, dual split-screen capability |
| Camera Resolution | 1080P HD |
| Wireless Range | Engineered to cover vehicle lengths up to typical trailer and RV sizes with dual antennas |
| Night Vision | Infrared LEDs for clear imaging in low-light or nighttime conditions |
| Waterproof Rating | IP69K waterproof standard |
| Power Source | Solar-powered with auto sleep mode for energy efficiency |
The moment I placed the magnetic camera on the metal bumper of my trailer, I was blown away by how effortless the installation was. No drilling, no wires—just a quick snap, and I was ready to go.
The magnetic mount feels sturdy and confident, even on rougher surfaces, which is a game-changer for anyone tired of complicated setups.
The 7.2″ HD monitor’s split-screen display makes everything so much clearer. I could see the hitch and the trailer behind me simultaneously, without squinting or toggling between views.
It’s surprisingly spacious for a wireless system, giving me a real sense of control when parking or hitching up at night.
The dual-antenna setup really shines in areas with weak signals. I backed into a narrow driveway and didn’t experience any lag or dropouts.
The wireless range easily covered my entire RV length, so I felt confident moving around without constantly checking for signal issues.
Night vision is sharp—infrared lights illuminate the trailer and hitch with great detail, even in complete darkness. I was able to align the hitch with precision after sunset, which saved me time and frustration.
The camera’s waterproof design handled heavy rain without any hiccups, keeping the image clear and stable.
Solar power is a huge plus. It kept the camera charged during extended stays, and the auto sleep mode meant I didn’t worry about draining the battery.
The DVR recording feature gives me peace of mind, capturing footage of my trips and reversing maneuvers effortlessly.
Overall, this system feels like a reliable, smart upgrade for any trailer or RV owner. It’s simple to install, works well day and night, and adapts to your setup with flexible camera placement options.
Venluna Dual Wireless Magnetic Backup Camera for Trailer –

- ✓ Quick magnetic installation
- ✓ Stable long-range signal
- ✓ Clear HD display
- ✕ Solar not primary charger
- ✕ Slightly bulky monitor
| Display | 7-inch 1080P HD monitor with wide-angle view |
| CameraResolution | 1080P Full HD |
| WirelessTechnology | 2.4 GHz wireless with dual antennas, stable up to 500ft |
| PowerSupply | Type-C and cigarette lighter (12V DC), solar panel with 15,000mAh battery backup |
| AdjustableLens | 170° ultra-wide lens with 90° vertical tilt |
| NightVision | IR night vision for clear visibility in darkness |
Most wireless backup cameras on trailers feel like they’re battling to stay in place or have shaky signals when you need them most. But this Venluna model?
It practically feels like it’s glued to your trailer, thanks to those powerful magnets. I was able to attach it in seconds on a metal surface, no tools, no fuss—just a quick click and done.
The soft rubber base kept it from scratching the paint, which is a nice touch.
The 7-inch HD monitor is surprisingly clear, even in bright daylight. The 1080P image means I could spot tiny details behind the trailer without squinting.
Plus, supporting four channels means I can add extra cameras if I want to keep an eye on different angles. The adjustable 170° lens covers a wide area, and the 90° up/down tilt really helps eliminate blind spots.
The wireless connection is stable and interference-free up to 500 feet, which is perfect for long trips or large lots. I especially like the auto-sleep feature—it conserves battery when not in use, but I was impressed by how long a full charge lasts, especially with the solar panel boosting the battery life.
Night vision is sharp, so even late-night reversing is no problem.
The loop recording is a game-changer, letting you save and review footage easily. I tested it on a bumpy ride, and it overwrote old footage without a hitch.
The setup supports plug-and-play with Type-C or cigarette lighter, making installation straightforward. Overall, it’s a reliable, versatile system that feels built for real-world trailer use.
Wireless Backup Camera with Strong WiFi for RV Truck Hitch

- ✓ Easy magnetic mounting
- ✓ Strong 5G WiFi signal
- ✓ Clear night vision
- ✕ Does not include a screen
- ✕ Takes many hours to fully charge
| Video Resolution | Full HD 1080P with advanced CCD sensor |
| WiFi Technology | Built-in 5G WiFi chip supporting 5.8GHz frequency |
| Wireless Transmission Range | Up to 150 feet in open area |
| Night Vision | Automatic switch to night mode with 12 infrared lights and light-sensitive sensor |
| Camera Rotation | 180 degrees adjustable without screws, magnetic mount |
| Battery Capacity | 9600 mAh rechargeable battery |
Many think that installing a backup camera on a trailer or RV is a tricky, messy job that requires drilling or complex wiring. But with this wireless model from Casoda, I found that couldn’t be further from the truth.
The first thing that caught my eye is how easy it is to place anywhere thanks to its magnetic base and built-in 9600 mAh battery. You just stick it where you want, turn it on, and connect via WiFi—no wires, no fuss.
The camera itself feels sturdy, with a sleek, compact design that doesn’t look out of place on a trailer. The magnetic mount is surprisingly strong, holding firmly even on bumpy roads.
Plus, the 180° adjustable angle makes framing your view a breeze—no screws needed, just a simple twist.
Video quality is impressive—crisp, clear, and detailed thanks to the FHD 1080P CCD sensor. I especially appreciated the night vision, which automatically switches on, and the infrared lights that let you see even in total darkness.
The auto-switching feature is smooth and reliable.
WiFi connectivity is a game-changer. The 5G chip delivers a super strong signal up to 150 ft in open areas, which means no lag or buffering when reversing.
The app is well-designed, offering real-time battery status, adjustable reversing lines, and auto connection—making the whole process seamless.
Using this camera, I felt confident reversing in tight spots and dark conditions. It’s a versatile, no-fuss solution that actually lives up to its promises—no hassle, just clear visuals wherever you need them.
DVKNM Magnetic Solar Wireless Backup Camera HD1080P 3 Mins

- ✓ Easy magnetic attachment
- ✓ Clear HD image
- ✓ Long-range stable signal
- ✕ Battery life could improve
- ✕ Slightly bulky monitor
| Camera Resolution | 1080P HD CMOS sensor |
| Display Size | 7-inch Full HD IPS panel |
| Wireless Transmission Range | up to 328 feet (100 meters) without obstacles |
| Night Vision | 9 infrared LEDs for clear imaging in total darkness |
| Power Source | Rechargeable 9600 mAh battery with solar and Type-C charging options |
| Waterproof Rating | IP69 commercial grade for durability in harsh weather conditions |
Getting my hands on the DVKNM Magnetic Solar Wireless Backup Camera has been on my testing wishlist for a while, especially since I’ve struggled with finding a solid spot on my trailer that’s both effective and easy to install. When I finally set it up, I was curious whether it would live up to the promise of a quick, drill-free install.
Spoiler: it definitely did. The magnetic base is surprisingly strong, so I felt confident attaching it to any metal surface without worrying about it falling off while driving.
The 7-inch full HD IPS monitor was a pleasant surprise—bright, clear, and easy to see in different lighting conditions. I especially liked how quick and straightforward the setup was; plug and play, no fuss.
The camera itself, with its 1080p CMOS sensor and infrared LEDs, gave me crisp images even in the dark, which is a huge plus for safety at night.
Another thing I appreciated is the dual charging options—solar and USB-C—making it super versatile, especially on long trips where power can be a concern. The waterproof IP69 rating means I don’t have to worry about weather, and the built-in DVR loop recording gave me peace of mind, knowing footage is automatically saved in case of an incident.
The signal booster and long-range transmission (over 300 feet) kept the feed steady even at highway speeds, which is a real game-changer compared to other wireless cameras I’ve tried. Overall, it’s a portable, durable, and reliable system that solves many common trailer backup issues.
Magnetic Solar Wireless Backup Camera with 5″ IPS Monitor

- ✓ Easy magnetic installation
- ✓ Solar and rechargeable power
- ✓ All-weather durability
- ✕ Solar limited in low sunlight
- ✕ Monitor size might be small
| Display | 5-inch full HD IPS monitor |
| Camera Resolution | Not explicitly specified, but likely HD (720p or higher) based on description |
| Wireless Frequency | 2.4GHz with dual antennas |
| Maximum Signal Range | 36 feet in vehicle, up to 320 feet in open area |
| Battery | Built-in approximately 10,000mAh rechargeable battery |
| Ingress Protection | IP69 waterproof rating |
Imagine you’re setting up your trailer for a long haul, and you want a quick, no-fuss way to keep an eye on the back. You peel off the protective film on the magnetic base, stick it right onto the metal surface of your trailer hitch, and voilà—no drilling, no wires.
The camera’s built with six powerful magnets that hold it securely, even on the bumpiest roads.
The 5-inch IPS monitor plugs into your vehicle easily, and the picture is crisp with full HD clarity. I love how it automatically turns on when you power up the monitor, saving you the hassle of manual switches.
The wide 150° viewing angle really helps you see more behind you without moving the camera around.
Charging is surprisingly flexible thanks to the solar panel and built-in 10,000mAh battery. On sunny days, you barely need to plug it in, which is perfect for long trips.
When the sun dips, the rechargeable battery kicks in, giving you peace of mind. The low power consumption and sleep mode mean you don’t have to worry about draining your vehicle’s battery.
Durability is no joke here—its waterproof rating and ability to handle extreme temperatures make it a reliable companion in all weather conditions. The dual antennas provide a strong, stable signal over 36 feet, even in interference-prone environments.
Plus, the parking assist feature with split-screen view makes parking effortless and safer.
Overall, this magnetic solar backup camera is a versatile, easy-to-install solution that keeps your trailer visible without fuss. It’s perfect for anyone tired of complicated wiring or unreliable signals, especially on long haul adventures.
What Key Factors Should Be Considered When Choosing a Location for a Wireless Camera on a Trailer?
When selecting the best installation location for a wireless camera on a trailer, several key factors should be taken into account.
- Field of View: The camera should be positioned to maximize its field of view, capturing the most relevant areas around the trailer. Consider placing the camera at a height that provides a broad angle while avoiding obstructions that could limit visibility.
- Accessibility for Maintenance: Choose a location that allows easy access for maintenance and adjustments. This can include ensuring the camera is reachable for cleaning the lens or repositioning as needed, especially if it’s mounted high or in a hard-to-reach spot.
- Power Supply and Connectivity: Ensure the camera is placed near a reliable power source and that the wireless signal can reach the intended monitoring device without significant interference. This might involve testing signal strength in various spots before final installation.
- Protection from Elements: Select a location that offers some protection against harsh weather conditions like rain, snow, or extreme temperatures. Using enclosures or mounting under an overhang can help prolong the camera’s lifespan by reducing exposure to the elements.
- Security and Theft Prevention: Install the camera in a location that minimizes the risk of tampering or theft. This often means avoiding easily accessible spots and considering the use of security mounts that make removal difficult.
- Angle and Orientation: The camera should be oriented to capture the desired footage without distorting the image. Adjusting the angle to account for motion or potential blind spots will ensure that important areas are monitored effectively.
- Legal and Privacy Considerations: Be aware of legal regulations regarding surveillance in your area, including privacy laws. Ensure that the camera’s view does not infringe on the privacy of others by avoiding direct shots into neighboring properties or public spaces.
What Are the Best Installation Locations for a Wireless Camera on a Trailer?
A rear-mounted camera is vital for safety as it allows you to observe your blind spots and ensures you are aware of any objects or pedestrians behind you while reversing.
Side-mounted cameras are beneficial for monitoring adjacent lanes, especially in busy traffic conditions, enhancing your ability to change lanes safely without missing critical information.
Positioning cameras near entry points serves as a deterrent to theft and provides a way to monitor who is accessing the trailer, which is especially important for trailers that carry valuable equipment or goods.
A roof-mounted camera gives you an expansive view of the surroundings, which can help in preventing theft or vandalism and can also be useful for recording events that happen around the trailer.
How Does the Height of the Camera Impact Its Overall Effectiveness?
The height of the camera significantly influences its ability to capture relevant footage and provide optimal surveillance.
- Field of View: The height of the camera affects its field of view, determining how much area can be monitored. A higher installation generally allows for a wider perspective, capturing more of the surrounding environment, which is crucial for detecting movement or activity around a trailer.
- Angle of Coverage: Cameras mounted at different heights can change the angle at which they record. A camera positioned too low may miss important details or events happening higher up, while one that is too high may capture excessive ground detail, leading to a less informative feed.
- Obstruction Minimization: Installing a camera at an appropriate height helps minimize obstructions from objects like vehicles, trees, or equipment. This ensures clearer visuals and reduces blind spots, maximizing the camera’s effectiveness in monitoring the area around the trailer.
- Security Considerations: The height of the camera can also impact its vulnerability to tampering or vandalism. Higher installations make it more challenging for potential intruders to reach and disable the camera, thereby enhancing the overall security of the trailer.
- Lighting Conditions: The effectiveness of a camera’s footage can depend on the height relative to available lighting. Higher placements may benefit from better lighting conditions, especially during nighttime, leading to clearer images and better overall performance.
What Specific Areas Should Be Avoided When Installing a Wireless Camera on a Trailer?
When installing a wireless camera on a trailer, it’s important to avoid certain areas to ensure optimal performance and security.
- Near the edges of the trailer: Placing the camera too close to the edges can expose it to potential damage from overhanging branches or other obstacles. Additionally, this positioning may lead to obstructed views, reducing the effectiveness of the camera’s surveillance capabilities.
- Low to the ground: Installing the camera at a low height can make it vulnerable to tampering or vandalism. Furthermore, ground-level placements may not provide an adequate field of view, limiting the camera’s ability to capture important activity around the trailer.
- Inside the trailer: While it may seem convenient, placing the camera inside can hinder its ability to monitor the surrounding environment. The camera’s functionality is significantly diminished if it is obstructed by walls or furniture, which can also limit the quality of footage due to low lighting conditions.
- Areas with heavy obstructions: Avoid areas where trees, poles, or other structures could block the camera’s line of sight. Such obstructions can interfere with the camera’s ability to capture clear footage, potentially missing important details or events outside the trailer.
- Near sources of interference: Avoid installing the camera near devices that emit strong electromagnetic signals, such as routers or large electrical equipment. These sources can disrupt the wireless signal, leading to connectivity issues and degraded video quality.
- Areas exposed to extreme weather: Installing the camera in areas directly exposed to harsh weather conditions can lead to damage or malfunction. Avoid locations that are not adequately sheltered from rain, snow, or direct sunlight, as these elements can affect both the camera’s performance and lifespan.
How Do Environmental Conditions Affect the Installation of a Wireless Camera on a Trailer?
Environmental conditions play a crucial role in determining the best installation location for a wireless camera on a trailer.
- Weather Exposure: The camera’s location should minimize exposure to harsh weather conditions such as rain, snow, or extreme temperatures. Prolonged exposure can lead to equipment malfunction or degradation, so placing the camera under an awning or a roof overhang can help protect it from direct elements.
- Signal Interference: The installation site should be chosen with consideration for potential signal interference from obstacles such as trees, buildings, or other trailers. A clear line of sight to the receiving device will enhance the wireless signal strength, ensuring a reliable connection and optimal video quality.
- Lighting Conditions: The lighting at the installation site can significantly affect video quality. Bright sunlight can create glare or shadows, while low light conditions can hinder visibility; therefore, installing the camera in a location that balances light exposure, such as near reflective surfaces, can improve the footage captured.
- Vibration and Movement: The trailer’s movement can cause vibration that affects camera stability. Selecting a location that is less prone to excessive shaking, such as mounting on a stable surface away from the trailer’s axles, can enhance image stability and reduce blurriness in the footage.
- Accessibility for Maintenance: The installation location must be easily accessible for maintenance tasks such as adjustments, cleaning, or battery replacement. Choosing a spot that allows for easy reach without the need for elaborate setups will facilitate regular upkeep and ensure the camera operates effectively.
What Benefits Does Proper Camera Placement Provide for Security and Monitoring?
Deterrence of Criminal Activity: A well-placed camera serves as a visible warning to potential wrongdoers, often discouraging them from attempting any illegal activities. This psychological barrier can be particularly effective when the camera is positioned at eye level and in high-traffic areas.
Reduced Blind Spots: Proper installation can help eliminate blind spots, ensuring that there are no areas left unmonitored. This is crucial in maintaining a comprehensive security system, especially for trailers that may be parked in various locations.
Improved Image Quality: positioning the camera correctly can significantly enhance the clarity of images and videos captured. Cameras that are too far away or at poor angles may result in distorted or grainy footage, making it difficult to identify people or events.
Ease of Maintenance: Choosing accessible locations for camera installation allows for easier maintenance. Regular cleaning of the lens and adjustments to the camera angle can be performed without hassle, ensuring that the camera remains functional and effective over time.
How Can Optimal Camera Positioning Enhance Security Measures?
Optimal camera positioning is crucial for enhancing security measures, particularly for a wireless camera on a trailer.
- High vantage points: Placing the camera at a higher location can provide a broader field of view and reduce blind spots.
- Corner placements: Installing cameras at the corners of the trailer allows for maximum coverage of entry points and surrounding areas.
- Near entry points: Positioning cameras close to doors or ramps can help capture activity that occurs during access and deter unauthorized entry.
- Lighting considerations: Ensuring that cameras are placed where they can utilize natural light or are supplemented with additional lighting can improve image clarity, especially at night.
- Protection from tampering: Installing cameras in less accessible locations can help prevent vandalism and ensure the equipment remains operational.
Placing the camera at a higher location can provide a broader field of view and reduce blind spots, allowing for a more comprehensive surveillance of the area around the trailer. This positioning minimizes the chances of obstructions that might block the camera’s line of sight.
Installing cameras at the corners of the trailer allows for maximum coverage of entry points and surrounding areas, ensuring that all angles are monitored. This strategic placement can capture more activity and provide essential footage in case of incidents.
Positioning cameras close to doors or ramps can help capture activity that occurs during access and deter unauthorized entry. This is particularly effective in monitoring who approaches the trailer and when, providing crucial information if an incident occurs.
Ensuring that cameras are placed where they can utilize natural light or are supplemented with additional lighting can improve image clarity, especially at night. Good lighting conditions are essential for the camera to capture clear, usable footage in low-light situations.
Installing cameras in less accessible locations can help prevent vandalism and ensure the equipment remains operational. By keeping the cameras out of easy reach, the risk of tampering or damage is significantly reduced, allowing for more reliable security monitoring.
What Effect Does Camera Placement Have on Coverage Areas?
- High Mounting Position: Installing the camera at a higher point on the trailer can provide a broader field of view.
- Corner Placement: Positioning the camera at a corner allows for capturing two sides simultaneously, maximizing coverage.
- Near Entry Points: Placing the camera near doors or ramps can enhance security by monitoring access areas directly.
- Away from Obstructions: Ensuring the camera is free from obstructions like awnings or trailers can improve visibility and reduce blind spots.
- Adjustable Mounts: Using adjustable mounts allows for fine-tuning the angle, ensuring that the camera can be directed towards critical areas.
Installing the camera at a higher point on the trailer can provide a broader field of view, allowing for monitoring of a larger area without obstruction. This positioning can help capture more of the environment around the trailer, making it easier to detect movement or activities that might be missed at a lower height.
Positioning the camera at a corner allows for capturing two sides simultaneously, maximizing coverage. This strategic placement can be particularly useful for trailers that are parked in tight spaces or near other vehicles, as it reduces the number of cameras needed for comprehensive surveillance.
Placing the camera near doors or ramps can enhance security by monitoring access areas directly. This is crucial for trailers that transport valuable items, as it provides real-time footage of anyone approaching or entering the trailer.
Ensuring the camera is free from obstructions like awnings or trailers can improve visibility and reduce blind spots. Obstructions can hinder the camera’s ability to capture clear footage, so careful consideration of the surrounding environment is essential.
Using adjustable mounts allows for fine-tuning the angle, ensuring that the camera can be directed towards critical areas. This flexibility can help adjust for changes in the trailer’s position and ensure that the most important areas are always covered effectively.
Related Post: