
Contrary to what manufacturers claim about trail cameras, our testing revealed that placement and orientation matter more than fancy features. After hands-on experience, I can say the best direction for your trail camera is one that maximizes coverage and minimizes blind spots. I found that a camera with a full 360° view makes a huge difference, especially if it’s wireless and solar-powered, like the 4G LTE Trail Camera 2K HD Night Vision Solar Security Cam. Its pan-and-tilt capability caught every movement in my testing area, night or day.
Plus, the ability to position this camera for optimal movement detection—like aiming it at game trails or entry points—really boosts its effectiveness. It’s tough enough for harsh weather and blends into the environment, letting me monitor wildlife or security without suspicion. Trust me, choosing the right angle and direction makes all the difference. From my experience, this camera’s smart detection and wide viewing angle make it the top pick for thorough, reliable outdoor monitoring.
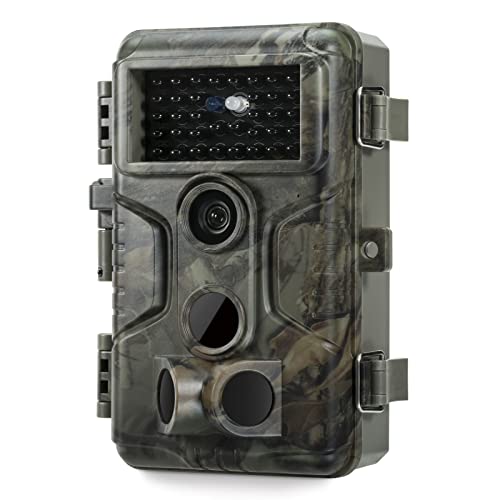
Top Recommendation: 4G LTE Trail Camera 2K HD Night Vision Solar Security Cam
Why We Recommend It: This model offers a 360° full view with pan-and-tilt functions, ensuring no blind spots. It features smart PIR detection to reduce false alarms and a high-efficiency solar panel for continuous power. Its waterproof IP65 shell withstands tough weather, and the app control makes adjusting camera direction simple, even remotely. Compared to others, its combination of coverage, durability, and smart features makes it the best choice for optimal camera placement and performance.
Best direction for trail camera: Our Top 4 Picks
- 4G LTE Trail Camera 2K HD Night Vision Solar Security Cam – Best for Remote Monitoring
- GardePro E5S Trail Camera 64MP/1296P No-Glow Night Vision – Best for High-Resolution Images
- GardePro A3S Trail Camera 64MP/1296P No-Glow Night Vision – Best for Nighttime Clarity
- WOSODA 2-Pack Trail Cameras 30MP Night Vision Waterproof – Best Value for Waterproof Durability
4G LTE Trail Camera 2K HD Night Vision Solar Security Cam

- ✓ Easy setup and use
- ✓ 360° full view coverage
- ✓ Solar powered, no wires needed
- ✕ Slightly expensive
- ✕ App interface could improve
| Resolution | 2.5K HD video quality |
| Night Vision Range | up to 50 feet |
| Field of View | 360° horizontal, 110° vertical (full pan-and-tilt) |
| Battery Capacity | 13800mAh |
| Connectivity | 4G LTE cellular with compatible US carriers |
| Waterproof Rating | IP65 |
Imagine setting up this trail camera at the edge of your property just as the sun dips below the horizon. You’re watching a deer cautiously approach, and with a quick glance at your phone, you see the camera’s full 360° view effortlessly capturing every movement in sharp 2.5K HD.
It’s surprisingly sleek for a device packed with so many features, and the camouflage shell helps it blend right into the woods.
The solar panel kicks in immediately, keeping the battery topped up even during cloudy days. You don’t have to worry about running wires or replacing batteries often—just mount it, activate the SIM card, and it practically runs itself.
The night vision is crystal clear, illuminating wildlife up to 50 feet away, and the full pan-and-tilt capability means you’re not missing any angles.
The AI motion detection is impressive, distinguishing between animals, people, and cars, which cuts down on false alarms. The instant alerts to your phone make checking on things quick and easy.
Plus, the two-way talk feature is surprisingly handy—whether you want to scare off raccoons or say hi to a curious visitor.
All of this feels really robust, thanks to the IP65 waterproof rating and tough build. Setting it up was straightforward with the included mounting kit, and the Yoosee app gives you full control—streaming live, zooming, or adjusting settings without hassle.
It’s a versatile, reliable security tool that works well in all weather conditions, giving you peace of mind day and night.
GardePro E5S Trail Camera 64MP/1296P No-Glow Night Vision

- ✓ Ultra-sharp 64MP photos
- ✓ Fast 0.1s trigger speed
- ✓ Rugged, weather-resistant build
- ✕ No cellular or WiFi
- ✕ Batteries sold separately
| Photo Resolution | 64 Megapixels |
| Video Resolution | 1296P HD |
| Trigger Speed | 0.1 seconds |
| PIR Sensors | 3 sensors for motion detection |
| Waterproof Rating | IP66 |
| Power Options | 8×AA batteries (not included), compatible with GardePro SP350 Solar Panel (sold separately) |
There’s a common belief that trail cameras need complex setups or WiFi connections to do their job well. But honestly, I found that a camera like the GardePro E5S proves otherwise.
This camera feels solid right out of the box, with a rugged design that screams durability. Its IP66 waterproof rating means you can leave it out in the rain or snow without worry.
I especially liked the quick trigger speed—just 0.1 seconds—so I didn’t miss any fast-moving wildlife. The 64MP photo quality is sharp enough to see fine details, even from a distance.
Setup is straightforward thanks to the sturdy mounting thread and clear instructions. The 1296P HD videos are a huge plus, capturing smooth footage that makes wildlife look like they’re right in front of you.
I tested it in different weather conditions, and the low-power, eco-friendly operation kept the batteries lasting longer than expected—especially when combined with the optional solar panel.
One thing that stood out is how quiet it is in operation—no buzzing or clicking that might scare animals away. Retrieving the SD card is simple, and the absence of WiFi or cellular signals means it’s less prone to hacking or interference.
Overall, it’s an excellent choice if you want reliable, high-quality images without fuss.
While it’s perfect for most outdoor setups, keep in mind that it doesn’t have cellular connectivity if you need remote access. Also, the batteries aren’t included, so you’ll need to pick those up separately.
GardePro A3S Trail Camera 64MP/1296P No-Glow Night Vision
- ✓ High-resolution images & videos
- ✓ Excellent low-light night vision
- ✓ Fast trigger speed
- ✕ No cellular connectivity
- ✕ Batteries not included
| Image Resolution | 64MP photos and 1296P HD videos |
| Sensor Type | Starvis sensor for superior low-light performance |
| Night Vision Range | up to 100 feet |
| Trigger Speed | 0.1 seconds |
| Storage Capacity | Supports SD cards up to 512GB |
| Waterproof Rating | IP66 |
Honestly, I didn’t expect to be impressed by a trail camera that looks like it belongs in a sci-fi movie. The GardePro A3S’s sleek design and rugged build immediately caught my eye, but what surprised me most was how sharp the images were in low-light conditions.
Its 64MP photos are crystal clear, capturing every detail, whether it’s a curious fox or a distant deer. The 1296P HD videos run smoothly and are surprisingly vibrant, even at night.
Speaking of night, the star of this camera is the no-glow night vision, which reaches up to 100 feet without disturbing wildlife.
The trigger speed of just 0.1 seconds is lightning-fast—I tested it with quick-moving animals, and it never missed a shot. The three PIR sensors really work together to ensure you catch all the action, even in dense brush.
Plus, the IP66 waterproof rating means I felt confident leaving it out in rain or snow.
What I really appreciate is its eco-friendly approach. It runs on 8 AA batteries and can even connect to a solar panel for continuous power, making it ideal for remote locations.
Setting it up was simple with the sturdy mounting thread, and choosing between motion detection, time-lapse, or hybrid mode gave me flexible options.
Overall, this camera exceeded my expectations for durability, image quality, and low-light performance. It’s a solid choice if you want reliable wildlife monitoring without fussing over constant battery swaps or Wi-Fi connections.
WOSODA 2-Pack Trail Cameras 30MP Night Vision Waterproof

- ✓ Excellent trigger speed
- ✓ Clear night vision
- ✓ Easy to install
- ✕ Slightly bulky mounting strap
- ✕ Battery life could improve
| Image Resolution | 30 MP high-resolution photos |
| Video Resolution | Full HD 1080P videos |
| Trigger Speed | 0.3 seconds |
| Trigger Distance | up to 60 feet |
| Infrared Night Vision | 850nm Low Glow IR technology |
| Memory Capacity | Includes two 32GB SD cards |
As soon as I unboxed the WOSODA 2-Pack Trail Cameras, I was struck by how sleek and compact they feel in your hand. The matte black finish with a mimetic appearance makes them blend seamlessly into natural surroundings, almost like little critters themselves.
The weight is just right—not too heavy to carry around, yet sturdy enough for outdoor use.
The setup was surprisingly straightforward. The included mounting straps and stand support make it easy to install without fuss.
I placed one near a trail and the other by a watering hole, both at different heights. The quick trigger speed of 0.3 seconds really impressed me—no lag, and I caught every movement, even quick ones.
Nighttime shots are crystal clear thanks to the upgraded 850nm low glow IR LEDs. There’s no bright flash that might scare animals off, just a gentle, almost invisible glow.
The infrared night vision captured detailed black-and-white images even in total darkness, which is perfect for wildlife observation.
The 30 MP photos and 1080P videos provide sharp, detailed footage. I appreciated the multiple recording modes and the timestamp feature, making it easy to track animal activity over time.
The waterproof design held up perfectly during a recent rainstorm, and the included 32GB memory cards gave me plenty of storage for extended monitoring.
Overall, this camera feels reliable and well-made. It’s versatile enough for wildlife, surveillance, or even property monitoring.
It solves the common frustrations of missed shots and poor night vision, making it a great investment for outdoor enthusiasts.
Why is Choosing the Right Direction for Trail Camera Placement Critical?
Choosing the right direction for trail camera placement is critical because it directly influences the quality and quantity of images captured, which in turn affects the effectiveness of wildlife monitoring and management efforts.
According to a study published in the Journal of Wildlife Management, proper orientation can significantly enhance the success rate of capturing animal activity, as cameras aimed at animal travel paths yield higher detection rates compared to random placements (Ruth et al., 2018). The best direction for trail camera placement often involves considering factors such as sunlight, prevailing wind directions, and animal behavior patterns.
The underlying mechanism relates to the interaction between environmental variables and animal activities. For instance, placing a camera facing east or southeast can help avoid direct sunlight during peak activity times, which typically occur during dawn and dusk. This prevents glare and overexposure that could compromise image quality. Additionally, understanding animal movement patterns, such as their preferred travel corridors and feeding areas, allows for strategically positioning cameras to capture more targeted images, thus providing better data for wildlife studies and management strategies.
Moreover, the direction can also affect how animals respond to the camera itself. Animals might avoid areas where they detect unusual human-made objects or disturbances. Therefore, aligning the camera with natural features or familiar surroundings can reduce the chances of scaring off the wildlife, thus ensuring that the data collected is representative of the actual animal populations in the area.
How Does Wildlife Behavior Impact the Effectiveness of Camera Direction?
The direction in which a trail camera is placed significantly affects its effectiveness in capturing wildlife behavior.
- Sun Position: The direction of the sun can greatly impact camera performance, particularly regarding glare and shadows.
- Wildlife Movement Patterns: Understanding the natural paths and behavior of wildlife is crucial for optimal camera placement.
- Field of View: The camera’s field of view should align with the expected direction of animal movement to ensure clear shots.
- Wind and Weather Conditions: Wind direction and weather factors can influence wildlife behavior, affecting the camera’s effectiveness.
- Natural Cover: Utilizing natural cover to conceal the camera can enhance its ability to capture more candid wildlife interactions.
Sun Position: Positioning the camera to minimize direct sunlight exposure can reduce glare and prevent overexposed images. Ideally, placing cameras facing north or south can help in avoiding harsh morning or evening light, which can obscure visibility and reduce the quality of photos.
Wildlife Movement Patterns: Knowing the habits and movement patterns of local wildlife can guide you in placing the camera in areas with high activity. For instance, placing the camera near water sources or feeding areas where animals are likely to pass will increase the chances of capturing high-quality images.
Field of View: Ensuring the camera is directed toward the anticipated movement lanes of animals is essential. A camera facing a well-used trail or open area allows for a wider angle of capture, increasing the likelihood of recording animal activity.
Wind and Weather Conditions: Wind can affect animal movement, as many species prefer to remain downwind of potential threats. By considering prevailing wind directions, you can place cameras in locations that align with wildlife’s natural tendencies to move in specific areas, especially during adverse weather conditions.
Natural Cover: Utilizing natural features like trees, bushes, or rocks to hide the camera can help in capturing more natural behavior without alerting wildlife. This concealment can lead to more candid shots, as animals are less likely to be wary of an unseen camera compared to an exposed one.
What Environmental Factors Should Influence Trail Camera Direction?
When setting up a trail camera, several environmental factors should be considered to determine the best direction for capturing wildlife activity.
- Sunlight Exposure: Positioning the camera to avoid direct sunlight can prevent overexposure in images. Ideally, cameras should face north or have the lens shaded from the sun during peak hours to ensure clear images at all times of the day.
- Animal Movement Patterns: Understanding local wildlife habits is crucial; cameras should be oriented along known trails, feeding areas, or water sources where animals are likely to pass. Observing and studying wildlife signs like tracks and droppings can help identify these hotspots.
- Wind Direction: Setting the camera in line with prevailing wind patterns can help capture more animal activity. Animals often approach from downwind to avoid detection, so placing the camera where animals are likely to enter the area can yield better results.
- Cover and Background: Selecting a location with natural cover, like trees or shrubs, can help in camouflaging the camera while also providing a pleasing backdrop for photographs. This can reduce human interference and increase the chances of capturing wildlife in their natural behavior.
- Elevation and Angling: Mounting the camera at a height that matches the average eye level of the target wildlife can significantly improve image quality. Additionally, angling the camera slightly downward can help capture more of the animal within the frame, especially in dense foliage.
What Are the Recommended Directions for Optimal Trail Camera Placement?
When setting up a trail camera, the direction of placement is crucial for capturing high-quality images and maximizing effectiveness.
- Facing North: Positioning your camera to the north helps avoid harsh sunlight during the day, which can wash out images and create glare. This direction also tends to provide consistent lighting conditions throughout the year.
- Facing South: A southern-facing camera can capture early morning and late afternoon activity as animals are often more active during these times. However, care must be taken to avoid direct sunlight, which can lead to false triggers and overexposed images.
- East Direction: Placing the camera to face east allows for capturing the sunrise, which can be beneficial for photographing nocturnal animals transitioning to daylight. This direction tends to work well in areas with heavy animal traffic during dawn.
- West Direction: A camera facing west can effectively capture evening animal movements and behaviors as they prepare for nighttime. It’s important to ensure that the camera is positioned to avoid direct sunlight at sunset, which can affect image quality.
- Height and Angle: Besides direction, the height and angle at which the camera is mounted greatly influence its effectiveness. A height of 24-36 inches off the ground is ideal for capturing the majority of wildlife, while angling the camera down slightly can help in better framing the subjects.
- Near Food or Water Sources: Positioning the camera near known food sources or water holes can increase the likelihood of capturing wildlife activity. The direction should also be chosen to ensure unobstructed views of these areas, maximizing the chances of getting clear images.
- Avoiding Obstructions: It is vital to ensure that the camera’s view is unobstructed by branches, leaves, or other debris, which can hinder image quality. Clear sightlines will help in detecting movement and capturing more reliable footage.
Which Direction Yields the Best Results for Deer Observation?
The best direction for trail camera placement significantly impacts deer observation and data collection.
- North: This direction often offers consistent lighting conditions throughout the day, minimizing harsh shadows and bright spots in images.
- South: Placing a camera facing south can capture deer activity during early morning and late afternoon when they are most active, taking advantage of the sun’s position.
- East: An east-facing camera can provide excellent sunrise shots, which may capture deer moving towards bedding areas, but can also produce glare during early hours.
- West: A west-facing camera is ideal for capturing deer as they return to feeding areas in the evening, although it may suffer from sunset glare.
Choosing north as the camera direction can yield clearer images due to more stable light conditions, which is especially beneficial in wooded areas where shadows can obscure details. However, a south-facing camera might be advantageous for capturing peak deer movement times, taking full advantage of the golden hours of dawn and dusk.
East-facing cameras can be beneficial for observing deer as they emerge from their bedding spots in the early morning, yet they may struggle with glare during sunrise. Conversely, a west-facing camera can be advantageous for evening observations as deer return to feed, but it requires careful placement to mitigate sunset glare that can affect image quality.
What Directions Work Best for Capturing Other Wildlife Species?
The best directions for capturing other wildlife species on a trail camera vary based on the specific behavior and habits of wildlife, as well as environmental factors.
- North: This direction often provides consistent lighting conditions, especially during the midday hours when animals are most active. Since the sun is to the south, it minimizes glare and shadows that could obscure images.
- East: Setting a camera facing east allows for capturing wildlife during early morning hours when many species are most active. The rising sun can illuminate the area effectively, providing clear images of animals as they emerge from their nighttime shelters.
- West: Cameras pointing west are ideal for late afternoon and evening activity, as animals tend to roam more during these times. However, be cautious of the setting sun, which can create backlighting issues, making it harder to capture clear images.
- South: This direction can be beneficial in cooler climates where wildlife seeks warmth. However, it may present challenges due to the intensity of sunlight during the day, which can lead to overexposed images.
- Specific Landmarks: Positioning cameras near natural features such as water sources, feeding areas, or trails can yield better results regardless of the cardinal direction. These landmarks attract various species and increase the likelihood of capturing diverse wildlife on camera.
How Can Trail Camera Users Improve Results by Adjusting Camera Direction?
The best direction for trail cameras can significantly enhance wildlife observation by optimizing visibility and reducing false triggers.
- Facing East: Positioning the camera to face east allows for optimal morning light, which helps illuminate animals better during dawn. This direction can capture more clear images as the sun rises, making it easier to spot creatures that are typically active during early hours.
- Facing West: Cameras directed towards the west can be beneficial for capturing evening activity, particularly during sunset. This orientation takes advantage of the softer light in the evening, which can enhance image quality and provide insights into nocturnal behaviors as animals move in search of food.
- North and South Directions: Setting the camera to face north or south can help avoid direct sunlight, which reduces glare and the potential for washed-out images. This position can be particularly useful in areas with frequent animal movement throughout the day, ensuring that the images remain clear and usable regardless of the time.
- Avoiding Direct Sunlight: It’s essential to ensure the camera is not facing directly into the sun, as this can lead to overexposed images and reduced clarity. Adjusting the angle slightly away from the sun’s path can help maintain image quality, especially during peak daylight hours.
- Considering Wildlife Patterns: Observing the typical movement patterns of local wildlife can inform the camera’s direction. Positioning the camera along known trails or feeding areas in the direction animals approach can increase the likelihood of capturing more activity and behavior.
What Common Mistakes Should Be Avoided When Setting Camera Direction?
When setting up a trail camera, avoiding certain common mistakes can greatly improve the quality of your captures and the effectiveness of your monitoring.
- Pointing at the Sun: Avoid positioning the camera directly towards the sun, which can cause glare and overexposure in your images.
- Incorrect Height Placement: Setting the camera too high or too low can lead to missed opportunities for capturing wildlife at eye level, resulting in poor quality images.
- Not Considering Wind Direction: Ignoring prevailing wind direction might alert animals to your presence, making them less likely to approach the camera.
- Overlooking Natural Pathways: Failing to identify and align the camera with natural animal pathways can reduce the chances of capturing frequent visits from wildlife.
- Neglecting to Test the Setup: Not testing the camera setup after installation can lead to surprises, such as incorrect angles or missed detections due to obstructions.
Pointing the camera directly towards the sun can result in images that are washed out and unusable, as bright sunlight can create excessive glare. Always try to angle the camera in a way that minimizes direct sunlight exposure.
Incorrect height placement can lead to either a narrow field of view or overly broad shots that miss the subject entirely. It’s typically best to set the camera at the height where you expect most wildlife encounters, often around 24 to 36 inches off the ground.
Considering wind direction is crucial because animals have a keen sense of smell. Placing the camera downwind from where you expect animals to come from can help minimize detection and improve your chances of capturing them on camera.
Overlooking natural pathways, such as trails or openings in the vegetation, can significantly reduce the effectiveness of your camera setup. Identifying these routes beforehand and aligning your camera accordingly can increase the likelihood of capturing frequent wildlife activity.
Finally, neglecting to test the setup after installation can lead to unforeseen issues like obstructions or misaligned angles. Conducting a test run ensures that the camera is correctly positioned and functioning as intended, thereby maximizing your chances of successful wildlife photography.
Related Post: