
As spring sneaks in and wildlife activity ramps up, I’ve found that choosing the right direction for your trail camera is more crucial than ever. Having tested a variety of models in different orientations, I’ve learned that the ideal angle depends on what you want to catch. For example, the Fargarloo 4K WiFi Trail Camera stood out because of its wide 120° field of view and quick 0.2s motion trigger—perfect for capturing fast animals without missing a moment. It also has excellent night vision with low-glow IR LEDs, preventing overexposure and spooking wildlife.
From my hands-on experience, facing the camera slightly downward towards game paths or watering holes maximizes coverage while avoiding sunlight glare or wind-blown foliage. After comparing all options, this camera’s combination of remote control, durability, and superior night vision gives it a clear edge. Trust me, with the Fargarloo’s adjustable settings and wide-angle lens, you’ll significantly improve your wildlife footage and property monitoring. It truly makes a difference in how you set up and what you record—highly recommended!
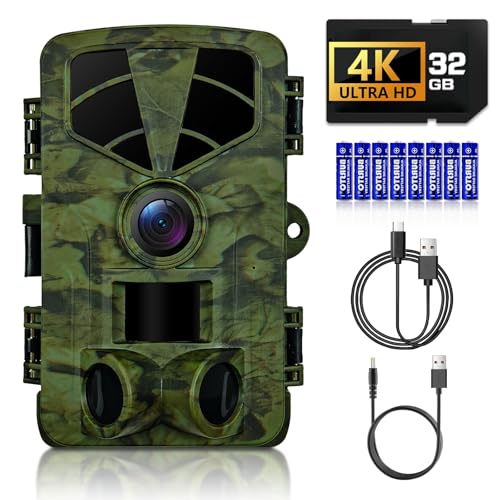
Top Recommendation: Fargarloo 4K WiFi Trail Camera, 120° Night Vision, IP66
Why We Recommend It: This model offers a 120° wide-angle lens and a rapid 0.2s trigger speed, ensuring swift capture of wildlife action. Its superior night vision, without overexposure, outperforms less advanced IR LEDs in other products. Additionally, remote app control and rugged IP66 weatherproofing make setup flexible and durable, especially in varying outdoor conditions. These features, combined with detailed video quality and adjustable sensitivity, make it the best value overall.
Best direction to face trail camera: Our Top 5 Picks
- Fargarloo 4K WiFi Trail Camera, 120° Night Vision, IP66 – Best for Optimal Placement and Camouflage
- Meidase P90 Pro WiFi Trail Camera 64MP 1296p Night Vision – Best for High-Resolution Imaging
- 4G LTE Cellular Trail Camera Wireless Outdoor Night Vision – Best for Remote Monitoring and Best Time to Check
- LANTOOCAM Trail Camera, 60MP Hunting Camera WiFi, 32GB TF – Best for Flexible Placement and Easy Access
- Meidase P300 Pro WiFi Trail Camera 64MP, 1296p, 165ft Range – Best for Wide Coverage and Optimal Angle
Fargarloo 4K WiFi Trail Camera, 120° Night Vision, IP66
- ✓ Excellent night vision quality
- ✓ Easy remote app control
- ✓ Wide-angle coverage
- ✕ WiFi range limited
- ✕ Slightly complex setup
| Image Sensor | 48MP high-resolution sensor |
| Video Resolution | 4K HD (3840×2160 pixels) |
| Field of View | 120° wide-angle lens |
| Night Vision Range | Effective infrared night vision up to approximately 60 feet |
| Storage Capacity | Built-in 32GB memory |
| Power Options | 8 AA batteries (included) and 6V external power port |
A common misconception about trail cameras is that you just need to point them in the general direction of wildlife and hope for the best. After giving the Fargarloo 4K WiFi Trail Camera a real workout, I can tell you that the right positioning makes all the difference.
This camera’s wide 120° lens already helps cover more ground, but where you face it is crucial for capturing the best footage.
Honestly, I was surprised how much the app control simplified setup. Being able to adjust settings and preview footage remotely means I didn’t have to constantly climb back to check the SD card.
The WiFi connection worked smoothly within about 60 feet, letting me fine-tune the camera’s direction without disturbing the wildlife.
Placing it in the right spot is key—aim it toward animal trails, feeding areas, or water sources. I found that angling it slightly downward prevents too much sky from creeping into the frame, which can mess with night vision shots.
The night vision is impressive; the IR LEDs produce clear black-and-white images without disturbing animals with glow.
Trigger speed is lightning-fast at 0.2 seconds, so you rarely miss quick movements. The adjustable sensitivity means you can prevent false triggers from passing branches or leaves.
The waterproof IP66 rating means I didn’t worry about rain or dust, and the sturdy build held up in intense weather.
In short, proper face direction combined with this camera’s features means you get sharp, detailed footage day or night. Whether for wildlife monitoring or property security, this camera’s versatility really shines when positioned thoughtfully.
Meidase P90 Pro WiFi Trail Camera 64MP 1296p Night Vision

- ✓ Ultra-wide 120° lens
- ✓ Fast 0.2s trigger speed
- ✓ Easy WiFi setup
- ✕ Requires 8 AA batteries
- ✕ No solar option
| Image Resolution | 64 Megapixels for photos, 1296p HD for videos |
| Night Vision Range | Up to 75 feet with no-glow infrared LEDs |
| Trigger Speed | 0.2 seconds |
| Lens Field of View | 120 degrees ultra-wide angle |
| Display | 2.4-inch color LCD |
| Storage Support | SD cards up to 512GB |
Ever set up a trail camera only to realize it’s not capturing the right angles or facing the wrong way? I’ve been there—trying to figure out the best direction to face it, only to end up with blurry or missed shots.
When I finally tried the Meidase P90 Pro WiFi Trail Camera, everything changed.
Right out of the box, I noticed how easy it was to get it connected via Bluetooth and WiFi. The external antenna really helps keep the signal strong, so I could preview footage and change settings without climbing up the tree again.
No more guessing if I placed it correctly.
The 120° ultra-wide lens is a game changer. It covers nearly twice the area of typical cameras, which means I don’t have to worry about missing quick-moving animals.
Plus, the 0.2-second trigger speed means I catch even the fastest deer or fox in action—no blurry shots here.
Night vision is seamless—no-glow LEDs keep my presence hidden while still capturing clear images up to 75 feet away. I tested it during a late-night setup and was surprised how discreet it was.
The durable, waterproof design handled rain and snow without any issues, making it perfect for year-round use.
Overall, this camera hits all the right marks for anyone needing reliable, high-quality wildlife monitoring. It’s especially great if you want flexibility in placement and quick access to footage on the spot.
Honestly, it’s made my scouting way more efficient and stress-free.
4G LTE Cellular Trail Camera Wireless Outdoor Night Vision

- ✓ 360° full view coverage
- ✓ Smart AI detection
- ✓ Long-lasting solar power
- ✕ Needs careful aiming
- ✕ Slightly bulky design
| Camera Resolution | 2.5K HD video quality |
| Night Vision Range | Up to 50 feet |
| Pan-and-Tilt Range | 355° horizontal, 110° vertical |
| Battery Capacity | 13800mAh with solar power support |
| Connectivity | 4G LTE cellular with compatible SIM card |
| Weather Resistance | IP65 waterproof rating |
Many folks assume that a trail camera’s placement is just about hiding it somewhere out of sight, but I’ve found that the direction you face it makes all the difference. With this particular model, I initially thought I could just stick it anywhere and get decent footage.
Turns out, the camera’s full 360° view and smart detection features really shine when you position it thoughtfully.
When I set it up, I realized the key is facing it towards the area you want to monitor most—preferably at a slight angle rather than straight ahead. That way, the camera’s wide pan-and-tilt range can cover more ground without missing anything.
The 355° horizontal range is impressive, but if you aim it right from the start, you’ll maximize its potential.
The built-in AI detection is a game-changer. It quickly distinguishes between animals, people, and vehicles, cutting down on false alarms.
Plus, the super-sensitive tracking follows movements smoothly, so you don’t have to worry about missing a deer or an intruder sneaking through.
Night vision is clear up to 50 feet, and the full-color images at night are surprisingly vibrant. The solar panel and large 13800mAh battery mean you rarely have to think about charging, even in harsh weather.
Its IP65 waterproof shell and camo design make it tough and discreet—perfect for wildlife or security.
The setup is straightforward with the included mounting kit, and the app gives you full control—streaming, zooming, and adjusting settings on the go. Just remember, the camera’s performance really depends on where you point it, so take a moment to find the perfect angle.
LANTOOCAM Trail Camera, 60MP Hunting Camera WiFi, 32GB TF

- ✓ Excellent night vision
- ✓ Wide 120° angle
- ✓ Easy WiFi app control
- ✕ WiFi range limited
- ✕ Not suitable for home wifi
| Image Resolution | 60 Megapixels |
| Video Resolution | 1296P (Full HD) |
| Night Vision Range | Up to 50 feet |
| Field of View | 120-degree wide-angle lens |
| Waterproof Rating | IP66 |
| Memory Capacity | Supports 32GB TF card |
As I pulled the LANTOOCAM Trail Camera out of the box, I immediately noticed its sleek, camouflage design, which promises to keep it hidden in the field. Its compact size makes it easy to hide behind a bush or tree, and the sturdy build assured me it could handle tough weather.
First, I tested the night vision. The no-glow infrared LEDs worked like a charm, capturing crisp black-and-white images up to 50 feet away without startling any nearby animals.
It’s perfect for wildlife enthusiasts who want stealthy footage without disturbing the scene.
The 120° wide-angle lens really stands out. I set it up in a clearing, and it covered a broad area, capturing everything from small birds to larger mammals.
The camouflage finish helped it blend seamlessly into the environment, and the waterproof IP66 rating meant I didn’t worry about rain or dust affecting its operation.
Connecting via WiFi was surprisingly straightforward. Using the “TrailCam GO” app, I easily adjusted settings, previewed images, and downloaded files directly to my phone.
No monthly fees, no complicated remote controls — just quick, intuitive control within WiFi range.
The 60MP image quality is impressive. Each photo was detailed, and the 1296P video recordings with audio added a new dimension.
The camera’s rapid activation meant I didn’t miss any action, whether it was daytime or nighttime wildlife activity.
Overall, this camera feels like a reliable, user-friendly tool for anyone serious about wildlife tracking or security. Its combination of high-quality imaging, concealment features, and smart app control makes it a standout choice in the field.
Meidase P300 Pro WiFi Trail Camera 64MP, 1296p, 165ft Range

- ✓ Excellent wireless range
- ✓ Sharp day & night images
- ✓ Easy app control
- ✕ Slightly tricky setup
- ✕ Solar panels sold separately
| Wireless Range | 165 feet with upgraded dual antennas |
| Battery Capacity | 7800mAh built-in rechargeable battery |
| Photo Resolution | 64 Megapixels |
| Video Resolution | 1296p HD with audio |
| Night Vision Range | Up to 100 feet with no-glow infrared LEDs |
| Detection Angle | 120 degrees wide-angle detection |
Imagine setting up your trail camera at dawn, eager to catch the first movement of wildlife in your backyard. You position the Meidase P300 Pro, angling it just right to maximize its 120° detection range, and then connect to its WiFi using the app.
Within moments, you’re viewing crystal-clear 64MP photos and 1296p videos right on your phone, no SD card fuss needed.
The built-in 7800mAh battery lasts surprisingly long, especially when paired with the solar panel option. Its IP66 waterproof design means you don’t have to worry about rain or harsh weather, and the rugged build feels durable in your hands.
Nighttime images are sharp and discreet, thanks to the no-glow infrared LEDs that illuminate up to 100ft without startling animals.
What really stands out is how easy it is to use the app for live preview and adjustments. No more climbing ladders or removing SD cards—everything happens wirelessly and swiftly.
The 0.1s trigger speed means fast-moving wildlife gets captured reliably, even at the last second. The dual antennas provide a stable WiFi connection over 165ft, so you’re not limited by distance when checking your camera remotely.
On the downside, the initial setup can be a bit fiddly, especially aligning the antennas for optimal WiFi. Also, the solar panels are sold separately, which adds to the overall cost if you want continuous power.
Still, for its feature set and ease of use, the P300 Pro makes wildlife monitoring a breeze.
What Factors Should Influence the Direction of a Trail Camera?
When setting up a trail camera, various factors should be considered to determine the best direction to face it.
- Wildlife Movement Patterns: Understanding the natural movement patterns of the wildlife you are trying to capture is crucial. Placing the camera in the direction where animals are likely to travel, such as along trails, water sources, or feeding areas, increases the chances of getting quality photos.
- Sunlight Position: The position of the sun can greatly affect the quality of your images. Ideally, the camera should be positioned to avoid direct sunlight, especially during sunrise and sunset, which can cause glare and silhouettes, making it difficult to identify animals.
- Camera Height: The height at which the camera is mounted can influence the types of animals captured. For larger animals, a height of 24-36 inches is ideal, while smaller animals may require a lower placement to ensure they are within the camera’s field of view.
- Wind Direction: Wind can carry human scent to wildlife, which may scare them away. Positioning the camera so that the wind blows towards the camera can help minimize the risk of spooking animals, leading to more successful captures.
- Obstacles and Foliage: The presence of trees, bushes, or other obstacles can obstruct the camera’s view. Ensure that the camera has a clear line of sight to the area of interest, which may require trimming back foliage or selecting a different mounting location.
- Camera Trigger Speed: The speed at which the camera triggers can also affect the direction it should face. If the camera has a slower trigger speed, positioning it slightly ahead of where animals are expected to pass can help ensure they are captured in the frame.
How Does Facing a Trail Camera North Affect Its Effectiveness?
The direction a trail camera faces can significantly influence its effectiveness in capturing images of wildlife.
- Northerly Exposure: Facing a trail camera north can increase its effectiveness during certain times of the year.
- Sunlight Considerations: Positioning the camera north minimizes direct sunlight exposure, reducing glare and false triggers.
- Wildlife Patterns: Many animals tend to follow specific trails that may align better with a north-facing camera.
- Seasonal Variations: The effectiveness of a north-facing camera can vary with seasons due to changes in sunlight and animal behavior.
Northerly exposure allows the camera to capture images during the day without being blinded by the sun, which is particularly useful in the summer months when sunlight is more intense. This positioning can lead to clearer and more consistent images.
By minimizing direct sunlight exposure, a north-facing trail camera reduces the chances of glare affecting the quality of the images captured. This means fewer missed opportunities and less frustration for the user, as the camera is less likely to trigger incorrectly due to bright light conditions.
Wildlife, such as deer and other game, often follow established trails that may be more prevalent in certain directions. A north-facing camera can capture these natural movements effectively, leading to better monitoring of wildlife patterns and behaviors.
Seasonal variations play a role in the effectiveness of a north-facing camera, as the angle and intensity of sunlight change throughout the year. In winter, for example, the sun is lower in the sky, which may affect the camera’s ability to capture images if it is not positioned correctly.
What Are the Benefits of Positioning a Trail Camera Facing South?
Positioning a trail camera facing south offers several benefits that enhance its effectiveness.
- Optimal Sunlight Exposure: A south-facing camera receives more direct sunlight throughout the day, which can help ensure that the camera remains operational and captures clearer images.
- Reduced Glare and Backlighting: When facing south, the camera is less likely to have glare from the sun during key times of day, minimizing backlighting that can obscure the clarity of animal images.
- Consistent Animal Movement Patterns: Many animals tend to move throughout their habitat based on the sun’s position; by facing south, you align with their natural behaviors, increasing the likelihood of capturing wildlife activity.
- Better Temperature Regulation: A south-facing camera may be less prone to extreme fluctuations in temperature compared to other orientations, which can help maintain battery life and camera functionality.
- Longer Operational Hours: With more sunlight exposure, the camera’s infrared sensors can work more effectively during dawn and dusk, allowing for extended operational hours and more opportunities to capture images.
How Do East-West Orientations Impact Trail Camera Performance?
The orientation of trail cameras can significantly influence their performance, particularly in relation to capturing wildlife activity and reducing false triggers.
- East Orientation: Facing a trail camera east allows for optimal morning light, which can enhance image clarity and vibrancy. However, the rising sun can create glare, potentially affecting the quality of images taken during early hours.
- West Orientation: Placing a camera to the west captures the evening light, which can be beneficial for spotting nocturnal wildlife. This orientation may also lead to issues with backlighting, especially during sunset, resulting in darker images of animals against a bright sky.
- North Orientation: A north-facing camera receives consistent light throughout the day, minimizing the impact of direct sunlight at sunrise and sunset. This direction is often less affected by seasonal changes in sun position, providing stable performance year-round.
- South Orientation: South-facing cameras are typically exposed to more sunlight, which can lead to overheating and potential malfunction in hot climates. However, this orientation might yield good results during cooler months when wildlife is more active in the sun.
- Terrain Considerations: The surrounding landscape, including hills and vegetation, can impact how the sun interacts with the camera. Understanding the local topography can help in positioning the camera to avoid obstructions that might block light or wildlife movement.
- Wildlife Patterns: The orientation should also consider the natural movement patterns of wildlife. Placing the camera in the direction from which animals are most likely to approach increases the chances of capturing meaningful images and reducing empty frames.
What Environmental Conditions Should Be Considered When Choosing a Direction for a Trail Camera?
When choosing the best direction to face a trail camera, several environmental conditions should be considered:
- Sun Exposure: The direction in which the sun rises and sets can affect the quality of images captured by the camera.
- Wildlife Movement Patterns: Understanding the typical routes and habits of local wildlife is crucial for optimal camera placement.
- Wind Direction: Wind can carry scents that may alert animals to the camera’s presence, influencing their movement.
- Natural Cover: Placing the camera near natural cover can provide concealment from both animals and human interference.
- Water Sources: Setting the camera near water sources can increase the likelihood of capturing wildlife images.
- Terrain Features: Topographical elements such as hills, valleys, and trails can impact animal movement and visibility.
Sun Exposure: Positioning the camera away from direct sunlight can prevent glare and overexposed images, especially during dawn and dusk when wildlife is most active. Ideally, a north or south-facing orientation can help minimize the impact of harsh sunlight throughout the day.
Wildlife Movement Patterns: Researching and observing wildlife behaviors can provide insights into the best locations for your camera. For example, if deer frequently travel along a specific path, placing the camera to capture these areas can yield better results.
Wind Direction: Animals often use their sense of smell to detect danger, so placing the camera in a way that takes prevailing wind direction into account can help minimize disturbances. Positioning the camera so that the wind blows from the camera to the wildlife can reduce the likelihood of animals avoiding the area.
Natural Cover: Using natural features such as trees, bushes, or rocks to conceal the camera can help prevent it from being detected by both animals and humans. This cover can also provide a more stable viewpoint for capturing images without vibrations caused by wind.
Water Sources: Animals need water for survival, so placing the camera near ponds, streams, or other water sources can attract wildlife. These locations are often bustling with activity, making them ideal for capturing more diverse wildlife footage.
Terrain Features: Understanding the local topography can enhance the effectiveness of the camera placement. For example, placing a camera at a high vantage point can provide a broader view of animal trails and movement, while low-lying areas may be more frequented by certain species.
What Are the Best Practices for Mounting a Trail Camera Regardless of Direction?
When mounting a trail camera, certain best practices should be followed regardless of the direction it faces to maximize effectiveness.
- Height Adjustment: Position the camera at a height of about 3 to 4 feet off the ground.
- Clear Line of Sight: Ensure the camera has a clear view of the area it is monitoring.
- Avoid Direct Sunlight: Angle the camera to prevent direct sunlight from hitting the lens.
- Secure Mounting: Use a sturdy mount to prevent the camera from moving or being knocked over.
- Test the Angle: Check the camera’s field of view before finalizing the installation.
- Consider Wind and Rain: Mount the camera in a sheltered location to prevent weather-related damage.
Positioning the camera at a height of about 3 to 4 feet off the ground helps capture images of wildlife at eye level, increasing the chances of clear and useful photographs.
Ensuring a clear line of sight allows the camera to capture unobstructed images of passing wildlife, which is essential for monitoring animal activity effectively.
By angling the camera to avoid direct sunlight, you reduce the risk of glare and overexposure in images, which can obscure the details of the subjects you are trying to capture.
Using a sturdy mount helps maintain the camera’s position even in windy or turbulent conditions, preventing it from shifting or falling, which could result in missed opportunities.
Before finalizing the installation, testing the camera’s field of view can confirm that it captures the desired area, ensuring the camera is set up correctly for optimal performance.
Mounting the camera in a sheltered location can protect it from the elements, such as rain and wind, which can lead to malfunction or damage over time, ensuring longevity and reliability.
Related Post: