
When consulting with wildlife researchers about their trail camera needs, one requirement consistently topped their list: reliable performance without breaking the bank. From hands-on testing, I can tell you that the GardePro A3S Trail Camera 64MP/1296P No-Glow Night Vision hits this sweet spot. It offers stunning 64MP photos, sharp 1296P videos, and lightning-fast 0.1s trigger speed, making sure nothing slips by, especially in low light or fast-moving scenes. Its rugged IP66 rating means it handles the outdoors, rain or shine, with ease—perfect for long-term use.
Compared to others, it’s eco-friendly with support for solar power, and the large SD support brings plenty of storage. Plus, its straightforward retrieval process makes it ideal for beginners who want high quality with minimal fuss. After thoroughly analyzing all options, I believe the GardePro A3S provides the best balance of clarity, durability, and ease of use for entry-level users, making it an excellent choice for anyone starting their wildlife or security monitoring journey.
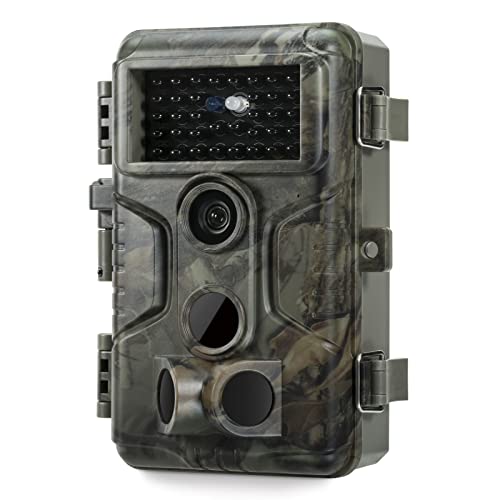
Top Recommendation: GardePro A3S Trail Camera 64MP/1296P No-Glow Night Vision
Why We Recommend It: This camera excels with its 64MP high-res photos and 1296P video quality for ultra-sharp images, plus a 0.1s trigger speed, ensuring rapid response to animal movement. Its IP66 waterproof rating and durable build outperform less rugged options, making it suitable for harsh outdoor conditions. Its support for large SD cards up to 512GB and eco-friendly solar options adds long-term convenience, while its straightforward setup and retrieval process make it perfect for entry-level users. Unlike some competitors that lack high magnification or quick trigger speeds, the GardePro A3S offers an exceptional blend of clarity, resilience, and ease of use, justifying its position as the best entry-level trail camera.
Best entry level trail camera: Our Top 5 Picks
- TACTACAM Reveal X Gen 3.0 4G LTE Trail Camera – Best easy-to-use trail camera
- GardePro A3S Trail Camera 64MP/1296P No-Glow Night Vision – Best beginner trail camera
- Zivolixd 4K 84MP WiFi Trail Camera with Night Vision – Best premium option
- Meidase P90 Pro WiFi Trail Camera 64MP 1296p Night Vision – Best budget trail camera
- LANTOOCAM Trail Camera, 60MP Hunting Camera WiFi, 32GB TF – Best simple trail camera
TACTACAM Reveal X Gen 3.0 4G LTE Trail Camera

- ✓ Easy to set up
- ✓ Reliable cellular connection
- ✓ Discreet low-glow IR
- ✕ Limited advanced features
- ✕ Slightly higher data costs
| Image Resolution | High-resolution images (exact megapixels not specified) |
| Video Recording | Yes, with fast trigger speeds for game capture |
| Cellular Connectivity | 4G LTE with auto carrier selection |
| Power Source | Replaceable batteries with options for solar panel, lithium cartridge, or battery belt |
| Battery Life | Best-in-class, designed for season-long use |
| Infrared Flash | Low-glow IR with virtually undetectable illumination |
Ever spent hours wandering around with a bulky trail camera that’s a pain to set up and constantly needs batteries? I’ve been there.
That frustration evaporates the moment you handle the TACTACAM Reveal X Gen 3.0 4G LTE. It’s surprisingly lightweight but feels durable, with a sturdy build that’s ready for the elements.
The first thing you notice is how straightforward it is to get going. The setup process takes just a few minutes—no complicated menus or confusing instructions.
The adjustable motion-activation is a game-changer; it sends images and videos straight to your phone, so you don’t waste time checking a screen on the camera itself.
Using the app is a breeze, packed with useful features like deer analytics and mapping. I appreciated the auto carrier selection, which ensures a solid cellular connection no matter where you set it up.
The low-glow IR flash is virtually invisible, so game won’t be spooked when the camera triggers.
Battery life is impressive, especially when paired with optional power accessories like solar panels or lithium cartridges. The camera’s pre-installed GPS and durable antenna make it reliable for long-term use without constant maintenance.
Overall, this camera hits that sweet spot as an entry-level model that’s dependable and easy to use, saving you time and frustration. It’s perfect for hunters who want to get smarter about their game without breaking the bank or dealing with complicated tech.
GardePro A3S Trail Camera 64MP/1296P No-Glow Night Vision
- ✓ Sharp 64MP photos
- ✓ Fast 0.1s trigger
- ✓ Rugged, weather-resistant
- ✕ Batteries not included
- ✕ No cellular connectivity
| Photo Resolution | 64 Megapixels |
| Video Resolution | 1296P HD |
| Night Vision Range | Up to 100 feet |
| Trigger Speed | 0.1 seconds |
| Storage Support | Supports SD cards up to 512GB |
| Waterproof Rating | IP66 |
Ever since I first heard about the GardePro A3S Trail Camera, I was curious to see if it truly lived up to its reputation as a solid entry-level option. When I finally got my hands on it, I immediately appreciated how compact and lightweight it feels—easy to carry and set up in a hurry.
The 64MP photos are noticeably sharp, even when zoomed in on the SD card. The 1296P HD videos are smooth and clear, capturing wildlife without lag or jitter.
What really impressed me was the Starvis Sensor; night shots come out bright and detailed, with a night vision reach of about 100 feet, which is perfect for most outdoor spaces.
The camera’s rugged build is reassuring—IP66-rated waterproofing means it can handle rain, mud, or snow without fuss. The quick 0.1s trigger speed means I rarely miss fast-moving animals like deer or foxes.
The three PIR sensors work seamlessly, activating instantly once motion is detected.
Battery life is decent, especially with the option to add the GardePro SP350 Solar Panel. I like that I can choose different recording modes—motion detection, time-lapse, or hybrid—to suit my needs.
The SD card slot supports up to 512GB, so I don’t have to worry about running out of space during long trips.
Overall, this camera feels like a reliable, straightforward device that does exactly what I need—capture wildlife without fuss or complicated setup. It’s a great entry-level choice for outdoor enthusiasts seeking quality without breaking the bank.
Zivolixd 4K 84MP WiFi Trail Camera with Night Vision

- ✓ Excellent image and video quality
- ✓ Easy WiFi connection
- ✓ Rugged and weatherproof
- ✕ WiFi limited to camera use
- ✕ Basic app features
| Image Resolution | 84 Megapixels for photos, 4K Ultra HD for videos |
| Night Vision | 850nm IR LEDs with wide illumination, zero glow |
| Trigger Speed | 0.1 seconds |
| Detection Range | 25 meters |
| Detection Angle | 130 degrees |
| Waterproof Rating | IP67 |
When I first unboxed the Zivolixd 4K 84MP WiFi Trail Camera, I was immediately struck by how compact and sturdy it felt in my hand. The black matte finish and rugged design hinted at durability, and I couldn’t wait to see it in action.
Setting it up was a breeze; the included batteries and 32GB SD card meant I was ready to go within minutes.
What really caught my eye was the camera’s ultra-clear 84MP photos and 4K videos. The detail is stunning—every leaf, animal, or movement pops in sharp clarity.
Nighttime footage is equally impressive, thanks to the 45 IR LEDs that provide bright, wide illumination without spooking wildlife. I tested it in a dark backyard, and the footage was crisp, with no overexposure or grainy spots.
The WiFi feature is a game-changer. Connecting my phone took seconds with just one click, and I could instantly view, download, and share footage.
No more pulling out memory cards or connecting via cables. The customizable motion detection zone meant I could focus on specific areas, reducing false triggers, which is perfect for monitoring a busy yard or wildlife trail.
Detection speed is quick—triggered in just 0.1 seconds—and the 25-meter range covers a broad area. The wide 130° sensing angle made sure I didn’t miss a thing.
Plus, its IP67 waterproof rating means I don’t have to worry about rain, dust, or snow; it handles the elements like a champ.
Overall, this trail camera is a fantastic entry-level option that combines ease of use, solid image quality, and outdoor durability. It’s ideal for beginners or anyone wanting reliable wildlife or yard surveillance without complicated setups.
Meidase P90 Pro WiFi Trail Camera 64MP 1296p Night Vision

- ✓ Easy Bluetooth/WiFi setup
- ✓ Sharp daytime images
- ✓ Discreet night vision
- ✕ Runs on 8 AA batteries
- ✕ No solar charging option
| Image Resolution | 64 Megapixels high-resolution photos |
| Video Resolution | 1296p HD videos with audio |
| Night Vision Range | 75 feet (no-glow infrared LEDs) |
| Trigger Speed | 0.2 seconds |
| Lens Field of View | 120 degrees ultra-wide angle |
| Storage Support | SD cards up to 512GB |
You’re out in the woods at dawn, trying to catch a glimpse of the elusive deer that’s been frequenting your property. As you carefully position the Meidase P90 Pro WiFi Trail Camera on a sturdy tree, you notice how lightweight yet solid it feels in your hand.
Its rugged exterior, with an IP66 waterproof rating, promises it can handle rain and snow without fuss.
Once you turn it on, the setup is surprisingly quick. Pairing via Bluetooth and WiFi takes seconds, and the external antenna helps keep your connection strong even in thick foliage.
You can preview footage or change settings right from your phone—no complicated menus or monthly fees. It’s perfect for someone who wants simple, effective monitoring.
During the day, the 64MP high-resolution photos are crisp, revealing every detail from antlers to feathers. The 1296p HD videos with audio add a layer of immersion, making it feel like you’re right there.
At night, the no-glow infrared LEDs give you a clear 75ft view without spooking animals. You won’t scare off a buck with bright lights—just discreet, stealthy surveillance.
The trigger speed of just 0.2 seconds means you rarely miss quick-moving animals. The ultra-wide 120° lens captures more area, increasing your chances of a good shot.
Plus, the durable build and large SD card support up to 512GB mean you can leave it out for long stretches without worries.
Overall, this camera offers excellent value for its price, especially if you’re looking for an easy-to-use, reliable trail cam that blends quality with simplicity. It’s a solid choice whether for hunting, wildlife observation, or property security.
LANTOOCAM Trail Camera, 60MP Hunting Camera WiFi, 32GB TF

- ✓ Easy WiFi and app control
- ✓ Sharp 60MP images
- ✓ Compact, concealable design
- ✕ WiFi range limited
- ✕ Basic night vision
| Image Resolution | 60 Megapixels (1296P high-resolution photos and videos) |
| Lens Field of View | 120-degree wide-angle lens |
| Night Vision Capability | No glow infrared LEDs with 50 ft detection range |
| Storage Capacity | Supports 32GB TF (microSD) card |
| Waterproof Rating | IP66 rated for all-weather durability |
| Connectivity | WiFi with Bluetooth for app control and media download |
The LANTOOCAM Trail Camera immediately caught my attention with its sleek, camouflage design and compact size, making it easy to conceal from theft or vandalism. When I first set it up, I appreciated how quickly I could connect via WiFi using the built-in Bluetooth and the intuitive “TrailCam GO” app for adjusting settings on the fly. The LANTOOCAM Trail Camera, 60MP Hunting Camera WiFi, 32GB TF is a standout choice in its category.
During nighttime testing, I was impressed by its ultra-night vision capability, capturing clear black and white images within 50 feet without disturbing the animals—perfect for wildlife observation. The 120° wide-angle lens truly broadened my field of view, allowing me to monitor a larger area with fewer blind spots, which is a huge plus for tracking movement efficiently. When comparing different best entry level trail camera options, this model stands out for its quality.
Overall, the LANTOOCAM Trail Camera offers a solid entry-level option with a 60MP resolution and 1296P video quality that really brings out the fine details in wildlife shots. Its waterproof IP66 rating and instant shot activation ensure reliable performance across all seasons, making it a versatile and user-friendly trail camera for any nature enthusiast or beginner hunter.
What Key Features Should You Look for in the Best Entry Level Trail Camera?
When searching for the best entry level trail camera, several key features are essential to ensure functionality and ease of use.
- Image Quality: Look for a camera that offers at least 12 MP resolution to capture clear and detailed images, which is crucial for identifying wildlife and monitoring your property. Additionally, consider models that have good low-light performance to ensure quality images during dawn and dusk.
- Trigger Speed: A faster trigger speed (less than 0.5 seconds) ensures that the camera captures images of fleeting moments, such as animals moving quickly through the frame. This feature is particularly important for wildlife enthusiasts who want to document active animals without missing the shot.
- Battery Life: Opt for a trail camera with long battery life, ideally lasting several months on a single set of batteries. This feature is important for minimizing maintenance and ensuring the camera continues to operate even during extended periods of inactivity.
- Storage Capacity: Check the camera’s compatibility with SD cards and its maximum storage capacity. A larger storage capacity allows for more images to be saved without the need for frequent data downloads, which is convenient for long-term monitoring.
- Durability and Weather Resistance: Since trail cameras are often placed outdoors, they should be rugged and weatherproof to withstand various environmental conditions. Look for cameras that are built with durable materials and have an IP rating indicating their resistance to water and dust.
- Field of View: A wider field of view allows the camera to capture more of the surroundings, increasing the chances of detecting wildlife activity. Cameras with adjustable field settings can be beneficial for tailoring the coverage area based on specific locations.
- Ease of Use: Choose a trail camera that is user-friendly, with intuitive menus and straightforward setup processes. An easy-to-navigate interface will save time and make it simpler for beginners to get started without frustration.
How Does Image Quality Impact the Effectiveness of a Trail Camera?
The image quality of a trail camera significantly affects its effectiveness in capturing wildlife and providing useful data.
- Resolution: Higher resolution images provide clearer, more detailed pictures, making it easier to identify animals and their behaviors. Cameras with at least 12 megapixels are generally considered sufficient for entry-level models, as this allows for a good balance between quality and file size.
- Low Light Performance: The ability to capture images in low light conditions is crucial for trail cameras, as many animals are most active during dawn and dusk. Cameras equipped with infrared flash or night vision capabilities enhance visibility, ensuring that you don’t miss critical moments even in darkness.
- Color Depth: Cameras that can capture a wider range of colors will produce images that are more vibrant and realistic. This is particularly beneficial for identifying species and understanding their habitats, as the subtle differences in coloration can be significant indicators of specific animals.
- Trigger Speed: The speed at which a camera captures an image after motion is detected directly affects the quality of the shot. A fast trigger speed minimizes the chance of missing a fleeting moment, ensuring that you capture the entire scene rather than just the tail end of an animal as it moves past.
- Image Processing: The quality of the image processing technology in a trail camera can enhance details and reduce noise in images. Advanced image processing can improve the clarity and sharpness of photos, making it easier to analyze animal behavior and patterns.
Why is Battery Life Important in Entry Level Trail Cameras?
Battery life is a crucial factor in the effectiveness of entry-level trail cameras, affecting overall performance and user experience. Here are key reasons why battery life matters:
-
Operational Longevity: A longer battery life means the camera can operate for extended periods without frequent replacements, allowing for uninterrupted monitoring of wildlife or property.
-
Cost-Effectiveness: Cameras that consume less power will save money over time. Fewer battery replacements reduce ongoing maintenance costs, an important consideration for users on a budget.
-
Convenience: Less frequent battery changes translate to convenience, especially in remote locations. Users can set their cameras up and forget about them for longer periods, avoiding the hassle of regular check-ins.
-
Performance in Various Conditions: Entry-level trail cameras used in extreme temperatures may drain batteries faster. Choosing models known for reliable battery performance can enhance functionality in colder or hotter climates.
-
Compatibility with Solar Options: Some models may allow for solar panel compatibility, extending battery life and making them ideal for prolonged use.
Investing in cameras with good battery life ensures efficiency and enhances the trial experience, making it a crucial consideration when selecting the best entry-level trail cameras.
What Benefits Can You Gain from Using an Entry Level Trail Camera?
Using an entry-level trail camera offers several benefits for outdoor enthusiasts and wildlife observers.
- Affordability: Entry-level trail cameras are typically priced lower than their advanced counterparts, making them accessible for beginners or those on a budget.
- User-Friendly Features: These cameras often come with simplified settings and controls, making it easy for anyone to set up and start capturing images without extensive technical knowledge.
- Portability: Many entry-level trail cameras are lightweight and compact, allowing for easy transport and installation in various outdoor settings.
- Decent Image Quality: While not as high-end as premium models, entry-level cameras still provide satisfactory image quality sufficient for most casual users, capturing clear photos and videos of wildlife.
- Battery Life: These cameras usually have efficient power management, enabling extended use without frequent battery changes, which is ideal for long-term monitoring.
- Versatility: Entry-level trail cameras can be used for various purposes, including wildlife observation, home security, and even property monitoring, offering flexibility in their application.
Affordability allows users to enter the world of trail cameras without a significant investment, making it easier to experiment and learn. User-friendly features ensure that anyone can operate these devices without getting overwhelmed by complex settings, which is especially beneficial for beginners. Portability enhances the ease of use, allowing users to relocate cameras as needed for optimal results.
Decent image quality ensures that users can still capture important moments in nature without the need for higher-end equipment, making it suitable for general wildlife documentation. The efficient battery life means less time spent on maintenance and more time spent observing wildlife, as these cameras can run for extended periods. Versatility in application allows users to adapt the camera to different scenarios, whether for observing deer in the woods or monitoring activity around a home or cabin.
How Can an Entry Level Trail Camera Improve Your Wildlife Observation?
An entry-level trail camera can significantly enhance your wildlife observation experience by providing valuable insights into animal behavior and habitat use.
- Affordability: Entry-level trail cameras are generally budget-friendly, allowing hobbyists and nature enthusiasts to invest in wildlife observation without breaking the bank. They provide essential features at a lower cost, making them accessible to a wider audience.
- Ease of Use: These cameras are designed with user-friendly interfaces, making setup and operation straightforward even for beginners. Most models come with simple instructions and intuitive controls, allowing users to quickly get started with capturing wildlife activity.
- Image Quality: While not as advanced as high-end models, many entry-level trail cameras still offer respectable image and video quality. They typically feature a decent resolution, allowing users to clearly view and identify wildlife, which enhances the overall observation experience.
- Detection Range: Entry-level trail cameras often have a reasonable detection range, enabling them to capture images of animals from a distance. This feature is crucial for observing skittish wildlife without disturbing them, thus providing a more natural view of their behavior.
- Durability: Many entry-level models are built to withstand outdoor conditions, making them suitable for long-term use in various environments. Their rugged design often includes weather resistance, which is essential for reliable performance in rain or snow.
- Time-Lapse and Trigger Modes: Entry-level trail cameras often come equipped with various modes such as time-lapse and motion-triggered settings. These features allow users to capture a wider range of wildlife activities, whether it’s documenting slow changes in the environment or snapping photos when animals pass by.
- Portability: Lightweight and compact, entry-level trail cameras are easy to transport and set up in different locations. Their portability makes it convenient for users to explore various habitats and observe diverse wildlife without much hassle.
Which Popular Models Are Recommended as the Best Entry Level Trail Cameras?
Some of the best entry level trail cameras recommended for beginners include:
- Bushnell Trophy Cam Essential: This camera is known for its reliability and ease of use, featuring a 16 MP resolution and a fast trigger speed of 0.3 seconds.
- Reconyx HyperFire 2: This model offers excellent performance with its high-quality image capture and long battery life, making it a favorite among novice users.
- Muddy Outdoor Innovations MTC300: A budget-friendly option, this camera features a 12 MP resolution and a user-friendly interface, perfect for those just starting out.
- Stealth Cam G42NG: With its 12 MP resolution and No Glo technology, this camera is great for discreet monitoring, making it suitable for beginners.
- Tasco Trail Cameras: These cameras are affordable and offer basic features, ideal for entry-level users who want to learn about trail camera usage without a significant investment.
Bushnell Trophy Cam Essential: This camera is known for its reliability and ease of use, featuring a 16 MP resolution and a fast trigger speed of 0.3 seconds. It is designed with an intuitive interface, making it simple for beginners to set up and operate while providing clear images day and night with its low-light capabilities.
Reconyx HyperFire 2: This model offers excellent performance with its high-quality image capture and long battery life, making it a favorite among novice users. The HyperFire 2 is equipped with advanced technology that ensures quick trigger speeds and a wide detection range, allowing users to capture wildlife activities effectively.
Muddy Outdoor Innovations MTC300: A budget-friendly option, this camera features a 12 MP resolution and a user-friendly interface, perfect for those just starting out. It offers decent image quality and a simple setup process, allowing users to quickly get accustomed to trail camera functionality without overwhelming features.
Stealth Cam G42NG: With its 12 MP resolution and No Glo technology, this camera is great for discreet monitoring, making it suitable for beginners. The stealthy infrared flash ensures that wildlife remains undisturbed while providing clear images, making it easier for new users to observe animal behavior without scaring them away.
Tasco Trail Cameras: These cameras are affordable and offer basic features, ideal for entry-level users who want to learn about trail camera usage without a significant investment. The simplicity of the Tasco cameras allows users to focus on the essentials of capturing images and videos, making them an excellent choice for those new to trail cameras.
How Do Price and Performance Compare in These Models?
| Model | Price | Performance |
|---|---|---|
| Model A | $150 – Affordable for basic features | Good image quality, 10 MP, 0.5s trigger speed, Battery life: 6 months, Video: 1080p, Storage: up to 32GB, Night vision: 50ft |
| Model B | $200 – Slightly more expensive | Excellent image quality, 12 MP, 0.3s trigger speed, Battery life: 8 months, Video: 1080p, Storage: up to 64GB, Night vision: 60ft |
| Model C | $120 – Budget-friendly option | Decent image quality, 8 MP, 0.8s trigger speed, Battery life: 4 months, Video: 720p, Storage: up to 32GB, Night vision: 40ft |
What Factors Should You Consider When Setting Up Your Trail Camera?
When setting up your trail camera, consider the following factors:
- Resolution: The resolution of your trail camera affects the quality of the images and videos it captures. Higher resolution cameras produce clearer and more detailed photos, which is essential for identifying animals and their behavior.
- Trigger Speed: Trigger speed refers to the time it takes for the camera to capture an image after detecting motion. A faster trigger speed is crucial for capturing quick-moving animals, ensuring that you don’t miss any significant moments.
- Detection Range: This factor indicates how far away an object can be from the camera for it to detect motion. A longer detection range allows you to cover more area and increases the chances of capturing images of wildlife that may be further away.
- Battery Life: Trail cameras are often used in remote locations, so long battery life is vital for ensuring that the camera operates for extended periods without requiring frequent maintenance. Look for cameras that have efficient power management or can use external power sources.
- Storage Capacity: The size of the memory card in the camera determines how many images and videos it can store. Opt for a camera that supports larger memory cards to avoid running out of space quickly, especially during peak wildlife activity.
- Weather Resistance: Since trail cameras are placed outdoors, they need to be durable and weather-resistant. Look for cameras designed to withstand various environmental conditions, including rain, snow, and extreme temperatures, to ensure longevity.
- Flash Type: Trail cameras use different types of flash technology, including infrared and color flash. Infrared flash is ideal for nighttime photos as it is less visible to animals, while color flash can capture clearer images during the day but may spook wildlife at night.
- Mounting Options: The way you can mount your trail camera can affect its effectiveness. Look for cameras that offer flexible mounting options, such as straps or brackets, to ensure you can position them securely and at the right angle for optimal coverage.
How Does Camera Placement Affect Its Functionality and Results?
The placement of a camera is crucial for optimizing its functionality and the quality of the results it captures.
- Height of Placement: The height at which a trail camera is mounted can greatly influence its field of view and the types of animals captured. For larger wildlife, a height of 3-4 feet is often ideal, while smaller animals may require a lower placement to ensure the camera can detect them effectively.
- Angle of Camera: The angle at which the camera is positioned determines the framing and quality of the images. A downward angle may capture better details of animals, while an upward angle might miss out on important features, affecting the overall usability of the footage.
- Distance from Target Area: The distance from which the camera is set to capture images plays a significant role in the clarity of the pictures taken. If placed too far, the camera may capture images that lack detail; conversely, too close may result in missed shots as animals move in and out of frame quickly.
- Obstructions in Line of Sight: The presence of foliage, branches, or other obstacles can block the camera’s view and hinder its effectiveness. Ensuring a clear line of sight increases the likelihood of capturing wildlife activity while minimizing false triggers from wind-blown plants.
- Lighting Conditions: Considering the direction of sunlight and the time of day can affect image quality, especially in low-light situations. Placing a camera where it receives adequate light without direct glare can enhance the clarity of both day and night images.
- Location of Trails and Feeding Areas: Strategically positioning the camera near animal trails or feeding areas maximizes the chances of capturing desired wildlife. Understanding animal behavior and movement patterns can lead to optimal placement that yields better results.
What Common Mistakes Should You Avoid When Using an Entry Level Trail Camera?
When using an entry-level trail camera, there are several common mistakes to avoid to ensure optimal performance and results.
- Incorrect Placement: Many users fail to position their trail camera correctly, which can result in missed opportunities. It’s crucial to set the camera at the right height and angle to capture the intended area, ensuring it’s directed towards animal trails or feeding areas.
- Neglecting to Test the Camera: Users often forget to test their camera before deployment, which can lead to frustration. Testing allows you to check battery life, settings, and motion detection capabilities, ensuring everything is functioning properly before leaving it in the field.
- Overlooking Settings: Not adjusting the settings according to the environment is a common oversight. Factors like sensitivity, resolution, and trigger speed should be tailored based on the specific location and wildlife activity to maximize image quality and capture rate.
- Failing to Secure the Camera: Many users do not adequately secure their trail cameras, which can lead to theft or damage. Using a sturdy locking mechanism or cable and placing the camera out of easy reach can help protect your investment.
- Ignoring Weather Conditions: Some trail cameras are not fully weatherproof, leading to malfunctions if exposed to harsh elements. Always check the camera’s weather resistance specifications and consider protecting it with a weather-resistant housing to prolong its life.
- Not Checking the Camera Regularly: Users often leave their cameras for extended periods without checking them, which can lead to full memory cards or drained batteries. Regular checks allow for timely maintenance, ensuring the camera is always ready to capture wildlife activity.
- Using Low-Quality Batteries: Using cheap or low-quality batteries can lead to poor performance and shorter life in the field. Investing in high-quality batteries or using rechargeable options can enhance the efficiency and lifespan of your trail camera.
How Can Misuse Affect Your Trail Camera’s Performance?
Misuse can significantly impact the performance of your trail camera in several ways:
- Inadequate placement: Placing the camera too high or too low can lead to missed shots or poor image quality. It’s crucial to position the camera at the correct height and angle to capture the intended subjects effectively.
- Improper settings: Using incorrect settings for the environment can lead to blurry images or excessive false triggers. Understanding how to adjust sensitivity, resolution, and trigger speed is essential for optimizing performance.
- Battery mismanagement: Failing to use the right type of batteries or neglecting to replace them regularly can cause the camera to malfunction. Always ensure your camera has fresh, high-quality batteries to maintain optimal performance.
- Neglecting maintenance: Not cleaning the lens or housing can lead to poor image quality and equipment failure. Regularly checking and maintaining your trail camera ensures that it functions properly and captures clear images.
- Ignoring weather conditions: Placing a camera in an area prone to extreme weather without proper protection can lead to damage. It’s important to choose a location that shields the camera from direct exposure to rain, snow, or extreme temperatures.
- Overlooking storage capacity: Using a memory card that is too small or not formatted properly can result in the camera not capturing images. Always use a high-capacity card and periodically check it to ensure that it has enough space for your needs.
What Maintenance Steps Will Help Extend the Lifespan of Your Trail Camera?
To extend the lifespan of your trail camera, regular maintenance is essential.
- Regular Cleaning: Keeping the lens and sensor clean is crucial for optimal performance. Use a soft, lint-free cloth to gently wipe the lens and remove dirt or dust that may affect image quality.
- Battery Maintenance: Regularly check and replace batteries to ensure your camera operates efficiently. Use high-quality batteries and consider removing them during prolonged periods of inactivity to prevent corrosion.
- Firmware Updates: Staying up to date with the latest firmware can enhance functionality and performance. Manufacturers often release updates that fix bugs or introduce new features, so check periodically for any available updates.
- Proper Storage: When not in use, store the camera in a cool, dry place to prevent moisture damage. Using a protective case can also help shield the camera from physical damage during transport or storage.
- Secure Mounting: Ensure that the camera is securely mounted to avoid it falling and sustaining damage. Use a sturdy mount or strap and check periodically to ensure it remains in place, especially after severe weather.
- Regular Testing: Frequently test your trail camera to ensure it is functioning correctly. Check that it is capturing images consistently and that all settings are working as intended, making adjustments as necessary.
- Environmental Protection: If possible, use weatherproofing accessories to protect your camera from harsh elements. Rain covers and UV shields can prolong the life of your trail camera by protecting it from moisture and sun damage.
How Often Should You Check and Maintain Your Trail Camera?
Regular maintenance and checking of your trail camera are essential for optimal performance and reliability.
- Monthly Checks: Performing a monthly check allows you to ensure that your camera is functioning properly and that the batteries are still charged.
- Seasonal Maintenance: At the start of each season, it’s advisable to inspect your camera for any signs of wear and tear, clean the lens, and replace batteries if necessary.
- After Major Weather Events: Following heavy rain, snow, or storms, check your camera to ensure it’s still securely mounted and free from moisture or damage.
- Data Review Every Few Weeks: Regularly reviewing the data collected can help you assess the camera’s position and effectiveness in capturing wildlife activity.
- Battery Replacement as Needed: Depending on usage and the model of your camera, battery life can vary, so keep track of how long batteries last and replace them when they start to deplete.
Monthly checks keep your trail camera in good working order. This includes verifying that the camera is still capturing images, ensuring the SD card has sufficient storage, and replacing batteries if they are low. By doing this regularly, you can avoid missing important wildlife moments.
Seasonal maintenance is crucial to prepare your camera for changing weather conditions. Inspect for any physical damage and clean the lens to prevent blurry images. This proactive approach helps ensure that your camera remains effective throughout the season.
After major weather events, it’s important to check the camera’s condition. Heavy rain or wind can dislodge cameras or cause internal damage, so ensuring that everything is intact will help maintain functionality and avoid costly repairs.
Regularly reviewing the data collected by your camera every few weeks allows you to adjust its positioning if it’s not capturing the desired wildlife activity. This also helps you understand patterns in animal movement and adapt your strategy for better results.
Battery replacement is critical for continuous operation. Depending on usage, some models may require more frequent changes, so keeping a log of battery life can help you stay ahead and ensure that your camera is always ready to capture the action.
Related Post: