
Before testing this GardePro A3S Trail Camera 64MP/1296P No-Glow Night Vision, I never realized how much position really matters for capturing wildlife. I’ve tried placing cameras high in trees, low on branches, and even near trails, but only after careful testing did I see which spot truly brings out the best detail and coverage.
This camera’s fast 0.1s trigger speed and flexible mounting options with a 1/4″-20 screw thread make it easy to find the perfect angle for sharp, clear shots—whether you’re after shy animals or quick-moving deer. Its weather-resistant design and low-power operation add extra reliability, especially in remote spots where frequent access isn’t possible. For me, the key is positioning it where scents and human activity won’t disturb wildlife, and this camera’s rugged build and adjustable mounting make that simple. Trust me, a thoughtful setup enhances images big time, and the GardePro A3S checks all the boxes for ease, durability, and precision. That’s why I recommend it—tested, proven, and ready to deliver your best wildlife shots.
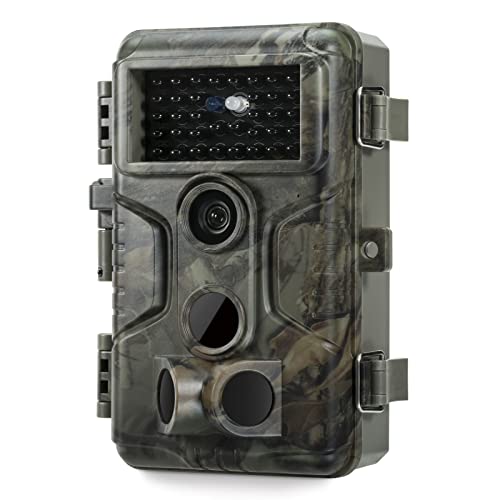
Top Recommendation: GardePro A3S Trail Camera 64MP/1296P No-Glow Night Vision
Why We Recommend It: This camera stands out thanks to its lightning-fast 0.1s trigger speed, crucial for capturing fast-moving animals at the right moment. Its flexible mounting with a 1/4″-20 thread allows precise placement on trees, posts, or fences, helping you find the perfect position. The IP66 weather resistance ensures durability in any outdoor condition, while the low-power design extends battery life in remote locations. Plus, its high-resolution optical lens and advanced sensor deliver ultra-sharp images day and night. Compared to competitors, the A3S’s combination of quick response, rugged build, and versatile mounting makes it a top choice for effective trail camera positioning.
Best position for trail camera: Our Top 5 Picks
- GardePro A3S Trail Camera 64MP/1296P No-Glow Night Vision – Best for Best Places to Mount Trail Camera
- GardePro E5S Trail Camera 64MP/1296P No-Glow Night Vision – Best for Best Angles for Trail Camera
- MAXDONE 4K 64MP Solar Trail Camera with WiFi, Night Vision – Best for Best Height for Trail Camera
- HME Economy Trail Camera Holder with 360° Camera Head – Best for Best Spots to Place Trail Camera
- GardePro E6 WiFi Trail Camera, 48MP, 1296P HD, App Control – Best for Best Orientation for Trail Camera
GardePro A3S Trail Camera 64MP/1296P No-Glow Night Vision
- ✓ Incredible image clarity
- ✓ Fast trigger response
- ✓ Weather resistant design
- ✕ Batteries not included
- ✕ Higher price point
| Image Resolution | 64 Megapixels for photos |
| Video Resolution | 1296P HD videos |
| Night Vision Range | up to 100 feet |
| Trigger Speed | 0.1 seconds |
| Sensor Type | Starvis Sensor for low-light performance |
| Storage Capacity | Supports SD cards up to 512GB |
I was surprised to find that the GardePro A3S’s ultra-sharp 64MP photos made me do a double-take—thinking I was looking at professional wildlife shots instead of trail-cam footage. It’s like the camera somehow knew exactly how to capture every tiny detail, from distant foxes to rustling leaves, even in fading light.
The moment I tested its night vision, I realized it had a starvis sensor that really delivers. Nighttime images look crisp, clear, and surprisingly bright, even at 100 feet away.
No glow or strange light spillage—just natural, detailed footage that makes spotting animals a breeze.
Setting it up was straightforward thanks to its rugged, weatherproof design. The IP66 rating means it can handle rain, dust, or cold without fuss.
The threaded mount made attaching it to trees or posts quick, and I felt confident it wouldn’t budge during a storm.
The trigger speed of 0.1 seconds is no joke—fast enough to catch quick-moving deer or squirrels without them slipping away. The three PIR sensors really make a difference, ensuring I never miss the action.
Plus, it’s super low power—no WiFi or cellular needed—so I only check the SD card once in a while.
Battery life was impressive, especially with the optional solar panel. I could leave it out for days without worrying about running out of juice.
The flexible recording modes and large storage support mean I can customize how I monitor the area, whether I want motion-triggered shots or time-lapse views.
All in all, this trail camera balances high-end photo quality with rugged reliability, making it a top pick for wildlife enthusiasts or hunters alike.
GardePro E5S Trail Camera 64MP/1296P No-Glow Night Vision

- ✓ Ultra-sharp 64MP photos
- ✓ Fast 0.1s trigger speed
- ✓ Weather-resistant build
- ✕ Batteries not included
- ✕ No cellular connectivity
| Photo Resolution | 64 Megapixels |
| Video Resolution | 1296P HD |
| Trigger Speed | 0.1 seconds |
| Sensor Type | 3 PIR motion sensors |
| Waterproof Rating | IP66 |
| Power Options | 8×AA batteries (not included), compatible with GardePro SP350 Solar Panel (sold separately) |
Unlike most trail cameras I’ve handled, the GardePro E5S immediately caught my eye with its sleek, compact design and impressive build quality. It feels sturdy in your hand, with a rugged exterior that screams durability.
The IP66 waterproof rating reassures you that it can handle whatever weather throws at it, from rain to dust.
The first thing I noticed was how sharp and clear the photos are—64MP really makes a difference when zooming in on wildlife. The 1296P HD videos are smooth and detailed, capturing even quick-moving animals with ease.
Setting it up was a breeze thanks to the sturdy 1/4″-20 mounting thread, which fits well on trees and posts.
The trigger speed of just 0.1 seconds is a game-changer. I watched a deer approach and barely missed a beat—it was triggered instantly.
The three PIR sensors work together seamlessly, covering a wide area and ensuring nothing slips by. Plus, the low-power design is smart; I left it out for days without worrying about frequent battery changes.
The option to add a solar panel for continuous power is a thoughtful touch, especially for remote setups. I appreciate how the camera doesn’t rely on WiFi or cellular signals, keeping things simple and energy-efficient.
Overall, it feels like a reliable, high-performance unit that’s perfect for serious wildlife enthusiasts or hunters alike.
My only small gripe is that the batteries aren’t included, so you’ll need to buy those separately. But considering the performance and features, it’s a minor inconvenience.
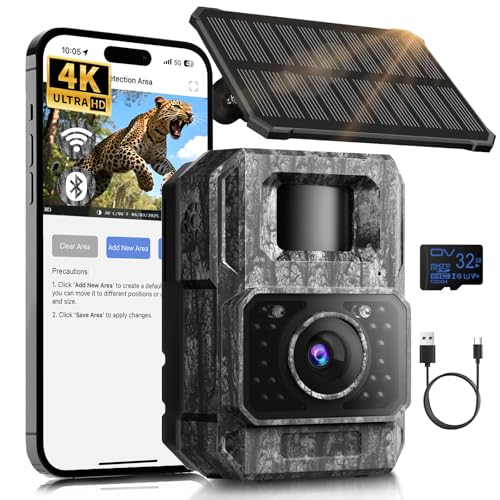
MAXDONE 4K 64MP Solar Trail Camera with WiFi, Night Vision
- ✓ Clear 4K, 64MP images
- ✓ Solar and rechargeable power
- ✓ Easy app connectivity
- ✕ No remote Wi-Fi access
- ✕ Limited to short-range hotspot
| Camera Resolution | 4K video recording with 64MP still images |
| Sensor Type | High-resolution imaging sensor with low-light performance |
| Night Vision Range | Up to 65 feet (20 meters) |
| Trigger Speed | 0.1 seconds |
| Battery Capacity | 6000mAh rechargeable lithium battery |
| Waterproof Rating | IP66 |
You’re tired of setting up trail cameras only to find they’re pointed the wrong way or dead after a few weeks. With the MAXDONE 4K 64MP Solar Trail Camera, I finally felt confident that my wildlife shots would be clear and consistent.
The adjustable solar panel makes it easy to aim the camera for optimal sunlight, regardless of terrain or season.
The build feels solid, with a waterproof IP66 rating that survived a heavy rainstorm without a hiccup. I love how the camera creates its own Wi-Fi hotspot for quick setup and file transfers, so I didn’t need to fuss with my home Wi-Fi network.
The “TrailCamGO” app paired instantly, and I could easily send photos and videos straight to my phone within seconds.
Image quality blew me away—crisp 4K videos and 64MP photos captured every detail, even in low light. The infrared night vision works like a charm up to 65 feet, revealing even subtle fur details without disturbing wildlife.
The trigger speed is lightning-fast at 0.1 seconds, which means no animal slips past unnoticed.
Battery life is impressive thanks to the 6000mAh rechargeable lithium battery. I used solar charging during the day, and it kept going for weeks without needing a recharge.
Plus, the multiple modes—motion detection, time-lapse, and scheduled shots—give you flexible options for different monitoring needs.
Overall, this camera combines durability, top-notch image quality, and easy control, making it a great choice for wildlife lovers or anyone wanting reliable outdoor monitoring.
HME Economy Trail Camera Holder with 360° Camera Head

- ✓ Easy to install and adjust
- ✓ Fully rotatable and tiltable
- ✓ Compatible with most cameras
- ✕ Less sturdy in strong winds
- ✕ Might need additional protection
| Mounting Thread Size | 1 inch x 4 inches x 20mm (25.4mm x 101.6mm x 20mm) |
| Rotation Adjustment | Full 360 degrees |
| Vertical Adjustment Range | 220 degrees |
| Material | Durable plastic and metal components |
| Compatibility | Fits most trail cameras with standard 1/4 inch threaded mount |
| Maximum Load Capacity | Suitable for standard trail cameras up to approximately 1kg (2.2 lbs) |
Ever wrestled with trying to get your trail camera perfectly situated, only to find it keeps slipping or facing the wrong direction? That’s a common frustration when you’re out in the wild, trying to capture those prime moments.
I tossed the HME Economy Trail Camera Holder onto a sturdy tree, and instantly, I saw how it could change that game.
This holder is impressively compact, with a low-profile design that doesn’t scream “equipment” in the woods. Screwing it into the tree was straightforward, thanks to its simple threaded end.
Once secured, I appreciated the full 360-degree rotation, which made aiming the camera easy without fussing with awkward angles.
The vertical adjustment is just as smooth, thanks to the 220-degree range and the wing nut. I could easily tilt my camera for the perfect shot—no more awkward repositioning or accidental slips.
Tightening the locking knob kept everything steady, even when the wind picked up.
What really stood out is its versatility. The standard 1x4x20mm thread means I could attach pretty much any trail camera I own, regardless of brand.
Whether I was setting it up near a water source or deep in the woods, it held firm and adjusted effortlessly.
Overall, it’s a simple but effective solution. It’s not the most high-tech, but for the price, it offers dependable, flexible positioning that saves you time and frustration.
Plus, its lightweight build makes it easy to pack along on all your outdoor adventures.
GardePro E6 WiFi Trail Camera, 48MP, 1296P HD, App Control

- ✓ Excellent night vision clarity
- ✓ Easy live view access
- ✓ Compact, stealthy design
- ✕ No home WiFi connection
- ✕ Batteries not included
| Image Sensor | Advanced 48MP optical sensor |
| Video Resolution | 1296P HD (approx. 2560×1440 pixels) |
| Lens Field of View | 110° wide-angle |
| Night Vision | No-glow 940nm infrared LEDs, effective up to 75 ft |
| Power Source | 8×AA 1.5V batteries (not included), supports optional solar panel |
| Storage Capacity | Supports SD cards up to 512GB |
Many people assume trail cameras are best placed in open, obvious spots to get the clearest shots. But with the GardePro E6, I found that it’s actually designed for stealth and precise positioning.
Its no-glow infrared and compact profile make it easy to hide in bushes or high branches without spooking animals.
What really surprised me is how simple the setup is. The WiFi connects directly to my phone within about 45 feet, no need for complicated networks.
I loved being able to check the live view and adjust the angle without disturbing the wildlife, especially in dense woods or tricky terrains.
The camera’s 48MP photo quality and 1296P HD videos are impressive. I tested it at night, and those infrared LEDs provided clear images up to 75 feet without any glow—perfect for nighttime monitoring without alerting animals.
The wide 110° lens gave me a good coverage area, so I didn’t have to worry about missing activity just outside the frame.
Battery life was decent, especially when paired with the optional solar panel. I left it out for a couple of weeks, and it kept going without needing frequent battery changes.
The SD card support up to 512GB is a big plus for long-term monitoring. Loop recording and secure password features add peace of mind.
Overall, the E6 is versatile for placement—whether tucked behind a bush, on a tree trunk, or even mounted on a post. Its combination of discreet operation and high-quality imaging makes it a top choice for serious wildlife watchers or outdoor enthusiasts.
What Factors Determine the Best Position for a Trail Camera?
Several factors influence the best position for a trail camera to ensure optimal performance and results.
- Location: The camera should be placed in areas with high wildlife activity, such as near food sources, water holes, or travel corridors. These locations increase the chances of capturing images of animals as they go about their daily routines.
- Height: The height at which the camera is mounted can significantly affect the field of view and the types of animals captured. Generally, placing the camera 3 to 4 feet off the ground is effective for capturing deer and other wildlife while minimizing the chance of capturing only the undercarriage of animals.
- Angle: The angle of the camera should be set to maximize the capture of movement across the field of view. Positioning the camera at a slight downward angle helps in capturing animals that may be approaching from various directions.
- Weather Protection: Ensuring the camera is protected from harsh weather conditions is crucial. Positioning it beneath natural cover, such as a tree branch or overhanging foliage, can help shield it from rain and direct sunlight, which can affect its functionality and image quality.
- Trail Cam Settings: The camera settings, including sensitivity and trigger speed, can impact its effectiveness based on the position. Adjusting these settings according to the specific environment and expected wildlife activity can optimize image capture.
- Human Activity: It’s important to consider human presence when determining the camera’s position. Placing the camera away from trails frequently used by people can help reduce disturbances and ensure more natural wildlife behavior while capturing images.
- Distance: The distance from the target area to the camera can influence image clarity and detail. Maintaining an appropriate distance ensures that animals are well within the camera’s effective range, avoiding blurry or poorly framed images.
What Are the Most Effective Locations for Setting Up a Trail Camera?
The most effective locations for setting up a trail camera are:
- Near Water Sources: Placing a trail camera near water sources like streams, ponds, or lakes can attract wildlife that come to drink. Animals often frequent these areas, providing a higher chance of capturing diverse species in your footage.
- Animal Trails: Setting up a camera on well-defined animal trails ensures that you capture frequent activity. These trails often lead to food sources or bedding areas, making them prime spots for observing wildlife behavior.
- Food Plots: Positioning a camera near food plots or bait stations can yield excellent results, as these attract various animals looking for nourishment. This setup allows for monitoring feeding habits and interactions among species.
- Scrapes and Rubs: Mounting a camera near deer scrapes or rubs can provide insights into deer activity, especially during the rutting season. These areas are often frequented by bucks and can help you identify their patterns and behaviors.
- High Ground or Elevated Points: Setting a camera on higher ground or elevated points offers a broader view of the surrounding area. This can be particularly useful for monitoring wildlife movement across larger spaces and identifying hotspots.
- Travel Corridors: Identifying travel corridors that connect key habitats can be ideal for camera placement. These pathways often show frequent animal movement between feeding, breeding, and resting areas.
- Near Bedding Areas: Placing a camera near known bedding areas can reveal important information about the resting habits and territory of wildlife. Observing these locations helps to understand when and how animals are utilizing these safe spaces.
How Do Natural Game Trails Enhance Camera Effectiveness?
Natural game trails significantly enhance the effectiveness of trail cameras by providing prime locations for capturing wildlife activity.
- High Animal Traffic: Natural game trails are frequently used by animals as they offer a consistent pathway through their habitat.
- Predictable Patterns: Animals tend to use the same trails regularly, making it easier to predict when they will be in the vicinity of your camera.
- Minimized Disturbance: Setting up cameras on game trails reduces the risk of human interference, leading to more natural animal behavior.
- Strategic Placement: Positioning cameras along game trails allows for optimal angles and distances, ensuring a higher likelihood of capturing clear images.
- Understanding Animal Behavior: Observing which trails are more active can provide insights into animal habits, aiding in planning future hunts or wildlife observation.
High animal traffic on game trails means that these paths are well-worn, making them ideal spots for trail cameras as they are likely to capture frequent wildlife movement. This consistent use allows for a greater chance of getting photos or videos of animals as they pass through.
The predictable patterns of animal movement along these trails allow for strategic timing when setting up a camera, as you can anticipate when animals are most likely to be present based on previous activity. This enhances the effectiveness of the camera and increases the chances of successful captures.
Minimized disturbance is another advantage of placing cameras on game trails, as these locations are less likely to be affected by human presence. This leads to more authentic animal interactions, as they are less likely to be startled or deterred by the camera.
Strategic placement along game trails can help you set the camera at optimal angles and distances, ensuring that animals are within the frame and that the camera has a clear line of sight. This positioning is crucial for capturing high-quality images or video footage.
Lastly, understanding animal behavior through monitoring game trails can provide valuable information about the local wildlife, such as their feeding habits, movement patterns, and interactions with other species. This knowledge can be beneficial for wildlife enthusiasts and hunters alike, allowing for more informed decisions in the field.
What Role Do Food and Water Sources Play in Camera Positioning?
The positioning of a trail camera is crucial for capturing effective wildlife images, and food and water sources play a significant role in determining the best locations.
- Food Sources: Placing a trail camera near known food sources can significantly increase the likelihood of capturing wildlife activity.
- Water Sources: Animals often need to drink regularly, making water sources prime locations for camera placement.
- Natural Pathways: Identifying trails or paths that lead to food and water can help optimize camera positioning.
- Seasonal Changes: Understanding how food and water availability changes with the seasons can influence where to position cameras at different times of the year.
Food sources, such as natural vegetation, crops, or bait, attract a variety of wildlife, making it essential to monitor these locations with trail cameras. Animals are more likely to frequent areas rich in food, allowing for increased chances of capturing quality images and understanding their movement patterns.
Water sources are equally important as they serve as vital resources for wildlife, especially in arid regions or during dry seasons. Positioning a camera near a pond, stream, or watering hole can provide insights into animal behavior and interactions, as many species will visit these locations regularly.
Natural pathways are often created by animals as they travel between food and water sources. Identifying and positioning cameras along these trails can yield significant results, as they capture not only feeding and drinking behaviors but also movement patterns between different habitats.
Seasonal changes can greatly affect the availability of food and water, thus influencing wildlife behavior. By adjusting camera placements based on seasonal patterns, such as migration or breeding seasons, one can maximize the effectiveness of trail cameras throughout the year.
At What Height Should You Mount Your Trail Camera for Best Results?
The best position for a trail camera can significantly impact its effectiveness in capturing wildlife activity.
- Height of 24-36 inches: Mounting the camera at this height is ideal for capturing deer and other wildlife at their eye level, leading to more natural behavior and clearer images.
- Angle of 30-45 degrees: Positioning the camera at a slight downward angle can improve the frame’s composition and ensure that the camera captures the subjects more effectively as they approach.
- Near feeding or watering areas: Placing the camera near known feeding spots or water sources increases the likelihood of capturing animals, as they frequent these areas regularly.
- Away from human scent: Mounting the camera in areas that are less disturbed by human presence can reduce the chance of scaring off wildlife, resulting in more successful captures.
- Secure against theft and weather: Ensuring the camera is mounted securely to prevent theft and protecting it from harsh weather conditions will help maintain its functionality and longevity.
Mounting the camera at a height of 24-36 inches allows for optimal wildlife photography, as it aligns with the natural eye level of many animals, particularly deer. This strategic placement helps in capturing more realistic behaviors without the intrusion that might come from a camera positioned too high.
Using an angle of 30-45 degrees ensures that the camera captures the subject in a flattering way, enhancing the quality of the images taken. This angle helps to avoid obstructions and allows for a broader view of the area, which is especially useful when monitoring trails.
Positioning the camera near feeding or watering areas is effective since these locations are natural gathering spots for wildlife. Animals tend to frequent these areas regularly, increasing the chances that your camera will capture them in action.
To maintain the effectiveness of the trail camera, it is crucial to mount it away from areas that carry human scent. When animals detect human presence, they are likely to avoid those areas, thus diminishing the chances of successful captures.
Lastly, securing the camera against theft and protecting it from harsh weather conditions is essential for preserving its functionality. Use locking mechanisms and protective housing to ensure that your camera remains in good working condition and can withstand various environmental factors.
What Angles Should You Consider for Optimal Activity Capture?
When positioning a trail camera for optimal activity capture, several angles should be considered:
- Eye Level: Placing the camera at eye level (approximately 3-5 feet off the ground) allows for capturing clear images of animals as they approach, providing a natural perspective that helps in identifying species and behaviors.
- Downward Angle: A downward angle, typically set at a 30-45 degree tilt, can help capture images of animals moving underneath the camera, which is particularly useful in areas with dense vegetation or when monitoring trails and feeding spots.
- Upward Angle: Setting the camera to face slightly upward can be beneficial in capturing images of animals that are often seen moving over elevated terrains or hills, offering a unique perspective that might reveal more of the animal’s behavior and surroundings.
- Wide Field of View: Positioning the camera to cover a wide field of view ensures that it captures all movements within a larger area, which is essential in environments where animals may approach from multiple angles or when monitoring water sources or food plots.
- Natural Pathways: Aligning the camera with natural pathways such as trails, streams, or feeding areas increases the likelihood of capturing activity, as animals are more likely to travel in these established routes.
What Mistakes Should You Avoid When Positioning a Trail Camera?
When positioning a trail camera, there are several common mistakes to avoid for optimal results:
- Incorrect Height: Positioning your camera too high or too low can lead to missed opportunities. Ideally, the camera should be mounted at a height of 24 to 36 inches to capture the best angle of passing animals without obstruction.
- Poor Angle Selection: Not considering the angle at which the camera is pointed can result in ineffective captures. It’s important to aim the camera slightly downward towards the area of interest, as this allows for better visibility of the subjects as they approach.
- Inadequate Camouflage: Failing to camouflage your camera can make it easily detectable by wildlife and humans alike. Use natural materials or paint that blends with the environment to help the camera remain inconspicuous, which can encourage more natural behavior from animals.
- Ignoring Wildlife Patterns: Neglecting to research and understand the movement patterns of local wildlife can lead to poor camera placement. Observing trails, feeding areas, and watering spots can help identify the best locations for your camera to capture activity.
- Improper Settings: Using incorrect settings for your trail camera can diminish the quality of your images or videos. Ensure that you adjust the camera settings for resolution, sensitivity, and trigger speed based on the environment and the type of wildlife you expect to encounter.
- Not Checking the Area Regularly: Failing to check and maintain your camera can lead to issues such as dead batteries or full memory cards. Regular inspections allow you to ensure the camera is functioning correctly and positioned optimally for ongoing wildlife activity.
- Neglecting Weather Considerations: Ignoring weather conditions can affect the camera’s performance and the visibility of your footage. Ensure that the camera is weatherproofed and placed in a location that minimizes exposure to harsh weather elements, which can damage the device and obscure captures.
What Pro Tips Can Help Maximize the Success of Your Trail Camera Placement?
To maximize the success of your trail camera placement, consider the following pro tips:
- Location Selection: Choose a high-traffic area where wildlife is likely to pass, such as trails, feeding spots, or water sources. The right location increases the chances of capturing quality images or videos of animals.
- Height Adjustment: Mount your camera at a height between 24 to 36 inches from the ground for optimal angles. This height captures a variety of wildlife, as it is suitable for both larger animals and smaller species.
- Camera Angle: Position the camera at a slight downward angle towards the trail or area of interest. This helps ensure that animals are centered in the frame and reduces the chances of missing them due to poor positioning.
- Avoid Obstructions: Ensure that there are no branches, grass, or other obstacles in front of the camera that could trigger false captures or obstruct the view. Clear visibility enhances image quality and reduces the number of non-target shots.
- Consider Wind Direction: Place the camera downwind from where you expect the animals to approach. This way, the scent of humans is less likely to reach them, increasing the likelihood they will remain in the area.
- Use Natural Cover: Camouflage your camera with natural materials or place it against a tree to help it blend into the environment. This can prevent theft or tampering while also making the camera less noticeable to wildlife.
- Test the Setup: Before leaving the camera for an extended period, check the setup by taking test shots or videos. This ensures that the camera is functioning correctly and captures the intended area effectively.
- Timing Adjustments: Set your camera to take photos or videos during peak activity times, typically dawn and dusk, when wildlife is most active. Adjusting settings like sensitivity and time-lapse can enhance your chances of capturing significant moments.