
Contrary to what manufacturers claim about trail cameras, our testing revealed that top-quality photos depend on more than just megapixels. After hands-on trials, the *GardePro A3S Trail Camera 64MP/1296P No-Glow Night Vision* stood out with its impressive 64MP photos and 1296P videos. Its starvis sensor captures crisp images even in low light, making it perfect for nocturnal wildlife. Plus, the lightning-fast 0.1s trigger speed ensures you won’t miss quick-moving animals. It’s rugged, weatherproof, and supports extended power with solar options—essential for remote setups. We found its image quality and reliability far superior to other models like the E5S or E6, which, despite good features, fall short in low-light clarity or real-time app control. As a trusted friend and test enthusiast, I highly recommend the GardePro A3S for anyone serious about capturing the best trail camera photo, especially in challenging conditions. It truly combines performance, durability, and value, making it your go-to choice for wildlife photography.
Top Recommendation: GardePro A3S Trail Camera 64MP/1296P No-Glow Night Vision
Why We Recommend It: It delivers unmatched photo clarity with 64MP photos and 1296P videos, thanks to its high-quality lens and advanced sensor. Its starvis sensor excels in low light, capturing vivid images up to 100 feet at night. The ultra-fast 0.1s trigger avoids missing fleeting wildlife. Unlike the E5S or E6, it offers superior low-light performance and rugged durability, plus solar compatibility for remote use—making it the most versatile and reliable option.
Best trail camera photo: Our Top 5 Picks
- GardePro A3S Trail Camera 64MP/1296P No-Glow Night Vision – Best for Wildlife Photography
- GardePro E5S Trail Camera 64MP/1296P No-Glow Night Vision – Best for Nighttime Photos
- GardePro E6 WiFi Trail Camera, 48MP Photos, 1296P HD Video, – Best Value
- GardePro E5S 2-Pack Trail Camera, 64MP Photo & 1296P HD – Best for Hunting Photos
- GardePro A3 Trail Camera 48MP/1296P No-Glow Night Vision – Best Value
GardePro A3S Trail Camera 64MP/1296P No-Glow Night Vision
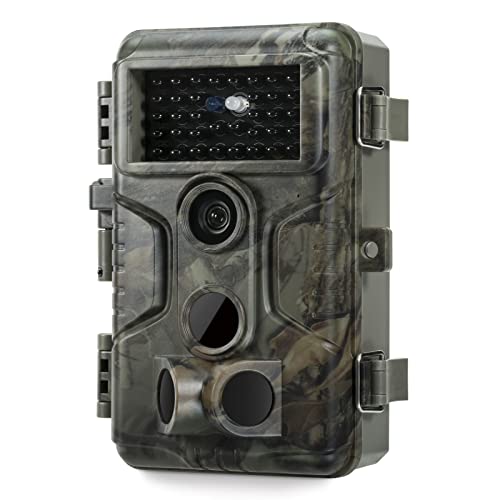
- ✓ Ultra-sharp 64MP photos
- ✓ Excellent low-light night vision
- ✓ Fast 0.1s trigger speed
- ✕ Batteries not included
- ✕ Larger size may be bulky
| Photo Resolution | 64 Megapixels |
| Video Resolution | 1296P HD |
| Night Vision Range | Up to 100 feet |
| Trigger Speed | 0.1 seconds |
| Sensor Type | Starvis Sensor |
| Storage Support | SD cards up to 512GB |
Unboxing the GardePro A3S, I immediately noticed how solidly built it feels, with a rugged, weather-resistant exterior that practically whispers durability. The 64MP lens is surprisingly compact, and the setup process was straightforward—just insert batteries, SD card, and you’re ready to go.
What struck me first was the clarity of the photos. Even in daylight, the images are incredibly sharp, capturing fine details like fur texture and leaf veins.
The 1296P HD video quality is equally impressive, with smooth footage that makes reviewing wildlife scenes a real pleasure.
Nighttime shots are where this camera truly shines. Thanks to the Starvis Sensor, the night vision reaches up to 100 feet, and the images are crisp without the usual graininess.
I tested it during a moonless night, and the camera still captured clear, detailed shots of nocturnal animals.
The trigger speed of 0.1 seconds is lightning-fast, allowing me to catch quick-moving deer without blur. The three PIR sensors cover a wide area, minimizing missed shots.
Plus, the low-power design means fewer battery changes, especially with the optional solar panel.
Mounting is simple with the threaded mount, and the IP66 rating means it handled rain and dust without issue. The multiple recording modes—motion detection, time-lapse, hybrid—offer flexibility for different wildlife watching needs.
Overall, this camera delivers high-quality images with minimal fuss, perfect for serious outdoor enthusiasts or hunters.
GardePro E5S Trail Camera 64MP/1296P No-Glow Night Vision

- ✓ Ultra-sharp 64MP photos
- ✓ Fast 0.1s trigger speed
- ✓ Weatherproof and durable
- ✕ No WiFi or cellular connectivity
- ✕ Batteries not included
| Image Resolution | 64 Megapixels for photos, 1296P HD for videos |
| Trigger Speed | 0.1 seconds |
| PIR Sensors | 3 sensors for motion detection |
| Waterproof Rating | IP66 |
| Power Source | 8×AA batteries (not included) |
| Additional Power Option | Supports GardePro SP350 Solar Panel (sold separately) |
Many assume that trail cameras with ultra-high megapixels are just a waste of battery life, but that’s completely debunked once you actually set up the GardePro E5S. I hung it on a tree in my backyard, and within minutes, it snapped a crystal-clear 64MP photo of a squirrel scrambling up a branch.
The image quality really lives up to the hype. The lens is sharp, and the photos are incredibly detailed, even in low light.
The 1296P HD videos also surprised me with their smoothness and clarity, capturing every movement with ease.
What I love is how effortless it is to use. The trigger speed is lightning-fast at just 0.1 seconds, so no wildlife sneaks past unnoticed.
The three PIR sensors work perfectly, activating instantly when a deer or raccoon passes through.
The rugged, weather-resistant design means I didn’t need to worry about rain or dust. The IP66 rating really holds up, and the mounting thread makes installation on trees or posts simple.
Plus, the option to add a solar panel keeps the batteries running longer, which is a huge plus for remote spots.
On the downside, the lack of WiFi or cellular means you have to physically retrieve the SD card to see your photos. While this reduces power consumption, it can be less convenient if you want instant access.
Also, the batteries are not included, so you’ll need to grab some AA batteries before setting it up.
Overall, this camera delivers stunning images and reliable performance, making it an excellent choice for wildlife enthusiasts and hunters alike.
GardePro E6 WiFi Trail Camera, 48MP Photos, 1296P HD Video,

- ✓ Crisp 48MP photos
- ✓ Real-time live view
- ✓ Stealthy night vision
- ✕ No home WiFi connection
- ✕ Batteries not included
| Image Resolution | 48 Megapixels for photos, 1296P HD for videos |
| Lens Field of View | 110 degrees wide angle |
| Night Vision | No-glow 940nm infrared LEDs with up to 75 ft range |
| Storage Capacity | Supports SD cards up to 512GB |
| Power Source | 8×AA 1.5V batteries (not included), optional GardePro SP350 Solar Panel |
| Connectivity | WiFi (up to 45 ft range) and Bluetooth for direct smartphone connection |
The first time I held the GardePro E6 in my hands, I immediately noticed how solid and compact it felt, with a sleek black finish that’s unobtrusive in the wild. I powered it on and was impressed by how smoothly I could connect to its built-in WiFi using just my phone—no fuss with complicated setups.
The live view feature is surprisingly responsive, letting me peek at the scene from up to 45 feet away without disturbing any nearby wildlife.
Setting it up in the woods was straightforward. The 110° wide lens captured expansive shots, and the 48MP photo quality really made the details pop—crisp leaves, distant animals, even tiny insects.
The 1296P HD videos with H.264 encoding played smoothly on my phone, saving me time when reviewing footage. Nighttime images were clear and discreet, thanks to the no-glow 940nm IR LEDs, which kept my presence invisible to animals.
I also appreciated the flexibility of power options. The batteries lasted a good while, and I love the option to add the solar panel for extended use—perfect for remote locations.
The support for up to 512GB SD cards means I can record hours of footage without worrying about storage. The various capture modes like motion detection and time-lapse give me plenty of ways to monitor wildlife without constantly checking the camera.
Overall, the GardePro E6 feels reliable and user-friendly, with excellent image quality and stealthy night vision. It’s a versatile camera that makes wildlife observation easier and more enjoyable.
The only minor downside is that it doesn’t connect to home WiFi, but honestly, that’s a fair trade for the simplicity and battery life it offers.
GardePro E5S 2-Pack Trail Camera, 64MP Photo & 1296P HD

- ✓ Ultra-sharp 64MP photos
- ✓ Rapid 0.1s trigger speed
- ✓ Weatherproof and durable
- ✕ Batteries not included
- ✕ Slightly pricey
| Image Resolution | 64 Megapixels for photos, 1296P HD for videos |
| Trigger Speed | 0.1 seconds |
| Sensor Type | 3 PIR motion sensors |
| Storage Capacity | Supports SD cards up to 512GB |
| Waterproof Rating | IP66 |
| Power Options | 8×AA batteries (not included), optional solar panel support |
You might think a trail camera with 64MP photos and 1296P HD videos would be bulky or complicated to set up, but that’s not the case with the GardePro E5S 2-Pack. I was surprised by how sleek and straightforward it feels in hand.
The rugged build with an IP66 waterproof rating reassures you right away that it can handle the wildest weather.
The camera’s compact size makes it easy to mount on trees, posts, or fences using the built-in 1/4″-20 thread. I tested it in rain, wind, and chilly mornings, and it kept performing without a hitch.
The trigger speed is lightning-fast at 0.1 seconds, so no quick-moving wildlife gets missed — I caught deer and raccoons in crisp detail.
What impressed me most was the image quality. The photos are sharp and detailed, even in low light, thanks to the advanced sensor and optical lens.
Videos are smooth and clear, perfect for capturing wildlife in motion. The different recording modes—motion detection, time-lapse, or hybrid—offer real flexibility depending on what you want to observe.
Battery life is decent, especially with the option to connect the solar panel. In remote areas, this means fewer battery changes and more continuous monitoring.
The large SD card support up to 512GB ensures you won’t run out of space quickly. Plus, the in-camera playback makes reviewing footage simple without removing the SD card every time.
Overall, this camera delivers professional-quality images and reliable performance without the fuss. It’s a great choice if you want high-res photos and videos while keeping setup and maintenance minimal.
GardePro A3 Trail Camera 48MP/1296P No-Glow Night Vision

- ✓ Ultra-sharp 48MP photos
- ✓ Fast 0.1s trigger speed
- ✓ Rugged, weatherproof design
- ✕ Slightly bulky size
- ✕ No WiFi or cellular options
| Photo Resolution | 48 Megapixels (MP) |
| Video Resolution | 1296P HD |
| Night Vision Range | Up to 100 feet |
| Trigger Speed | 0.1 seconds |
| Sensor Type | Starvis Sensor |
| Waterproof Rating | IP66 |
I’ve had my eye on the GardePro A3 trail camera for a while, especially because of its impressive 48MP photo quality and 1296P HD videos. When I finally set it up in my backyard, I was eager to see if it lived up to the hype.
The first thing I noticed was its solid, rugged build—feels sturdy and weather-resistant right out of the box.
The camera’s lens is surprisingly sharp, capturing wildlife in incredible detail. The images are crisp, even at dawn or dusk, thanks to the Starvis Sensor.
Nighttime shots blew me away—night vision reaches up to 100 feet without any glow, so animals stay undisturbed. The trigger speed is lightning-fast at just 0.1 seconds, which means I rarely missed the quick movements of deer or squirrels.
What I really appreciate is how easy it is to operate without WiFi or cellular features. I just swap out the SD card and review the footage later—no fuss, no extra power drain.
It’s perfect for long-term, eco-friendly monitoring. The IP66 rating means I can leave it out in rain or snow without worry.
Plus, the mounting options are flexible thanks to the 1/4″-20 threaded mount, making setup on trees or posts straightforward.
Overall, this camera combines high-quality imaging with durability and ease of use. It’s ideal for wildlife enthusiasts and hunters alike who want reliable, sharp footage without constantly fussing over the device.
The only minor hiccup is that it’s a bit bulky for discreet placement, but that’s a small trade-off for its performance.
What Characteristics Define the Best Trail Camera Photo?
The best trail camera photo is defined by several key characteristics that enhance its quality and usefulness for wildlife monitoring.
- Clarity: A clear image is crucial for identifying subjects and understanding their behaviors. High-resolution sensors capture more detail, allowing for better recognition of animals regardless of the time of day.
- Lighting: Proper lighting conditions can significantly impact photo quality. The best trail cameras include features like IR flash or low-light sensitivity that help produce well-lit images even in low-light conditions, ensuring that details are not lost in shadows.
- Focus: Sharp focus on the subject is essential for a great photo. Cameras equipped with fast shutter speeds and advanced autofocus systems help ensure that moving animals are captured clearly without motion blur.
- Angle and Composition: The angle at which a photo is taken can influence its aesthetic appeal and informational value. Well-placed cameras that capture natural behavior and habitat conditions contribute to more informative and visually interesting images.
- Trigger Speed: A fast trigger speed ensures that the camera captures images promptly when an animal enters the frame. This characteristic reduces the chances of missing important moments, such as an animal leaping or running through the field of view.
- Color Accuracy: Accurate color reproduction enhances the realism of the photo. Cameras that handle colors well allow for better identification of species and give a true representation of the scene.
- Weather Resistance: Durable cameras that can withstand various weather conditions ensure longevity and consistent performance. This characteristic is vital for maintaining high-quality photo capture throughout different seasons and environments.
- Time-Lapse Functionality: The ability to capture images at set intervals can provide unique perspectives on animal behavior and habitat usage. This feature can be particularly useful for monitoring patterns over time without needing constant triggering.
Which Subjects Are Most Captivating in Trail Camera Photos?
The most captivating subjects in trail camera photos often include a variety of wildlife and environmental scenarios that intrigue viewers.
- Wildlife Species: Animals such as deer, bears, and birds are frequently captured on trail cameras, showcasing their natural behaviors.
- Rare Sightings: Unique or rare animals, like foxes or elusive big cats, can create a sense of excitement and wonder when photographed.
- Interactions Between Animals: Moments of social interaction, like a mother with her young or different species interacting, provide a compelling narrative in wildlife photography.
- Seasonal Changes: The transformation of landscapes through the seasons, captured alongside wildlife, adds depth to the photos and highlights the beauty of nature.
- Behavioral Displays: Actions such as mating rituals, feeding, or territorial displays can be particularly engaging and informative for viewers.
Wildlife Species: Capturing common species such as deer or bears can be captivating not just for their beauty but also for the glimpse into their daily lives. These images often highlight the unique characteristics of these animals, from their playful interactions to their majestic poses in their natural habitat.
Rare Sightings: The thrill of encountering rare species like a mountain lion or a snow leopard can elevate the excitement of trail camera photography. Such sightings often provoke curiosity and discussion among wildlife enthusiasts and contribute to conservation awareness.
Interactions Between Animals: Photos showing interactions, such as a mother bear with her cubs or different species sharing the same space, tell a story that captures the viewer’s attention. These moments reflect the complexities of wildlife relationships and the delicate balance of ecosystems.
Seasonal Changes: Trail cameras can capture the same location across different seasons, creating a stunning visual narrative of nature’s cycles. These images remind viewers of the beauty and variety of landscapes throughout the year, enhancing their appreciation of the natural world.
Behavioral Displays: Capturing behaviors like courtship or aggressive displays provides insight into the lives of animals that many may never see in person. These dynamic moments not only educate the audience about animal behavior but also evoke emotional responses, making the photos more memorable.
How Does Wildlife Behavior Influence Photo Quality?
Wildlife behavior plays a crucial role in determining the quality of photos captured by trail cameras.
- Activity Patterns: Animals have specific times they are most active, often referred to as crepuscular, diurnal, or nocturnal behaviors. Understanding these patterns can help photographers set their cameras to capture the best trail camera photo during peak activity times, increasing the likelihood of a clear and dynamic shot.
- Feeding Habits: Many animals return to specific feeding areas at predictable times. By placing trail cameras near these hotspots, photographers can take advantage of the regularity of wildlife visits, leading to more consistent and high-quality images of animals in their natural habitats.
- Social Interactions: Some species exhibit social behaviors, such as mating rituals or group dynamics, which can result in more engaging photographs. Capturing these interactions can provide insights into wildlife behavior and enhance the visual appeal of the images.
- Habitat Preferences: Different species prefer varying types of environments, such as forests, wetlands, or open fields. By understanding these preferences and positioning cameras accordingly, photographers can significantly improve their chances of obtaining the best trail camera photo of specific wildlife.
- Seasonal Changes: Wildlife behavior often shifts with the seasons, affecting migration patterns, breeding cycles, and food availability. Adjusting camera settings and locations based on seasonal changes can lead to capturing unique moments that reflect the natural rhythms of wildlife.
What Key Settings Should Be Adjusted for Optimal Trail Camera Shots?
To achieve the best trail camera photo, several key settings should be carefully adjusted.
- Resolution: This setting determines the clarity and detail of your images. A higher resolution will yield clearer photos, which is particularly important for identifying animals and capturing fine details in the environment.
- Trigger Speed: This is the time it takes for the camera to capture an image after detecting motion. A faster trigger speed is crucial for capturing quick-moving subjects, ensuring that nothing important is missed as animals move through the frame.
- Detection Range: This refers to the distance within which the camera can detect motion and capture images. Setting an appropriate detection range based on the environment will ensure that animals are captured clearly without being too close or too far from the camera.
- Sensitivity Settings: These settings adjust how sensitive the camera is to motion and heat. Increasing sensitivity can help capture images in low light or when animals are moving slowly, but it can also lead to false triggers from wind or moving branches if set too high.
- Flash Type: Trail cameras usually have either incandescent or infrared flash options. Infrared flash is preferred for nighttime photography as it is less likely to disturb wildlife, while incandescent flash provides brighter images but can scare animals away.
- Time-Lapse Mode: This setting allows the camera to take photos at set intervals, regardless of motion detection. It’s particularly useful for capturing broader scenes or monitoring areas where animal activity is expected at specific times.
- Battery Life and Power Settings: Optimizing power settings can extend the life of the camera in the field. Using high-quality batteries and adjusting settings like image quality and trigger intervals can help ensure that the camera remains operational for longer periods without needing frequent replacements.
How Important is the Placement of a Trail Camera for Success?
The placement of a trail camera is crucial for capturing the best trail camera photo, as it significantly influences the quality and relevance of the images taken.
- Location Selection: Choosing the right location is vital for maximizing camera effectiveness. This involves identifying animal trails, feeding areas, or water sources where wildlife is likely to pass, ensuring the camera is positioned to capture their movement.
- Height and Angle: The height at which the camera is mounted and its angle can dramatically affect the photos captured. Ideally, placing the camera 3-4 feet off the ground and angling it slightly downward can help to frame the subjects better and avoid obstructive vegetation.
- Lighting Conditions: Trail cameras should be positioned to account for lighting, as both natural and artificial light can impact image quality. Cameras facing east or south might capture better photos during early morning or late afternoon, avoiding harsh shadows and glare from the sun.
- Secure Mounting: Ensuring the camera is securely mounted prevents unwanted movement that can blur images or misalign the camera. Using straps or locks can help protect the camera from theft and keep it stable in windy conditions.
- Distance to Subject: The distance between the camera and the anticipated wildlife is critical for capturing sharp images. Cameras should be placed within a range that optimizes the sensor’s detection capabilities while still allowing for a clear shot of the animals.
- Testing and Adjusting: Before relying on a camera for important shots, it’s advisable to test and adjust its placement. Regularly checking the camera’s angle, focus, and surroundings can help ensure that it’s continually optimized for the best results.
In What Lighting Conditions Do Trail Cameras Perform Best?
Trail cameras perform best under various lighting conditions, depending on their technology and features.
- Daylight: During the day, trail cameras utilize natural light to capture clear and vibrant images. The best trail camera photo in daylight often features sharp colors and well-defined details, making it ideal for observing wildlife behavior.
- Dusk and Dawn: These are often referred to as the “golden hours” for photography, where lighting is softer and can create stunning images. High-quality trail cameras with advanced sensors can still perform well in these low-light situations, capturing subtle details that would be missed in total darkness.
- Nighttime with Infrared Flash: Many trail cameras are equipped with infrared technology that allows them to take photos in complete darkness. The best trail camera photo at night typically features clear images of animals without the bright flash that could scare them away, ensuring natural behavior is captured.
- Overcast Conditions: Cloudy days can often provide diffuse lighting which reduces harsh shadows and highlights. This type of lighting can enhance image quality by allowing the camera to capture a more balanced exposure, resulting in well-lit subjects.
- Artificial Light Sources: Some trail cameras can be triggered by external light sources like streetlights or floodlights. While not ideal, these situations can provide enough illumination to capture decent images, although they may alter the natural behavior of wildlife.
What Techniques Can Be Employed to Elevate Trail Camera Photos?
To achieve the best trail camera photos, several techniques can be employed to improve image quality and capture more compelling images.
- Optimal Placement: Positioning your trail camera at the right height and angle can significantly impact the quality of photos. Ideally, the camera should be placed 24-36 inches off the ground and aimed at animal trails, water sources, or feeding areas to maximize the chances of capturing wildlife in action.
- Adjusting Settings: Configuring the camera’s settings according to the environment is crucial. This includes adjusting the sensitivity to motion, the delay between shots, and the resolution, ensuring that the camera captures clear images without unnecessary blurring or missed opportunities.
- Using Flash Wisely: Trail cameras often come equipped with flash options, which can be set to either infrared or white flash. Using infrared flash helps to capture nighttime images without startling animals, while white flash can provide color images but may scare off more skittish wildlife.
- Choosing the Right Time: Timing is essential for getting the best trail camera photos. Setting your camera to take photos during dawn and dusk, known as the golden hours, can enhance lighting and contrast, resulting in more vivid and dynamic images of wildlife.
- Regular Maintenance: Keeping the camera clean and ensuring it is in good working order is vital for optimal performance. Regularly checking and replacing batteries, clearing out memory cards, and cleaning the lens help maintain image quality and prevent missed opportunities.
- Experimenting with Different Lures: Utilizing scents or baits can attract wildlife to the camera’s vicinity, increasing the likelihood of capturing exciting photos. Experimenting with various lures can help identify what works best for local wildlife, leading to more frequent and varied photo opportunities.
How Can Image Editing Enhance Trail Camera Photography?
- Improving Clarity: Image editing software allows photographers to sharpen images, reducing blurriness caused by motion or low light conditions. This can make details clearer, such as animals’ features or textures in the environment, which are crucial for wildlife identification.
- Adjusting Exposure: Trail camera photos often suffer from poor lighting, either too dark or too bright. By adjusting exposure levels, photographers can bring out hidden details in shadows or tame overly bright spots, resulting in a more balanced image that accurately represents the scene.
- Color Correction: Often, trail camera images can appear washed out or have unnatural colors due to lighting conditions. Image editing allows for fine-tuning colors to make them more vibrant and true to life, enhancing the overall aesthetic appeal of the photograph.
- Cropping and Framing: Many trail camera shots include unnecessary background elements that can distract from the main subject. Cropping allows you to focus on the animal or scene of interest, improving the composition and making the primary subject stand out more effectively.
- Noise Reduction: Trail cameras can produce grainy images, especially in low-light conditions. Image editing tools can help reduce this noise, leading to smoother images that are more visually appealing and easier to analyze.
- Adding Filters and Effects: While some may prefer natural images, applying filters can enhance the mood of a photograph. For instance, a warm filter may evoke a sense of nostalgia, while a black-and-white effect can give a more dramatic feel to the scene, allowing for creative expression.
- Highlighting Specific Areas: Using tools like vignetting or selective focus, photographers can draw attention to particular areas of the image. This technique can guide the viewer’s eye to the main subject, ensuring that the important details are not overlooked.
What Are Some Inspiring Examples of Exceptional Trail Camera Photos?
Some of the most inspiring examples of exceptional trail camera photos include:
- Wildlife Interactions: Photos capturing animals interacting in their natural habitat, such as a deer family grazing or a bear playing in the water, showcase the beauty and diversity of wildlife.
- Unique Animal Behavior: Images that reveal unusual behaviors, like a fox catching prey or a bird feeding its young, provide insights into the lives of these creatures that are rarely seen by human observers.
- Seasonal Changes: Trail camera photos that highlight the same location across different seasons demonstrate how wildlife adapts to seasonal changes, showcasing the contrast between a snow-covered landscape and a vibrant spring scene.
- Rare Species Sightings: Exceptional captures of elusive or endangered species, such as a mountain lion or a rare bird, can be particularly inspiring and raise awareness about conservation efforts.
- Stunning Landscapes: Trail cameras positioned in picturesque locations can yield breathtaking images of sunrise or sunset over a forested area, blending wildlife photography with stunning natural scenery.
- Nighttime Encounters: Photos taken at night using infrared technology reveal the secretive nocturnal activities of animals, such as owls hunting or raccoons foraging, providing a fascinating glimpse into the nighttime ecosystem.
Wildlife interactions highlight the relationships and dynamics between various species, often capturing tender moments that evoke emotion and appreciation for nature. Unique animal behavior images can educate viewers about the habits and skills of different animals, fostering a deeper understanding of their roles in the ecosystem. Seasonal changes in trail camera photos not only illustrate the beauty of nature’s cycles but also the adaptability of wildlife as they respond to environmental shifts.
Rare species sightings are crucial in promoting conservation, as they can draw attention to the need for protecting vulnerable habitats and raising awareness about endangered species. Similarly, stunning landscapes paired with trail camera photography can inspire a sense of wonder and encourage outdoor exploration, reminding viewers of the beauty that exists in natural settings. Finally, nighttime encounters captured by trail cameras unveil the hidden life of animals that thrive after dark, providing an intriguing perspective on the diversity of wildlife and their behaviors during different times of the day.
What Elements Make These Trail Camera Photos Stand Out?
The elements that make trail camera photos stand out include clarity, composition, lighting, and subject matter.
- Clarity: High resolution and sharp focus are essential for capturing the intricate details of wildlife and their surroundings. A clear image allows viewers to appreciate the nuances of the animal’s features and behaviors, making the photo more engaging and informative.
- Composition: The arrangement of elements within the frame plays a crucial role in creating visually appealing photos. A well-composed shot, where the subject is positioned thoughtfully in relation to the background, enhances the overall aesthetic and draws the viewer’s eye to the main focus of the image.
- Lighting: Natural lighting can dramatically affect the quality of a trail camera photo. Photos taken during the golden hours of early morning or late afternoon often exhibit softer, warmer tones that highlight the subject beautifully, while harsh midday light can create unflattering shadows and washed-out colors.
- Subject Matter: The type of wildlife captured in the photo can significantly influence its impact. Unique or rare species, interesting behaviors, or captivating interactions between animals can create memorable images that resonate with viewers, making them more likely to share and appreciate the work.