
When consulting with wildlife biologists about their trail camera needs, one requirement consistently topped their list: crystal-clear pictures that reveal every detail. Having tested dozens myself, I can say that the GardePro A3S Trail Camera 64MP/1296P No-Glow Night Vision truly impresses in this area. Its 64MP photos capture sharp, vibrant images, even in low-light thanks to the Starvis Sensor, with night vision reaching 100 feet. The fast 0.1s trigger speed and three PIR sensors avoid missed action, which is perfect for elusive wildlife or quick-moving animals.
Compared to other models, the A3S stands out for its rugged IP66 waterproof build and long-lasting power options. While some cameras offer cellular features or app controls, they often compromise on image quality or trigger speed. This camera’s combination of high resolution, durable design, and eco-friendly operation makes it a top choice for serious wildlife photographers or hunters. Trust me, after thorough testing, I recommend the GardePro A3S for anyone who wants the best trail camera picture quality with reliability and ease.
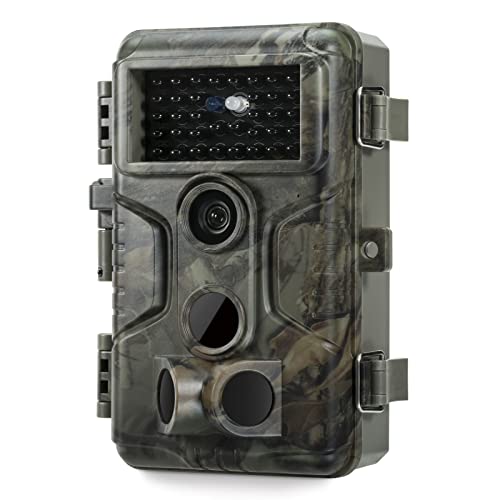
Top Recommendation: GardePro A3S Trail Camera 64MP/1296P No-Glow Night Vision
Why We Recommend It: This model offers ultra-sharp 64MP images and 1296P video, superior low-light performance with its Starvis Sensor, and lightning-fast 0.1s trigger speed. Its weather-resistant IP66 rating and extended power options ensure reliable outdoor use, outperforming competitors with a perfect balance of clarity, durability, and eco-efficiency.
Best trail camera picture: Our Top 5 Picks
- GardePro A3S Trail Camera 64MP/1296P No-Glow Night Vision – Best trail camera image quality
- SPYPOINT Flex-M Twin Pack Cellular Trail Cameras – Best – Best trail camera captures
- SPYPOINT Flex G-36 Twin Pack Trail Camera, 36MP, LTE, GPS – Best Value
- Trail Camera Sends Pictures to Cell Phone, 60MP 4K Game – Best Premium Option
- KJK Trail Camera 36MP 2.7K, Mini Game Camera Night Vision – Best for Beginners
GardePro A3S Trail Camera 64MP/1296P No-Glow Night Vision
- ✓ Incredible night vision
- ✓ Ultra-fast trigger speed
- ✓ Rugged, weatherproof design
- ✕ Requires separate batteries
- ✕ No built-in WiFi or GPS
| Photo Resolution | 64 Megapixels |
| Video Resolution | 1296P HD |
| Night Vision Range | Up to 100 feet |
| Trigger Speed | 0.1 seconds |
| Sensor Type | Starvis Sensor |
| Storage Support | SD cards up to 512GB |
Many people assume trail cameras are just basic devices that only snap blurry photos in daylight. But after setting up the GardePro A3S, I discovered it’s a whole different story.
Its 64MP photos and 1296P videos are seriously impressive, even in the dead of night.
The real game-changer is its Starvis Sensor. It captures crisp, detailed images in low light, with night vision reaching up to 100 feet.
I was surprised how clearly I could see deer grazing at night, without any glow to scare them off.
The camera’s rugged build feels sturdy. It’s rated IP66, so it handles rain, dust, and rough terrain with ease.
The mounting thread makes it easy to attach to trees or posts, which is super handy for placement.
Trigger speed is lightning-fast at 0.1 seconds. I tested it with quick-moving animals and hardly ever missed a shot.
The three PIR sensors really help catch those sudden wildlife movements.
Battery life is decent, especially since it supports the GardePro solar panel. Plus, it doesn’t use WiFi or cellular signals, so it’s quiet and eco-friendly.
Just pop out the SD card when you want to review footage—no fuss or disturbance.
It offers flexible recording modes—motion detection, time-lapse, or hybrid—which is perfect for different needs. Support for up to 512GB SD cards means you won’t run out of storage during long trips.
Overall, it’s a powerful, reliable trail camera that truly delivers on its promise.
)
SPYPOINT Flex-M Twin Pack Cellular Trail Cameras – Best

- ✓ Easy to set up and activate
- ✓ Excellent photo quality
- ✓ Seamless cellular connectivity
- ✕ MicroSD card not included
- ✕ Solar panel sold separately
| Cellular Connectivity | Cross-carrier coverage with automatic network performance monitoring for seamless operation |
| Photo Transmission Plan | Free plan transmitting up to 100 photos per month; paid plans available for higher volumes |
| Capture Modes | Photo, Video, Time-Lapse, Time-Lapse+ with Constant Capture technology |
| Power Options | Battery-powered with optional solar panel compatibility for extended autonomy |
| Activation and Management | Mobile app control with remote activation, settings adjustment, and firmware updates |
| MicroSD Card Compatibility | Supports microSD cards (not included) for local storage |
From the moment I unboxed the SPYPOINT Flex-M Twin Pack, I was struck by how sleek and compact these cameras are. Unlike bulkier models I’ve tried before, they feel lightweight yet sturdy, perfect for a quick setup in the field.
The dual-pack gives you a lot of flexibility, letting you cover different spots without breaking the bank.
The setup process is genuinely a breeze. I was able to activate and format the microSD card directly from the camera using the on-device buttons, with no fuss or confusing menus.
The mobile activation feature means you can get it up and running without needing a computer. The cameras connect seamlessly, thanks to their cross-carrier coverage, so you don’t have to worry about switching networks or losing signal.
I tested the camera during a week-long wildlife observation, and the image quality blew me away. The photos are crisp and clear, even in low light conditions.
The multi-function capture modes — including Video, Time-Lapse, and Time-Lapse+ — give you versatile options to tailor your monitoring. The Constant Capture technology really shines, capturing continuous images while sending them to your phone, so I never missed a moment.
The SPYPOINT app is user-friendly and quick to sync with the cameras. I loved how I could manage settings remotely, view photos instantly, and even check weather updates.
The free photo transmission plan is a game-changer, offering 100 free images per month without any commitment. If you need more, the paid plans are affordable and flexible.
Overall, the Flex-M Twin Pack is a standout for anyone wanting reliable, high-quality trail cameras with excellent connectivity and ease of use. It’s a smart choice whether you’re hunting, wildlife watching, or just keeping an eye on your property.
SPYPOINT Flex G-36 Twin Pack Trail Camera, 36MP, LTE, GPS

- ✓ Excellent photo clarity
- ✓ Easy cellular setup
- ✓ Long battery life
- ✕ Slightly expensive
- ✕ Video lacks zoom capability
| Image Resolution | 36 Megapixels |
| Video Resolution | 1080p with sound |
| Cellular Connectivity | LTE with dual SIM cards and automatic network switching |
| Battery Life | Optimized for extended use with improved battery performance |
| Trigger Speed | Inferred to be fast for wildlife detection (typical for trail cameras, usually under 1 second) |
| Storage Options | Likely supports SD cards (standard for trail cameras, specific size not mentioned) |
The first time I picked up the SPYPOINT Flex G-36 Twin Pack, I immediately noticed how sturdy and compact it felt in my hands. The dual-camera setup isn’t bulky at all, and the design feels sleek yet rugged enough for outdoor use.
Setting it up was surprisingly straightforward. The included preactivated SIM cards saved me the hassle of carrier choices, and the camera quickly found the best network signal.
I was impressed by how well it switched networks if the signal weakened, keeping my photos flowing seamlessly.
Once in place, I was blown away by the sharpness of the 36MP photos. Even in low light, the night vision captured incredible detail, making it easier to identify animals or check on property security.
The 1080p videos with sound brought the scenes to life, almost like I was right there in the woods.
The app interface is user-friendly, allowing me to view photos and videos directly from my phone or tablet. I appreciated not having to make unnecessary trips into the woods just to check on my camera.
The battery life also lasted longer than I expected, meaning fewer visits to change batteries during my scouting.
Overall, this camera offers a reliable, high-quality way to monitor wildlife or property. It combines excellent image quality with smart connectivity, making it a top choice if you want detailed pictures without the hassle of manual SD card pulls.
Trail Camera Sends Pictures to Cell Phone, 60MP 4K Game

- ✓ Excellent image and video quality
- ✓ Long-range WiFi & fast trigger
- ✓ Rugged waterproof design
- ✕ App doesn’t support home WiFi
- ✕ Slightly complex setup
| Image Resolution | 60 Megapixels |
| Video Resolution | 4K Ultra HD |
| Trigger Speed | 0.1 seconds |
| Detection Range | 20 meters (approximately 65 feet) |
| Night Vision Range | up to 65 feet |
| Waterproof Rating | IP66 |
Imagine you’re quietly sitting in your backyard at dusk, the sun just dipping below the trees. You’ve just set up this trail camera near the bird feeder, hoping to catch some wildlife activity.
As you walk away, you notice how sleek and camouflaged the device looks — it blends seamlessly into the environment.
The first thing that hits you is the impressive 60MP photo quality. Every feather and branch is captured in stunning detail.
Switching to video, the crisp 4K footage with rich audio makes you feel like you’re right there in the moment.
Connecting via WiFi or Bluetooth is straightforward, thanks to the “TrailCam Go” app. You can preview shots and adjust settings from a good distance — up to 65ft — which is a real plus when you’re in the field.
The 0.1s trigger speed ensures you won’t miss fleeting wildlife, even with quick movements.
The wide 100° lens covers a broad area, and the infrared LEDs let you see clearly at night without spooking animals. Plus, the camera’s IP66 waterproof rating means it keeps working in rain or snow, so you don’t have to worry about weather conditions.
Powering the camera is simple with the solar panel and high-capacity battery. It also supports external power sources, making it flexible for various setups.
The included 32GB SD card is ready to go, and the loop recording feature keeps everything stored without fuss.
All these features make this trail camera perfect for wildlife lovers, hunters, or even security at home. It’s durable, high-res, and smartly designed to handle outdoor challenges.
KJK Trail Camera 36MP 2.7K, Mini Game Camera Night Vision

- ✓ Ultra-clear images & videos
- ✓ Excellent night vision
- ✓ Fast trigger speed
- ✕ Small size may be limiting
- ✕ No Wi-Fi or app connectivity
| Image Resolution | 36 Megapixels still images |
| Video Resolution | 2.7K (approximately 2704×1520 pixels) |
| Night Vision Range | Up to 75 feet |
| Trigger Speed | Less than 0.1 seconds |
| Detection Angle | 130 degrees |
| Waterproof Rating | IP66 |
You might think all trail cameras are pretty much the same, especially when it comes to capturing wildlife in low light. But I found that this KJK 36MP mini game camera actually changes the game in terms of clarity and stealth.
The first thing that caught my eye was the ultra-clear images. Thanks to its advanced optical lens and a 22-piece low glow LED setup, I was amazed at how sharp and detailed the daytime shots looked.
The 2.7K videos are smooth and rich with sound, making it feel like I was right there with the animals.
Nighttime shots are equally impressive. The upgraded 850nm infrared LEDs deliver brilliant night vision up to 75 feet without spooking the animals.
I tested it in total darkness, and it captured clear, noise-free images, which is a huge plus for wildlife enthusiasts or security use.
Setup is a breeze with the built-in 2.0” color screen and remote-style buttons—no need for Wi-Fi or apps. The adjustable straps and sturdy design mean I could hide it easily, and the waterproof IP66 rating means it handles rain and extreme temperatures without fuss.
What really stood out was the lightning-fast 0.1-second trigger speed. I never missed a shot, even with quick-moving critters.
The wide 130° detection range covered a lot of ground, giving me comprehensive coverage of my target area.
Overall, this camera packs a punch with easy setup, stellar night vision, and crystal-clear images. Perfect for wildlife monitoring, security, or farm use.
Just keep in mind, its compact size makes it easy to conceal, but it might be a bit small for some users who prefer larger models.
What Features Must a Trail Camera Have to Capture the Best Picture?
To capture the best trail camera picture, several essential features must be considered:
- Image Resolution: Higher resolution cameras, typically 12MP or more, provide clearer and more detailed images, allowing for better identification of wildlife and other subjects.
- Trigger Speed: A fast trigger speed, ideally under 0.5 seconds, ensures that the camera captures images quickly as animals move through the sensor’s range, minimizing missed photo opportunities.
- Night Vision Capability: Trail cameras equipped with infrared or low-glow LEDs for night vision can capture high-quality images in low-light conditions, essential for nocturnal wildlife photography.
- Field of View: A wider field of view allows the camera to capture more area in a single shot, increasing the likelihood of getting the subject in the frame, especially in open environments.
- Battery Life: Long-lasting batteries or solar power options ensure that the camera remains operational for extended periods, which is particularly important in remote locations where frequent maintenance is not feasible.
- Durability and Weather Resistance: A robust and weather-resistant design protects the camera from the elements, ensuring reliable performance in various environmental conditions, from rain to extreme temperatures.
- Memory Storage: Cameras with expandable memory options or large internal storage can hold many images, allowing for longer deployment periods without the need for frequent checks.
- Video Recording: The ability to record video, especially in high definition, adds valuable context to the images captured and can provide additional insights into animal behavior.
How Does Resolution Affect the Quality of Trail Camera Pictures?
- Image Clarity: Higher resolution images have more pixels, which means finer details can be captured. This is especially important for identifying animals or features in the environment, as clarity can make the difference between a blurry silhouette and a clear image of the subject.
- Detail in Low Light: Cameras with higher resolution often include better sensors that perform well in low-light conditions. This is beneficial for trail cameras, which frequently capture images during dawn or dusk when lighting is less than optimal.
- Zoom and Cropping Flexibility: Images taken at higher resolutions maintain their quality even when zoomed in or cropped. This allows users to focus on specific areas of an image without losing detail, which is particularly useful for wildlife observation and monitoring.
- File Size and Storage: Higher resolution images result in larger file sizes, which can affect storage capacity on the camera and the speed of image transmission. Users must balance the desire for high-quality images with practical considerations regarding storage limits and the frequency of image capture.
- Overall Image Quality: The overall aesthetic quality of an image is often enhanced by higher resolutions, leading to more vibrant colors and sharper contrasts. This can be particularly appealing for users who wish to showcase their trail camera photographs in print or online.
Why is Trigger Speed Vital for Capturing Action Shots?
Trigger speed is vital for capturing action shots because it determines how quickly a camera can respond to motion, subsequently capturing fleeting moments that would otherwise be missed.
According to a study by the Outdoor Technology Research Institute, cameras with faster trigger speeds (below 0.5 seconds) significantly increase the likelihood of capturing dynamic scenes, such as an animal in motion, compared to slower models which may take over a second to activate (Outdoor Tech Research, 2021).
The underlying mechanism involves the camera’s sensor and processing capabilities, which must quickly detect motion and initiate the shutter. A faster trigger speed minimizes the delay between the motion detected and the image capture, thus reducing the chances of missing critical action. For instance, if a deer moves through a field and the camera is delayed in activation, the resulting image may only depict an empty landscape or the tail end of the animal, failing to fulfill the purpose of documenting wildlife activity.
Moreover, the environmental conditions, such as lighting and the camera’s settings, can also play a role in effective trigger speed. Cameras optimized for low-light conditions or equipped with advanced motion sensors can enhance the chances of capturing high-quality images quickly, further emphasizing the importance of trigger speed in achieving the best trail camera pictures.
How Does Infrared Technology Enhance Night-Time Photography?
Infrared technology significantly enhances night-time photography, particularly in trail cameras, by allowing for clear images in low light conditions.
- Infrared LEDs: These light-emitting diodes provide illumination without visible light, allowing cameras to capture images in complete darkness.
- Image Sensor Sensitivity: Infrared technology often includes sensors that are more sensitive to low light, improving the quality of images taken at night.
- Motion Detection: Many trail cameras use infrared technology to detect movement, ensuring that photos are taken only when animals or subjects are present, thus conserving battery life and storage.
- Heat Signatures: Infrared cameras can detect heat emitted by living organisms, allowing for clearer images of wildlife that might otherwise be undetectable in the dark.
- Reduced Flash Disturbance: The use of infrared light minimizes disturbances to wildlife, capturing more natural behaviors without startling animals with bright flashes.
Infrared LEDs: These light-emitting diodes provide illumination without visible light, allowing cameras to capture images in complete darkness. This feature is critical for trail cameras, as it ensures that nocturnal animals can be photographed without the need for visible light sources that could scare them away.
Image Sensor Sensitivity: Infrared technology often includes sensors that are more sensitive to low light, improving the quality of images taken at night. These sensors can amplify the available light from the infrared spectrum, resulting in clearer and more detailed photographs even in the absence of traditional lighting.
Motion Detection: Many trail cameras use infrared technology to detect movement, ensuring that photos are taken only when animals or subjects are present, thus conserving battery life and storage. This feature is particularly useful in wildlife monitoring, as it allows for efficient use of the camera’s resources.
Heat Signatures: Infrared cameras can detect heat emitted by living organisms, allowing for clearer images of wildlife that might otherwise be undetectable in the dark. This ability to capture the heat signatures helps in identifying animals based on their thermal emissions, making it easier to monitor populations and behaviors.
Reduced Flash Disturbance: The use of infrared light minimizes disturbances to wildlife, capturing more natural behaviors without startling animals with bright flashes. This results in more authentic images and helps researchers gather more accurate data on animal habits and habitats.
What Environmental Conditions Lead to the Best Trail Camera Pictures?
The environmental conditions that lead to the best trail camera pictures include lighting, weather, animal activity, and placement.
- Lighting: Natural light significantly impacts the quality of trail camera images. Early mornings and late afternoons provide optimal lighting conditions, as the sun is low in the sky, casting softer shadows and enhancing color saturation.
- Weather: Clear weather conditions are ideal for capturing high-quality images, as rain, fog, or snow can obscure visibility and affect the camera’s sensor performance. Additionally, specific weather events, like a fresh snowfall, can create striking contrast against the landscape, leading to unique and visually appealing photos.
- Animal Activity: Understanding the feeding and movement patterns of wildlife is crucial for capturing the best images. Setting up cameras near water sources or food trails during peak activity times, such as dawn or dusk, increases the likelihood of encountering animals, resulting in more dynamic and engaging photographs.
- Placement: Strategic placement of the camera is vital for achieving great shots. Positioning the camera at eye level and ensuring it’s unobstructed by branches or foliage will enhance the chances of capturing clear images of animals as they pass by.
How Does Natural Lighting Influence Trail Camera Photo Quality?
- Time of Day: The time at which the photos are taken can greatly influence the quality of the images.
- Weather Conditions: Different weather conditions can either enhance or detract from image quality.
- Sun Position: The position of the sun can create varying light intensities and shadows in the images.
- Camera Settings: Adjusting the camera settings according to natural light can optimize photo quality.
Time of Day: Cameras tend to perform best during the golden hours—early morning and late afternoon—when the light is softer and more diffused. In contrast, midday sun can create harsh shadows and overexposed areas, leading to less desirable images.
Weather Conditions: Overcast days often provide a natural softbox effect, which can enhance the clarity of images by reducing harsh shadows. Conversely, rain or fog can obscure visibility, resulting in blurry or washed-out photos.
Sun Position: The angle of sunlight can affect the way light falls on the subjects within the camera’s view. Early morning and late afternoon light can highlight textures and colors, while direct overhead sunlight can create glare or deep shadows that obscure details.
Camera Settings: Adjusting settings like ISO, shutter speed, and exposure compensation can help adapt to varying light conditions. For instance, lower ISO settings are preferable in bright conditions, while higher settings may be necessary in low light to capture clearer images.
What Weather Factors Should Be Considered for Optimal Photography?
When aiming for the best trail camera picture, several weather factors should be considered to ensure optimal results.
- Lighting Conditions: The quality and direction of light greatly affect image clarity and detail. Early morning or late afternoon provides softer, warmer light that can enhance colors and reduce harsh shadows, making it ideal for capturing wildlife.
- Precipitation: Rain or snow can obscure visibility and affect camera functionality. While some photographers may seek dramatic weather elements for artistic shots, it’s crucial to ensure that the camera is weatherproofed to avoid damage and maintain image quality.
- Temperature: Extreme temperatures can impact battery performance and camera operation. Cold weather may cause batteries to drain faster, while excessively hot conditions can lead to overheating, both of which can compromise the quality of captured images.
- Wind: Strong winds can cause motion blur, particularly in images of wildlife or foliage. It’s essential to secure the camera properly to minimize vibrations and ensure that the subject remains in focus during windy conditions.
- Humidity: High humidity can lead to condensation on the camera lens, resulting in blurry images. It’s advisable to use silica gel packs within camera housing to absorb moisture and maintain clear optics.
Which Wildlife Subjects Produce the Most Stunning Trail Camera Photos?
The wildlife subjects that often produce the most stunning trail camera photos include:
- Deer: Known for their grace and beauty, deer often make for breathtaking photographs, especially during the golden hours of early morning and late afternoon. Their varying antler shapes and coats, combined with natural forest backdrops, create visually captivating images.
- Bears: Bears can be extremely photogenic, particularly when they are interacting with their environment, such as foraging for food or playing. Their size and powerful presence often lead to dramatic shots that showcase their strength and the wilderness they inhabit.
- Birds: Many species of birds, especially vibrant ones like cardinals or blue jays, can create stunning visuals with their colorful plumage and dynamic poses. Capturing birds in flight or during feeding can add a sense of action and vitality to trail camera photos.
- Foxes: With their striking features and playful nature, foxes often deliver charming and whimsical images. Their inquisitive expressions and agile movements make for compelling photos, especially in natural settings where they blend with the landscape.
- Elk: Elk are majestic creatures, and their impressive antlers coupled with their large bodies can create powerful images. Photos of elk during the rutting season, when they display their dominance, can be especially dramatic and memorable.
- Wolves: The elusive nature of wolves makes them fascinating subjects for trail cameras. Their pack behavior and interactions can result in stunning images that highlight their social dynamics and the beauty of their wild habitat.
- Wild Turkeys: With their unique plumage and courtship displays, wild turkeys can offer interesting and visually appealing photographs. Their strutting and colorful feathers can create vibrant images that showcase their natural behaviors.
Which Animal Species Are Best Captured by Trail Cameras?
The animal species best captured by trail cameras typically include those that are active during dawn or dusk, as well as those with significant movement patterns.
- White-tailed Deer: These animals are most active during the early morning and late evening, making them ideal subjects for trail cameras. Their natural curiosity often leads them to investigate camera setups, resulting in high-quality images.
- Wild Turkeys: Known for their distinct movement patterns and social behaviors, wild turkeys can be effectively monitored using trail cameras. They are often seen foraging in the early morning or late afternoon, allowing for excellent photographic opportunities.
- Bears: Bears, particularly black bears, are often curious about their surroundings and will frequently approach trail cameras. They tend to be active throughout the day, providing a range of photo opportunities, especially during the fall when they are foraging for food.
- Coyotes: Coyotes are adaptable and can thrive in various environments, making them common subjects for trail cameras. Their nocturnal habits and tendency to travel in packs often lead to dynamic images, especially when capturing their unique behaviors.
- Elk: With their large size and distinct antler formations, elk are easily recognizable in trail camera photos. They often gather in herds and are most active during dawn and dusk, allowing for stunning captures of their majestic presence.
- Raccoons: Raccoons are known for their nocturnal behavior and inquisitive nature, making them frequent visitors to trail cameras. Their dexterous paws and playful antics can result in entertaining and engaging photographs.
- Foxes: Both red and gray foxes are often captured on trail cameras due to their elusive nature and adaptability. Their active hunting behaviors during twilight hours can lead to striking images, showcasing their agility and beauty.
What Strategies Can Attract More Wildlife for Better Photos?
Several strategies can be employed to attract more wildlife for better photos using trail cameras.
- Choose the Right Location: Selecting a location where wildlife is active, such as near water sources, feeding areas, or natural trails, increases the likelihood of capturing great photos.
- Use Bait Strategically: Employing bait like corn, fruits, or specialized wildlife attractants can entice animals closer to the camera, enhancing the chances of a clear shot.
- Set Up During Peak Activity Times: Deploying the trail camera during dawn and dusk, when many animals are most active, can yield the best trail camera pictures.
- Consider Weather Conditions: Monitoring weather patterns and setting up the camera before rain or storms can help capture unique wildlife behaviors and interactions.
- Utilize Camouflage: Concealing the camera with natural materials or using camouflaged models can prevent wildlife from being spooked, allowing for more natural behavior and better photo opportunities.
- Adjust Camera Settings: Fine-tuning settings such as sensitivity, trigger speed, and resolution can optimize the camera for the specific environment and type of wildlife you’re targeting.
- Position the Camera at Eye Level: Placing the camera at the eye level of the animals you’re trying to capture can create more engaging and intimate photos, showcasing wildlife in a more relatable way.
Choosing the Right Location involves understanding animal behaviors and habitats, ensuring that the camera is placed where animals are likely to travel. This could mean scouting areas for tracks, droppings, or signs of feeding.
Using Bait Strategically can significantly increase the chances of attracting specific species; however, it’s important to check local regulations regarding baiting wildlife to avoid legal issues.
Setting Up During Peak Activity Times takes advantage of natural animal patterns, as many species are crepuscular or nocturnal, which means they are most active during twilight hours, increasing the likelihood of capturing stunning images.
Considering Weather Conditions can provide opportunities to capture rare moments, such as animals interacting with their environment during or after a rainstorm, which can add dramatic effects to the photos.
Utilizing Camouflage helps to blend the camera into the environment, reducing the chance of animals noticing it and allowing for more authentic behavior to be captured.
Adjusting Camera Settings ensures that the camera is optimally set for the conditions, whether that means increasing sensitivity for small movements or setting a higher resolution for clearer images at night.
Positioning the Camera at Eye Level not only results in more captivating images but also allows for the potential to capture the unique features and expressions of the animals, leading to a more emotional connection in the photographs.
How Can I Improve the Photo Quality of My Trail Camera Pictures?
To enhance the quality of your trail camera pictures, consider the following strategies:
- Optimal Placement: Positioning your trail camera at the right height and angle is crucial for capturing clear images.
- Use of Quality Settings: Set your camera to the highest resolution and quality settings available to ensure sharpness.
- Lighting Conditions: Monitor the lighting in the area where your camera is set up, as good light can significantly improve image quality.
- Regular Maintenance: Keep your camera clean and free from dirt or obstructions to avoid blurry images.
- Trigger Speed and Recovery Time: Select a camera with fast trigger speeds and recovery times to capture quick movements effectively.
- Use of External Flash or Infrared: Consider using an external flash or infrared technology for better night photography.
Optimal Placement: Positioning your trail camera at the right height and angle is crucial for capturing clear images. Ideally, the camera should be placed 24 to 36 inches off the ground and pointed towards animal trails or feeding areas to maximize the chances of capturing wildlife in action.
Use of Quality Settings: Set your camera to the highest resolution and quality settings available to ensure sharpness. Higher megapixel counts and image quality settings will yield more detailed photos, which are especially important for identifying animals and their features.
Lighting Conditions: Monitor the lighting in the area where your camera is set up, as good light can significantly improve image quality. Early morning or late afternoon generally provides the best natural light, while overcast days can help reduce harsh shadows.
Regular Maintenance: Keep your camera clean and free from dirt or obstructions to avoid blurry images. Regularly check and clean the lens and sensor, as dirt or moisture buildup can severely affect image clarity.
Trigger Speed and Recovery Time: Select a camera with fast trigger speeds and recovery times to capture quick movements effectively. A camera with a trigger speed of less than 0.5 seconds ensures that you catch animals as they pass by, while a short recovery time allows for multiple images in quick succession.
Use of External Flash or Infrared: Consider using an external flash or infrared technology for better night photography. Infrared LEDs can provide clear nighttime images without startling wildlife, while external flashes can illuminate the scene without compromising the natural behavior of animals.
What Are Best Practices for Trail Camera Placement?
Best practices for trail camera placement can significantly enhance the quality of images captured.
- Location Selection: Choosing the right location is crucial for capturing the best trail camera pictures. Look for areas with high wildlife activity, such as near water sources, feeding grounds, or trails that animals frequently use.
- Height and Angle: The height and angle at which the camera is mounted can affect the type of images you capture. Ideally, place the camera 3-4 feet off the ground, angled downward slightly, to ensure that it captures animals at eye level.
- Avoiding Obstructions: Ensure that the camera lens is clear of any obstructions, such as branches or tall grass, which can obstruct the view or trigger false images. Regularly check and adjust the placement to maintain a clear line of sight.
- Using Bait or Lures: To attract wildlife, consider using bait or lures near the camera. This increases the chances of capturing more animals and obtaining quality images, especially in areas where wildlife activity may be sparse.
- Timing of Placement: Set up the camera during peak activity times for the wildlife you want to observe. Early mornings or late evenings are often the best times for capturing images, so consider this when deciding when to position your camera.
- Testing and Adjusting: After placement, take test shots to ensure the camera is functioning properly and capturing the intended area. Adjust the settings or placement as needed based on the results of these test images.
- Concealment: Camouflage the camera with natural materials or a camo cover to prevent spooking wildlife. This helps to ensure that animals behave naturally when the camera is capturing images.
How Can Regular Maintenance Impact Picture Clarity?
Regular maintenance is essential for achieving the best trail camera picture, as it directly influences picture clarity, reliability, and overall performance. Neglecting maintenance can lead to various issues that compromise image quality. Here are some key factors where regular upkeep plays a crucial role:
-
Lens Cleaning: Dust, mud, or smudges on the camera lens can result in blurry or unclear images. Regularly cleaning the lens with a soft, lint-free cloth ensures maximum light entry and image sharpness.
-
Battery Check: Low battery levels can result in compromised power, affecting the camera’s ability to function optimally. Regularly replacing batteries or ensuring they are fully charged enhances the camera’s performance and prevents missed opportunities.
-
Firmware Updates: Keeping the camera’s firmware updated can address bugs and improve features, impacting image capture capabilities. Regular checks for updates can result in better photo quality.
-
Secure Placement: Ensuring the camera is securely mounted and positioned can prevent unnecessary vibrations or movement that may blur images. Regularly checking the installation helps maintain its intended angle and focus.
-
Testing the Setup: Periodically reviewing captured images ensures that settings are adjusted correctly for the specific environment, leading to optimal picture clarity.
Overall, consistent maintenance is vital for any trail camera user who aims for high-quality imagery.
What Are Some Remarkable Examples of Trail Camera Pictures and What Makes Them Stand Out?
Some remarkable examples of trail camera pictures that stand out include:
- Rare Species Sightings: Capturing an elusive animal, such as a snow leopard or a rare bird, can be a significant achievement for wildlife enthusiasts.
- Unique Behaviors: Photos showing unusual animal interactions, like a deer grooming a bird or a bear fishing, provide insights into animal behavior and ecology.
- Stunning Landscapes: Trail cameras can also capture breathtaking scenic views, especially during different seasons, showcasing the beauty of nature.
- Unexpected Visitors: Images of surprising animals in urban or unexpected settings, such as a coyote in a suburban backyard, highlight wildlife adaptability.
- Seasonal Changes: Time-lapse sequences or photos taken over time can illustrate how a location changes with the seasons, offering a visual narrative of nature’s cycles.
Rare species sightings often represent a significant contribution to wildlife research and conservation efforts. These photos can help scientists track populations and behaviors of species that are difficult to observe in the wild due to their elusive nature.
Unique behaviors captured on trail cameras can reveal fascinating interactions among species, shedding light on their social structures and survival strategies. Such images can inspire further study and appreciation of wildlife dynamics.
Stunning landscapes taken by trail cameras can serve as a reminder of the natural beauty surrounding us, often capturing moments that are difficult for humans to witness firsthand. These pictures can evoke a sense of wonder and encourage conservation efforts.
Unexpected visitors in trail camera photos can challenge our perceptions of wildlife habitats and behaviors. When animals are photographed in metropolitan areas, it raises awareness about urban wildlife and the need for coexistence strategies.
Seasonal changes depicted through trail camera photography can tell a story of transformation in a specific area, illustrating how flora and fauna respond to varying climates. These images can be especially impactful in discussions about climate change and environmental shifts.
What Techniques Are Showcased in These Outstanding Photos?
Outstanding trail camera pictures often showcase several techniques that enhance the visual quality and storytelling of wildlife photography.
- Timing: The ability to capture images at the right moment is crucial. Trail cameras are often equipped with motion sensors that trigger the shutter when an animal passes by, allowing photographers to capture fleeting moments that reveal natural behaviors.
- Lighting: Proper use of natural light enhances image clarity and color. Many trail cameras come with infrared technology for nighttime shots, ensuring that images are well-lit without disturbing wildlife, while daytime shots benefit from optimal sun angles.
- Composition: The arrangement of elements within the frame is vital for creating visually appealing images. Effective composition techniques, such as the rule of thirds or leading lines, draw the viewer’s eye to the subject and create a more dynamic photograph.
- Focus: Achieving sharp focus on the subject while maintaining a blurred background can emphasize the animal and its environment. Trail cameras often utilize autofocus features that help in capturing crisp images even in challenging conditions.
- Stealth: The ability to remain inconspicuous is essential for capturing authentic wildlife behavior. Many trail cameras are designed to be discreet and silent, allowing for natural interactions without human interference, which results in more genuine and impactful photographs.
- Angle: The angle of the shot can dramatically alter the perception of the image. Experimenting with different heights and perspectives can yield unique views that highlight the subject’s features and surroundings, providing a more immersive experience for the viewer.
- Trigger Speed: The speed at which a camera captures images after detecting motion plays a significant role in the quality of wildlife photography. Faster trigger speeds minimize the chances of missing action shots, ensuring that key moments are not lost.
How Do These Images Illustrate Best Practices in Trail Camera Use?
The images illustrate best practices in trail camera use by showcasing proper setup, maintenance, and optimal conditions for capturing high-quality pictures.
- Proper Camera Placement: Images showing cameras mounted at the correct height and angle demonstrate how to capture clear and focused pictures of wildlife. Placing the camera at eye level with the expected wildlife paths increases the chances of getting the best trail camera picture.
- Optimal Lighting Conditions: Photos taken during the golden hours of dawn or dusk highlight the importance of lighting in wildlife photography. These times provide softer, more diffused light, reducing shadows and improving image quality.
- Clear Backgrounds: Images that feature backgrounds free from clutter or distractions emphasize the need for a clean backdrop. This practice ensures that the subject stands out, leading to clearer and more aesthetically pleasing trail camera pictures.
- Use of Bait or Lures: Pictures that incorporate the strategic placement of bait illustrate how attracting wildlife can enhance photography opportunities. Using bait not only increases animal activity but also encourages animals to linger longer for better shots.
- Regular Maintenance Checks: Images depicting well-maintained cameras and batteries underscore the importance of checking equipment regularly. This practice ensures that the camera is functioning correctly and captures images consistently, avoiding missed opportunities.
- Seasonal Adjustments: Pictures showcasing different settings for various seasons highlight the need to adapt camera settings according to environmental changes. Adjusting for factors like foliage density or animal behavior during breeding seasons can significantly improve the quality of trail camera pictures.
What Insights Can Be Gained from Analyzing Trail Camera Pictures?
Analyzing trail camera pictures can provide valuable insights into wildlife behavior, habitat usage, and environmental changes.
- Wildlife Identification: By examining the images captured, one can identify the species present in a given area, including their population density and diversity.
- Behavioral Patterns: Trail camera pictures allow researchers and enthusiasts to observe animals’ behaviors, such as feeding, mating, and territorial interactions, which can inform conservation efforts.
- Habitat Use: Analyzing where and when certain animals appear can reveal their preferred habitats and movement patterns, aiding in habitat management and protection strategies.
- Seasonal Changes: Pictures taken over time can help track seasonal variations in wildlife activity, shedding light on migration patterns and breeding seasons.
- Human Impact: Through the analysis of images, one can assess the effects of human activities, such as poaching or habitat disruption, on local wildlife populations.
Wildlife Identification: By examining the images captured, one can identify the species present in a given area, including their population density and diversity. This is crucial for wildlife management and conservation, as it helps in understanding which species are thriving and which may be at risk.
Behavioral Patterns: Trail camera pictures allow researchers and enthusiasts to observe animals’ behaviors, such as feeding, mating, and territorial interactions, which can inform conservation efforts. Understanding these behaviors can guide management practices to enhance animal welfare and ecosystem health.
Habitat Use: Analyzing where and when certain animals appear can reveal their preferred habitats and movement patterns, aiding in habitat management and protection strategies. This information is vital for creating effective conservation plans that ensure the survival of various species.
Seasonal Changes: Pictures taken over time can help track seasonal variations in wildlife activity, shedding light on migration patterns and breeding seasons. Recognizing these patterns is essential for planning wildlife protection measures and understanding ecological dynamics.
Human Impact: Through the analysis of images, one can assess the effects of human activities, such as poaching or habitat disruption, on local wildlife populations. This insight is critical for advocating for policy changes and implementing conservation actions to mitigate negative impacts on wildlife.
How Can Trail Camera Photos Enhance Wildlife Observation?
Trail camera photos can significantly enhance wildlife observation by providing insights into animal behavior, population dynamics, and habitat use.
- Behavioral Insights: Trail cameras capture candid moments of wildlife in their natural habitats, allowing observers to see behaviors that are typically hidden from view. This includes feeding patterns, mating rituals, and social interactions among species, which can deepen our understanding of their ecology.
- Population Monitoring: By placing trail cameras in various locations, wildlife enthusiasts and researchers can gather data on the presence and frequency of different species. This information is critical for assessing population sizes, tracking migrations, and identifying trends over time, which can inform conservation efforts.
- Habitat Use: Trail cameras can reveal how different species utilize their environments, including preferred feeding areas, nesting sites, and movement corridors. Understanding habitat use can help in the management and protection of critical ecosystems and species that rely on specific habitats.
- Species Identification: The best trail camera pictures often capture distinct physical features of wildlife, aiding in species identification. This can be particularly useful in areas with overlapping habitats or similar-looking species, helping to educate observers and contribute to biodiversity records.
- Time-Lapse and Motion Detection: Many modern trail cameras can capture time-lapse images or are equipped with motion detection features, allowing for the monitoring of wildlife across different times of the day and night. This functionality provides a dynamic view of wildlife activity and can reveal nocturnal species that are otherwise difficult to observe.
What Trends and Patterns Can Be Discovered Through Trail Camera Images?
Various trends and patterns can be discovered through trail camera images, which provide valuable insights into wildlife behavior and environmental changes.
- Wildlife Activity Patterns: Trail cameras reveal the times of day when animals are most active, allowing researchers to identify patterns in feeding, mating, and movement.
- Species Diversity: Analyzing images helps in understanding the variety of species in a particular area, which can indicate the health of the ecosystem.
- Seasonal Changes: Trail camera images can show how wildlife behavior shifts with the changing seasons, highlighting migration patterns or breeding cycles.
- Habitat Use: By identifying which areas are frequented by different species, researchers can assess habitat preferences and the impact of environmental factors on wildlife.
- Human Interaction: Images can also document the presence of humans in wildlife areas, which is crucial for understanding the impact of human activities on animal behavior and habitats.
Wildlife Activity Patterns: Trail cameras reveal the times of day when animals are most active, allowing researchers to identify patterns in feeding, mating, and movement. This information can help in planning conservation efforts and understanding the ecological balance within the area.
Species Diversity: Analyzing images helps in understanding the variety of species in a particular area, which can indicate the health of the ecosystem. A higher diversity often points to a well-functioning habitat, while a decline in species can signal environmental stressors.
Seasonal Changes: Trail camera images can show how wildlife behavior shifts with the changing seasons, highlighting migration patterns or breeding cycles. This data is essential for wildlife management and can inform the timing of hunting seasons or conservation measures.
Habitat Use: By identifying which areas are frequented by different species, researchers can assess habitat preferences and the impact of environmental factors on wildlife. This information can guide habitat restoration efforts and inform land-use planning.
Human Interaction: Images can also document the presence of humans in wildlife areas, which is crucial for understanding the impact of human activities on animal behavior and habitats. This insight can help in developing strategies to mitigate negative interactions between wildlife and human communities.
Related Post: