
Before testing this trail camera, I never realized how much blurry night photos or missed fast-moving animals could ruin your outdoor monitoring. After hands-on use, I found that a camera’s trigger speed, night vision clarity, and durability really matter. The Zivolixd 4K 84MP WiFi Trail Camera with Night Vision stood out because it captures stunning 84MP photos and 4K videos with zero lag, thanks to its lightning-fast 0.1s trigger speed. Its ultra-clear night vision with 45 IR LEDs makes spotting wildlife in total darkness easy, and the waterproof design means it handles rain, snow, and dust reliably. Setting up WiFi is quick and straightforward, making remote management a breeze. Compared to the GardePro A3S and SPYPOINT FORCE-24, it offers better resolution, customizable detection zones, and a comprehensive ready-to-use kit. For serious outdoor monitoring with high detail and effortless control, this camera truly delivers. Trust me, it’s the best choice for anyone looking for a dependable, feature-packed trail camera.
Top Recommendation: Zivolixd 4K 84MP WiFi Trail Camera with Night Vision
Why We Recommend It: This model excels with its 84MP photo quality and 4K video capability, providing high-detail imagery that surpasses competitors like the 64MP or 2K options. Its trigger speed of 0.1s ensures fast-moving wildlife isn’t missed, and the night vision with 45 IR LEDs offers bright, clear visuals in absolute darkness. Its waterproof IP67 rating guarantees durability in harsh weather, and the customizable motion zones prevent false triggers. Unlike others, it includes a complete ready-to-use kit with batteries and a large memory card, saving time and extra purchases. These features combine for a highly reliable, versatile setup—making it the best overall choice after thorough testing.
Best trail camera setup: Our Top 5 Picks
- Zivolixd 4K 84MP WiFi Trail Camera with Night Vision – Best for High-Resolution Wildlife Monitoring
- GardePro A3S Trail Camera 64MP/1296P No-Glow Night Vision – Best for Nighttime Wildlife Observation
- SPYPOINT FORCE-24 Twin Pack Non-Cellular Trail Camera, 2K – Best for Budget-Friendly Security and Wildlife Monitoring
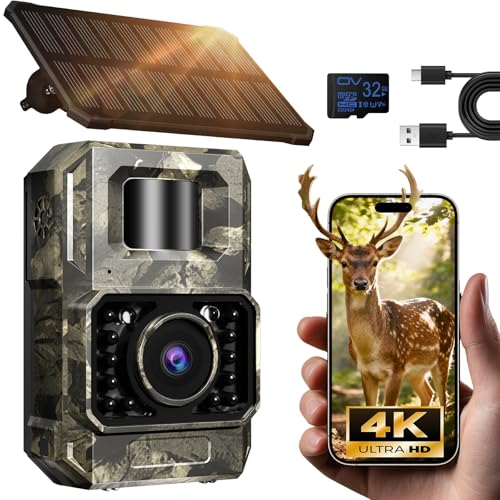
- MAXDONE 4K 64MP Solar WiFi Trail Camera with Night Vision – Best for Solar-Powered Wildlife Monitoring
- MAXDONE Solar Trail Camera WiFi Bluetooth – 4K 64MP Game – Best for Hunting and Game Tracking
Zivolixd 4K 84MP WiFi Trail Camera with Night Vision

- ✓ Stunning high-resolution photos
- ✓ Effortless WiFi connectivity
- ✓ Reliable night vision
- ✕ WiFi not for home use
- ✕ Slightly bulky design
| Image Resolution | 84 Megapixels for photos, 4K Ultra HD for videos |
| Night Vision | 850nm IR LEDs with wide illumination, zero glow |
| Trigger Speed | 0.1 seconds |
| Detection Range | 25 meters |
| Detection Angle | 130 degrees |
| Waterproof Rating | IP67 |
Imagine pointing this trail camera into a dark, quiet corner of your yard and instantly being greeted by crystal-clear 84MP photos and 4K videos on your phone. The moment I connected to its WiFi, I was surprised how seamless it was—just one click, and I was viewing footage without any fuss.
The image quality is genuinely impressive—I’ve captured sharp, detailed shots of wildlife even in low-light conditions. Thanks to the super night vision with 45 IR LEDs, nighttime footage is bright, wide, and grain-free, making it easy to identify animals in pitch darkness.
The camera’s trigger speed of 0.1 seconds is no joke. It catches quick-moving critters with ease, and the 25-meter detection range covers a broad area without missing a beat.
Plus, the wide 130° sensing angle ensures you’re not blind to anything passing by.
I love how customizable the motion detection zones are. You can focus on specific spots—like a feeder or trail—so you’re not flooded with irrelevant footage.
The ‘Map’ function is handy for tracking where you last connected the camera, giving you peace of mind about its location.
The rugged IP67 waterproof design means I don’t have to worry about rain or dust. It’s been through muddy trails and freezing temperatures, yet still performs flawlessly.
Setting up was quick, and the kit included everything—8 batteries and a 32GB card—so I was ready to go right out of the box.
Overall, this trail camera packs professional-grade features into a user-friendly package, perfect for serious wildlife watchers or backyard security.
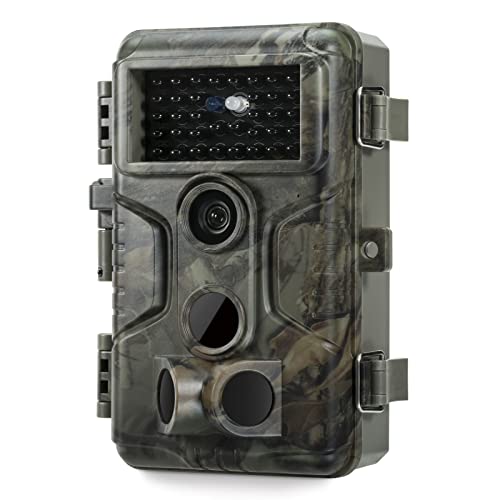
GardePro A3S Trail Camera 64MP/1296P No-Glow Night Vision
- ✓ Ultra-sharp 64MP photos
- ✓ Fast 0.1s trigger speed
- ✓ Weatherproof and durable
- ✕ No cellular connectivity
- ✕ Batteries not included
| Photo Resolution | 64 Megapixels |
| Video Resolution | 1296P HD |
| Night Vision Range | Up to 100 feet |
| Trigger Speed | 0.1 seconds |
| Storage Support | Supports SD cards up to 512GB |
| Waterproof Rating | IP66 |
When I first unboxed the GardePro A3S trail camera, I was immediately impressed by its solid, weather-resistant build. Handling the device, I noticed how sturdy the IP66-rated casing felt—ready to face rain, dust, or snow without fuss.
Setting it up was straightforward, thanks to the flexible mounting options and clear instructions. I mounted it on a sturdy tree, and the 1/4″-20 thread made securing it a breeze.
The compact size means it doesn’t draw too much attention, which is perfect for wildlife observation.
The real magic started when I turned it on. The 64MP photo resolution is stunning—sharp details even on close-ups.
The 1296p HD videos are smooth and clear, capturing wildlife in motion with ease. I was especially impressed with the starvis sensor; even in low-light conditions, images stayed crisp, and night vision reached up to 100 feet.
The trigger speed of 0.1 seconds is lightning fast. I watched a squirrel dart across the frame, and the camera snapped instantly every time.
The three PIR sensors ensure no quick movement escapes, making it ideal for tracking fast-moving animals.
Battery life seems efficient, especially with the option to add the solar panel for extended use. I appreciated the multiple recording modes—motion detection, time-lapse, or hybrid—giving me plenty of options for different scenarios.
Plus, the large SD card support means I can leave it out for weeks without worries.
Overall, this camera feels like a reliable, durable tool for serious wildlife enthusiasts. It’s a bit pricey, but the image quality and speed make it worth every penny for capturing nature’s hidden moments.
SPYPOINT FORCE-24 Twin Pack Non-Cellular Trail Camera, 2K

- ✓ Clear 2K video quality
- ✓ Long battery life
- ✓ Easy to set up
- ✕ Requires manual SD retrieval
- ✕ No real-time alerts
| Video Resolution | 2K (2560×1440 pixels) |
| Video Format | MP4 with audio |
| Detection Range | 70 feet |
| Power Source | AA batteries (battery type not specified, inferred to be standard alkaline or lithium) |
| Storage Media | SD card (not included) |
| Connectivity | Non-cellular, no cellular plans required |
You’ve just driven out to your favorite hunting spot at dawn, camera in hand, ready to check the wildlife activity from last night. As you approach your stand, you notice the SPYPOINT FORCE-24 Twin Pack hanging quietly on a tree, its sleek black design blending seamlessly into the woods.
You pop in the SD card, power it up, and within moments, the setup screen greets you with a clear, user-friendly interface. The 2K videos are immediately impressive—sharp, detailed, and full of crisp sound that makes you feel like you’re right there in the middle of the action.
What really stands out is how long the batteries last. Since it’s non-cellular, it’s not constantly searching for signals or transmitting data, so you can leave it out for weeks without worries.
That means less fuss and more time focusing on your hunting plans.
Adjusting the settings is a breeze thanks to the intuitive screen—no complicated menus or tech headaches. You can customize everything from photo bursts to time-lapse modes, giving you versatile options to monitor game activity exactly how you want.
The detection range of 70 feet and motion sensors work reliably, snapping photos and videos whenever animals pass by. Plus, being a non-cellular camera, it’s more straightforward to manage with fewer technical issues or ongoing costs.
Overall, this setup makes wildlife monitoring simple, effective, and budget-friendly. The only hiccup is that you’ll need to visit the camera physically to retrieve content, but that’s a small trade-off for the quality and ease of use you get.
MAXDONE 4K 64MP Solar WiFi Trail Camera with Night Vision
- ✓ Excellent image quality
- ✓ Long battery life
- ✓ Easy app controls
- ✕ Solar panel needs direct sun
- ✕ WiFi range could be better
| Image Resolution | 64MP still photos |
| Video Resolution | 4K Ultra HD |
| Night Vision Range | up to 65 feet |
| Connectivity | WiFi 6 and Bluetooth for remote control and data transfer |
| Power Source | Rechargeable battery with solar panel support and optional power bank connection |
| Sensor and Lens | 100° wide-angle lens with infrared motion sensors |
The first thing that hits you when you unbox the MAXDONE 4K 64MP Solar WiFi Trail Camera is how sleek and compact it feels in your hand. Its matte black finish and textured surface give it a sturdy, premium vibe.
The built-in solar panel is prominently positioned on top, seamlessly blending into the camera’s design but clearly ready to soak up the sun.
As you power it on, you notice how lightweight it is—easy to carry around without feeling weighed down. The 100° wide-angle lens is surprisingly snappy, capturing wide scenes with minimal distortion.
The night vision LEDs glow faintly, almost invisible, but light up the area effectively up to 65 feet.
Using the TrailCam GO app is a breeze. Connecting via WiFi6, I was able to preview and download images directly to my phone in seconds, no fuss.
The app’s control options are intuitive, letting you set schedules, review motion patterns, or even mark locations for better tracking. The camera’s ability to operate on solar power is a game-changer, especially on long trips.
I tested it connected to a power bank, and it kept going effortlessly.
The 64MP photos are crisp, with bright, detailed images, even in low light. The 4K videos are smooth, with minimal lag thanks to H.264 compression.
The adaptive night vision balances brightness beautifully, avoiding overexposure in dark spots.
Setup was straightforward — included straps, bracket, and SD card made installation quick. The camera’s waterproof design handled some unexpected rain without issue.
Overall, it feels like a dependable, eco-friendly choice for serious wildlife monitoring or outdoor adventures.
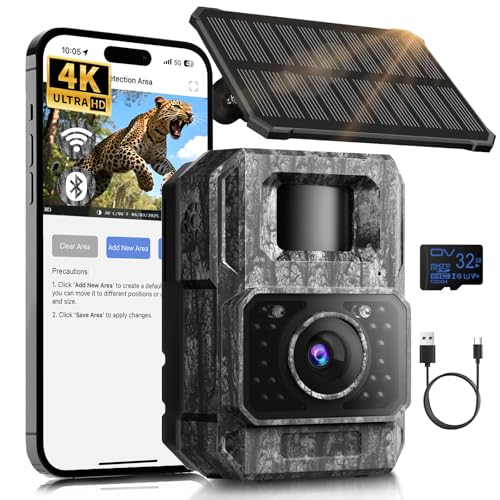
MAXDONE Solar Trail Camera WiFi Bluetooth – 4K 64MP Game
- ✓ Excellent image quality
- ✓ Easy app control
- ✓ Rugged waterproof design
- ✕ No remote internet access
- ✕ Limited WiFi range
| Sensor Resolution | 4K video recording and 64MP still images |
| Battery Capacity | 6000mAh rechargeable lithium battery |
| Night Vision Range | Up to 65 feet (20 meters) |
| Trigger Speed | 0.1 seconds |
| Waterproof Rating | IP66 |
| Connectivity | Creates its own Wi-Fi hotspot, supports Bluetooth pairing with TrailCamGO app |
Imagine setting up a trail camera and being surprised by how much thought has gone into its design—only to realize it’s more advanced than most you’d expect. That split solar panel?
It’s not just for show; it actually makes a difference. I was skeptical about the solar charging, but manually adjusting the panel’s angle to face the sun really boosts the battery life, even in shady spots.
Holding the MAXDONE Solar Trail Camera, you notice its sturdy, waterproof build with an IP66 rating. It feels solid, yet lightweight enough to mount easily.
The high-resolution 4K and 64MP sensor deliver crystal-clear images and videos, even in low light. Nighttime footage is impressive—sharp, clear, and without disturbing nearby wildlife, thanks to infrared night vision that reaches up to 65 feet.
The app setup is surprisingly simple. You connect via WiFi and Bluetooth to the “TrailCamGO” app within seconds.
Sending photos and videos directly to your phone without removing the SD card? That’s a game changer.
The camera’s trigger speed of 0.1 seconds captures fast-moving animals flawlessly. Plus, its multiple functions like time-lapse, scheduled shooting, and motion detection make it versatile for any monitoring need.
While it doesn’t connect to home Wi-Fi or support remote viewing, the local hotspot feature is still very effective. The rechargeable 6000mAh battery supports solar, Type-C, or battery power, so you’re covered for long-term use without constant replacements.
Overall, this camera blends robust performance with clever features that make wildlife watching or security checks effortless.
What Key Factors Should You Consider for the Best Trail Camera Setup?
When setting up the best trail camera, several key factors should be considered to ensure optimal performance and results.
- Camera Resolution: Higher resolution cameras capture clearer images, which are especially important for identifying animals and their features. Look for a camera with at least 12 megapixels to ensure high-quality photos even in low light conditions.
- Trigger Speed: The trigger speed is the time it takes for the camera to take a photo after movement is detected. A faster trigger speed (under 0.5 seconds) ensures that you capture quick-moving animals, preventing missed opportunities.
- Detection Range: This refers to how far away the camera can detect motion. A good detection range is essential for covering large areas and ensuring that wildlife is captured as they move through the field of view.
- Battery Life: Long battery life is crucial for trail cameras, especially if they are set up in remote locations. Look for cameras that can operate for several months on a single set of batteries to minimize maintenance and ensure consistent operation.
- Storage Capacity: Consider the amount of storage the camera supports, as this impacts how many images and videos can be saved. Cameras with SD card slots that can accommodate larger capacity cards will allow for longer periods of monitoring without needing to retrieve images frequently.
- Weather Resistance: Since trail cameras are often placed outdoors, they need to be durable and weatherproof. Look for cameras that are rated for all-weather use to withstand rain, snow, and extreme temperatures.
- IR Flash vs. White Flash: Infrared (IR) flash cameras are ideal for nighttime photos as they are less likely to spook wildlife, while white flash cameras provide clearer images but can startle animals. Choosing the right type depends on your specific needs and the type of wildlife you are observing.
- Field of View: The field of view determines how much area the camera can capture. A wider field of view is beneficial for monitoring large spaces, while a narrower field can help in focused observation of specific trails or feeding areas.
- Mounting Options: The ability to easily mount and adjust the camera’s angle is important for capturing the best shots. Look for cameras that come with versatile mounting options, including straps and brackets, to ensure optimal positioning.
- Ease of Use: The camera should be user-friendly, with simple setup and easy menu navigation. A camera that is straightforward to operate will save time during the setup process and improve your overall experience.
How Does Camera Resolution Impact Your Trail Camera’s Performance?
The resolution of a camera significantly influences the quality of images captured by trail cameras, affecting various aspects of performance.
- Image Clarity: Higher resolution cameras produce clearer and more detailed images, which is crucial for identifying wildlife species and their behaviors. A camera with low resolution may result in blurry or pixelated images, making it difficult to discern important details.
- Zoom Capability: Cameras with higher resolution allow for better cropping of images without losing detail, enabling users to zoom in on specific areas of the photo. This is particularly beneficial for analyzing animal features or markings from a distance without sacrificing image quality.
- Night Vision Performance: Many trail cameras utilize infrared technology for nighttime photography, and higher resolution can enhance the quality of these images. Improved resolution in low light conditions helps to capture clearer images, revealing more about the nocturnal activities of wildlife.
- Video Quality: Trail cameras with higher resolution often provide better video quality as well, which is essential for capturing dynamic scenes or behaviors. This results in smoother playback and clearer footage, making it easier to observe animal interactions and movements.
- Storage Requirements: While higher resolution images offer superior quality, they also require more storage space and can lead to quicker filling of memory cards. Users need to balance the need for high-resolution images with the practicalities of storage limitations and battery life.
Why is Trigger Speed Critical for Capturing Action Shots?
Trigger speed is critical for capturing action shots because it determines how quickly a camera can detect motion and take a picture, ensuring that fast-moving subjects are captured without significant delays.
According to a study by the Outdoor Writers Association of America, a trigger speed of less than 0.5 seconds is ideal for effectively capturing wildlife in motion, as animals can move quickly and unpredictably. Cameras with slower trigger speeds often miss the action entirely, resulting in empty frames or blurred images.
The underlying mechanism involves the sensor technology used in these cameras. When a subject moves in front of the camera, the infrared sensor detects the change in heat or motion and triggers the shutter. If this process takes too long, the subject may have already moved out of the frame, leading to missed opportunities. Additionally, variations in environmental conditions, such as wind or foliage movement, can further complicate detection, making a fast trigger speed even more vital for accurate action shots.
How Does Detection Range Influence Your Camera’s Effectiveness?
Detection range is a critical factor that significantly influences a camera’s effectiveness in capturing wildlife activity.
- Field of View: The field of view (FOV) determines how wide an area the camera can monitor at any given time. A wider FOV allows the camera to capture more subjects simultaneously, which is particularly useful in open areas where animals may move in and out of the frame quickly.
- Detection Distance: This refers to the maximum distance at which the camera can detect motion. Cameras with a longer detection distance are better suited for large properties or expansive landscapes, ensuring that distant wildlife is still captured without requiring the camera to be positioned too close to the action.
- Trigger Speed: Trigger speed is the time it takes for the camera to capture an image once motion is detected. A faster trigger speed is essential for effectively capturing quick-moving animals, which is more likely to happen when the detection range is optimized to suit the environment.
- Sensitivity Settings: Many trail cameras come with adjustable sensitivity settings that can influence detection range. Higher sensitivity can help detect smaller animals or movement at greater distances, while lower sensitivity may reduce the number of false triggers from non-target movements like swaying branches.
- Mounting Height and Angle: The placement of the camera affects its detection range as well. Mounting the camera at the appropriate height and angle can maximize its ability to detect motion, ensuring that it covers the intended area without missing any wildlife activity.
- Environmental Factors: Various environmental factors such as foliage density, terrain, and weather conditions can impact detection range. Cameras may perform differently in thick woods compared to open fields, and understanding these dynamics can help in positioning the camera for optimal effectiveness.
What Types of Trail Cameras Are Best Suited for Different Situations?
The best trail camera setups vary based on specific needs and environments.
- Standard Trail Cameras: These cameras are designed for general use and are suitable for monitoring wildlife or property.
- High-Resolution Trail Cameras: Ideal for capturing detailed images and videos, these cameras are perfect for situations where identification of animals is crucial.
- Wireless Trail Cameras: With the ability to send images directly to a smartphone or computer, these cameras are best for users who prefer real-time updates without needing to retrieve the camera.
- Low-Light Trail Cameras: Equipped with infrared or night vision capabilities, these cameras excel in low-light conditions, making them suitable for nocturnal wildlife observation.
- Stealth Cameras: Designed with features that minimize detection, these are ideal for sensitive areas where wildlife might be disturbed by the presence of a camera.
- Cellular Trail Cameras: These cameras utilize cellular networks to send images and alerts, making them great for remote locations where frequent visits are impractical.
Standard trail cameras are versatile options that typically feature moderate resolution and battery life, making them suitable for everyday wildlife monitoring. They are easy to set up and maintain, providing reliable functionality in various terrains.
High-resolution trail cameras offer superior image quality, often exceeding 12 megapixels, which is essential for identifying specific animals or monitoring their behavior closely. They are particularly useful in scenarios where detailed documentation of wildlife is necessary, such as for research or hunting purposes.
Wireless trail cameras enhance convenience by allowing users to receive images and notifications on their devices without visiting the physical camera location. This feature is beneficial for monitoring active areas or when the user wants to minimize the disturbance to the wildlife.
Low-light trail cameras are equipped with advanced technologies such as infrared flash, enabling them to capture clear images in darkness. This makes them invaluable for monitoring nocturnal species or for security purposes in poorly lit areas.
Stealth cameras prioritize discretion and often feature silent operation and low-glow flash options. They are designed to avoid detection by animals and humans alike, making them an excellent choice for sensitive environments where disturbance could alter natural behaviors.
Cellular trail cameras are particularly advantageous for remote monitoring, as they can send alerts and images over cellular networks, eliminating the need for frequent visits. This capability is perfect for users managing expansive properties or conducting wildlife research in hard-to-reach locations.
What are the Benefits of Choosing Traditional Over Cellular Trail Cameras?
The benefits of choosing traditional over cellular trail cameras are significant for various outdoor enthusiasts.
- Cost-Effectiveness: Traditional trail cameras are generally less expensive than cellular models, making them accessible for a broader range of budgets.
- Simplicity of Use: With fewer technological features, traditional cameras are easier to operate, requiring minimal setup and fewer potential points of failure.
- Reliability: Traditional cameras do not rely on cellular networks, which can be spotty in remote areas; thus, they provide reliable performance in diverse environments.
- No Subscription Fees: Unlike cellular trail cameras that often require monthly or annual subscription plans for data usage, traditional cameras have no ongoing costs, making them more economical in the long run.
- Battery Life: Traditional trail cameras typically have longer battery life since they don’t constantly transmit data, allowing for extended monitoring without the need for frequent battery replacements.
- Data Privacy: Using traditional cameras means that photos are stored locally on SD cards, ensuring privacy and security without the risk of data breaches associated with cloud storage.
- Field Versatility: They can be easily moved or repositioned without worrying about network coverage, allowing users to adapt their setups based on changing wildlife patterns.
Traditional trail cameras offer a range of benefits, particularly for those who prefer a straightforward approach without the complexities and costs associated with cellular technology.
How Do Infrared and Flash Sensors Affect Wildlife Photography?
Infrared and flash sensors play crucial roles in enhancing wildlife photography, especially when setting up the best trail camera.
- Infrared Sensors: Infrared sensors are designed to detect heat emitted by animals, allowing the camera to trigger without the need for visible light.
- Flash Sensors: Flash sensors utilize a visible light flash to illuminate the scene when capturing images, which can affect the behavior of wildlife.
- Stealth and Wildlife Behavior: The choice between infrared and flash sensors can significantly influence the stealth of the camera and the natural behavior of wildlife.
- Image Quality: Different sensor types can produce varying image quality, impacting the clarity and detail captured in wildlife photography.
Infrared sensors are designed to detect heat emitted by animals, allowing the camera to trigger without the need for visible light. This feature is particularly beneficial in low-light conditions and helps capture images of nocturnal animals without startling them, leading to more natural behavior. Additionally, infrared sensors are less likely to frighten away animals compared to traditional flash setups.
Flash sensors utilize a visible light flash to illuminate the scene when capturing images, which can affect the behavior of wildlife. While this type of sensor can produce vibrant and clear images, the sudden burst of light can startle animals, potentially leading to missed opportunities or altered behaviors. This makes it essential to consider the right context for using flash sensors in wildlife photography.
The choice between infrared and flash sensors can significantly influence the stealth of the camera and the natural behavior of wildlife. Cameras equipped with infrared sensors are generally less intrusive, allowing photographers to capture candid moments. In contrast, flash sensors may be more suitable for environments where well-lit images are necessary, but with the trade-off of potentially scaring off shy animals.
Different sensor types can produce varying image quality, impacting the clarity and detail captured in wildlife photography. Infrared images may sometimes appear grainier, especially at night, while flash images can be crisp and bright but might lose detail in highlights. Understanding these differences helps photographers optimize their trail camera setup for the best possible results in different scenarios.
What Are the Ideal Locations for Placing Your Trail Camera?
The ideal locations for placing your trail camera are crucial for capturing the best images and videos of wildlife.
- Near Water Sources: Placing your trail camera near ponds, streams, or other water sources is effective, as animals frequently visit these areas to drink. This location increases the likelihood of capturing diverse species, especially during dry seasons when water is scarce.
- Along Game Trails: Identifying well-used game trails is vital, as these routes are frequented by animals moving between feeding and bedding areas. Setting up your camera on these trails can lead to consistent and high-quality wildlife photos.
- Feeding Areas: Setting your camera near natural feeding areas, such as berry patches or nut-producing trees, can attract animals looking for food. This allows for greater chances to capture images of animals in a relaxed state, as they are often focused on eating.
- Scrapes and Rubs: In areas where deer are prevalent, placing cameras near scrapes (where bucks mark territory) or rubs (where they rub their antlers) can yield exciting footage during the rutting season. These spots are indicative of animal behavior and can help you monitor their activity patterns.
- Attractants: Using bait, such as corn or commercial attractants, can draw animals to your camera setup. This method can enhance your chances of capturing specific species or behaviors, but it is essential to ensure that baiting is legal in your area.
- High Ground or Elevated Positions: Installing your camera on elevated ground or in trees can provide a better vantage point to capture images of animals approaching from various angles. This method can reduce the chances of the camera being obstructed by underbrush and improves visibility.
- Near Trails or Paths: Placing your camera near established paths, such as logging roads or hiking trails, can capture images of both wildlife and human activity. This location can be particularly useful for monitoring animal movements in areas that are frequently disturbed.
How Can You Determine the Best Location to Capture Wildlife?
Determining the best location to capture wildlife involves several key factors that enhance the effectiveness of your trail camera setup.
- Wildlife Trails: Identifying well-established trails used by animals is essential. These trails often show signs of frequent use, such as tracks or droppings, indicating a consistent path for wildlife movement.
- Water Sources: Placing your camera near ponds, rivers, or streams can attract animals that need to hydrate. Water sources are vital for many species, especially in hot or dry climates, making them prime spots for capturing images.
- Feeding Areas: Locations with abundant food sources, such as fruit trees, berry bushes, or agricultural fields, are attractive to wildlife. Setting up a camera near these areas increases the likelihood of capturing animals as they forage for food.
- Scrapes and Rubs: Areas where animals have marked their territory, like deer scrapes or rubs on trees, are excellent spots for camera placement. These sites indicate animal activity, particularly during mating seasons when animals are more active in these regions.
- Natural Cover: Choosing locations with natural cover, such as dense bushes or fallen logs, can provide animals with a sense of security. This encourages them to move through these areas, allowing your camera to capture more natural behaviors.
- Elevation Changes: Setting up cameras on hillsides or near slopes can provide vantage points for observing wildlife. Animals often travel along these changes in elevation, and placing a camera here can yield diverse wildlife sightings.
What Environmental Factors Should You Consider for Optimal Results?
When setting up a trail camera for optimal results, several environmental factors need to be considered:
- Lighting Conditions: Proper lighting is crucial for capturing clear images. Trail cameras perform best in natural light, so positioning the camera where it can take advantage of the sun’s direction during peak activity times, such as dawn or dusk, can significantly enhance image quality.
- Temperature: Extreme temperatures can affect the performance of trail cameras, including battery life and sensor functionality. It’s essential to choose a camera designed to operate within the temperature range of your local environment, ensuring it remains functional in both hot and cold conditions.
- Humidity: High humidity can lead to condensation inside the camera, potentially damaging the internal components. Using a weather-sealed camera or placing silica gel packets inside the housing can help mitigate moisture issues and prolong the life of the camera.
- Wildlife Patterns: Understanding the behavior and movement patterns of local wildlife is key to successful trail camera placement. Setting the camera along established trails, food sources, or water holes where animals frequently visit will increase the chances of capturing desired images.
- Camera Placement Height: The height at which you mount your trail camera can impact the types of images you capture. Generally, placing the camera about 3-4 feet off the ground allows for optimal angles and minimizes the risk of obstruction from vegetation or other obstacles.
- Wind and Weather Conditions: Wind can cause branches and leaves to move, triggering false captures. It’s important to consider weather forecasts and potential storms that could lead to camera damage or obscure visibility, ensuring your camera is secured and shielded appropriately.
- Access to Power Sources: If your trail camera requires batteries, consider the availability and accessibility of power sources. Utilizing rechargeable batteries or solar power options can ensure your camera remains operational over extended periods without frequent maintenance.
What Accessories Can Enhance Your Trail Camera Setup?
Several accessories can significantly enhance your trail camera setup for better performance and results.
- Memory Cards: High-capacity, fast memory cards are essential to ensure your trail camera can store ample photos and videos without lag. Look for cards that offer at least Class 10 speed for optimal performance, especially if you plan to capture high-definition footage.
- Mounting Brackets: A sturdy mounting bracket can help you position your trail camera securely in various environments. It allows for adjustable angles and height, ensuring that you capture the best possible images from the desired vantage point.
- External Battery Packs: To extend the life of your trail camera, consider using external battery packs. These packs can provide additional power, especially in remote areas where changing batteries regularly is impractical, allowing your camera to operate longer without interruption.
- Security Boxes: Protecting your trail camera from theft and damage is crucial, particularly in public or high-traffic areas. Security boxes made from durable materials can be locked onto trees or posts, deterring potential thieves while keeping your camera safe from the elements.
- Wi-Fi or Cellular Modules: For real-time monitoring, a Wi-Fi or cellular module can be added to your trail camera setup. These devices allow you to receive instant alerts and view images remotely, making it easier to track wildlife activity without physically visiting the camera location.
- Camouflage Covers: To minimize the visibility of your trail camera, consider using camouflage covers. These covers help the camera blend into its surroundings, reducing the likelihood of it being noticed by wildlife or passersby, which can lead to more natural behavior from animals.
- Lens Filters: Adding lens filters can enhance image quality in various lighting conditions. For instance, UV filters can reduce glare and improve color accuracy, while polarizing filters can help cut down reflections in bright environments.
- Tripod or Ground Stakes: Using a tripod or ground stakes can provide extra stability for your trail camera. This is particularly useful in windy areas or when capturing videos, as it helps prevent blurry images caused by camera movement.
Which Mounting Solutions Provide Stability and Security?
The main mounting solutions that provide stability and security for trail cameras include:
- Tree Mounts: Ideal for natural environments, these mounts allow users to strap or screw the camera onto a tree trunk.
- Tripod Mounts: Offering flexibility in positioning, tripods can be adjusted for height and angle, providing stability on uneven ground.
- Ground Stakes: These are often used in open areas and can be driven into the soil, securing the camera at a fixed height for optimal visibility.
- Wall or Post Mounts: Perfect for urban or developed areas, these mounts attach directly to a wall or a post, ensuring a stable setup.
- Camera Blinds: These structures not only secure the camera but also provide concealment, making it less detectable to wildlife and potential thieves.
Tree mounts are a popular choice for their ease of installation and ability to blend in with the natural surroundings, making them less obtrusive to animals. They can be easily adjusted to different heights, ensuring the camera captures the desired field of view.
Tripod mounts are versatile and can be set up in various locations, allowing for camera adjustments in terms of height and angle. This adaptability makes them suitable for different terrains and environments, ensuring a stable shot regardless of the terrain.
Ground stakes are useful for securing cameras in areas where trees are sparse. They are designed to be driven into the ground, providing stability and a fixed position, making them ideal for monitoring wildlife in open fields.
Wall or post mounts are beneficial in areas where natural mounting options are limited. They provide a secure attachment point, making it easy to capture footage in settings such as backyards or near trails frequented by wildlife.
Camera blinds not only secure the camera but also offer concealment, enhancing the chances of capturing wildlife without detection. These setups can be strategically placed to provide a better angle and maintain a low profile, reducing the risk of theft or interference.
How Can External Power Sources Extend Your Camera’s Life?
External power sources can significantly enhance the longevity and functionality of your camera setup in the field.
- Solar Panels: Using solar panels can provide a continuous power supply to your camera, allowing it to operate indefinitely as long as there is sunlight. They are particularly useful in remote locations where changing batteries frequently is impractical.
- Battery Packs: High-capacity external battery packs can be connected to your camera, offering extended shooting time compared to standard batteries. These packs can often be recharged and reused, making them an economical choice for long-term monitoring.
- AC Power Adapters: If your trail camera supports it, an AC power adapter can be used when the camera is placed in a fixed location near a power source. This setup eliminates the need for batteries entirely, ensuring uninterrupted operation.
- Rechargeable Lithium-ion Batteries: These batteries can be used in conjunction with external power sources for extended periods. They are more efficient and have a longer lifespan than standard alkaline batteries, making them a great addition to a trail camera setup.
- Power Management Systems: Some advanced systems allow for the integration of power management features that optimize energy use. They can automatically switch between power sources, ensuring your camera remains operational even when one source is depleted.
What Steps Should You Follow for Setting Up Your Trail Camera Effectively?
To effectively set up your trail camera, follow these essential steps:
- Choose the Right Location: Select a spot that is frequented by wildlife, such as near water sources, feeding areas, or trails. Ensure the camera is secured to a tree or stable surface, allowing for a clear view of the desired area.
- Consider the Camera Height: Position the camera at a height of 3 to 4 feet above the ground for optimal angles. This height helps capture images of animals at eye level, leading to clearer and more informative shots.
- Set the Camera Direction: Aim the camera towards the area where you expect movement, ensuring it faces north or south to avoid direct sunlight that can cause glare. Adjust the angle slightly downward to capture more of the animal’s activity.
- Adjust the Settings: Configure the camera settings based on your specific needs, adjusting the resolution, trigger speed, and time-lapse options. Higher resolution settings yield better images, but they consume more battery life and storage space.
- Test the Camera: Before leaving the camera in place, conduct a test by walking in front of it to ensure it accurately detects motion and captures images as expected. This helps confirm that the camera is functioning properly and positioned correctly.
- Maintain the Camera: Regularly check on the camera to replace batteries and memory cards, and ensure it remains stable and clean. Keeping the camera well-maintained will enhance its performance and longevity.
How Do You Prepare Your Camera for Deployment in the Field?
Preparing your camera for deployment in the field involves several key steps to ensure optimal performance.
- Choose the Right Location: Selecting the best location is crucial for capturing quality images. Look for areas with signs of wildlife activity such as tracks, droppings, or feeding signs, while also considering the angle of the sunlight to avoid glare and ensure images are well-lit.
- Set the Camera Settings: Configuring the camera settings according to your objectives is essential. Adjust the resolution, trigger speed, and detection zones based on your needs, as well as setting the time-lapse and interval settings if you want to capture images over time.
- Test the Camera: Before final deployment, conduct a test run to ensure everything is functioning correctly. Take a few test shots, check the battery life, and confirm that the memory card is correctly formatted and has enough space for your intended duration.
- Secure the Camera: Using a sturdy mounting system is vital for keeping the camera in place. Consider using a lock or a cable to secure it to a tree or post to prevent theft or tampering.
- Check the Weatherproofing: Ensure that your camera is adequately weatherproofed to withstand the elements. If necessary, use protective cases or covers that don’t obstruct the lens or sensors, as this will help prolong the camera’s lifespan in harsh conditions.
- Regular Maintenance: Plan for regular checks on your camera to replace batteries and memory cards. This ongoing maintenance will allow you to monitor the images captured and make any necessary adjustments to settings or positioning.
What Routine Maintenance Can Prolong the Life of Your Trail Camera?
Regular maintenance is essential to ensure the longevity and optimal performance of your trail camera. The best trail camera setup involves several key maintenance practices:
- Regular Cleaning: Dust and debris can accumulate on the lens and housing of your trail camera, affecting image quality. Use a soft cloth to gently wipe the lens and ensure that the camera is free from dirt and moisture buildup.
- Battery Management: Regularly check and replace batteries to prevent power issues. Batteries that are low can cause your camera to malfunction or shut down unexpectedly, so using high-quality batteries and keeping spares on hand is advisable.
- Firmware Updates: Many trail cameras offer firmware updates that can enhance functionality and fix bugs. Regularly check the manufacturer’s website for updates and follow the instructions to ensure your camera operates with the latest features.
- Proper Storage: When not in use, store your trail camera in a dry, cool place to protect it from extreme temperatures and humidity. Using a protective case can also help shield it from physical damage during storage or transport.
- Check Mounting Location: Periodically inspect the area where the camera is mounted. Ensure it remains secure and choose locations that minimize exposure to extreme weather conditions, which can prolong the life of the camera.
- Inspect Cables and Connections: If your trail camera uses external power sources or has any cables, check them for wear and tear. Damaged cables can lead to power issues or data loss, so replacing them promptly is crucial.
- Review Settings and Adjustments: Regularly review the camera settings to ensure they are optimized for your current use case. Adjusting settings like sensitivity, resolution, and trigger speed can enhance performance and capture quality.