
Unlike other mods that just add flashy lights or basic upgrades, the True Mods 2ft Spiral RGB LED Whip Light for UTV ATV really stands out with its incredible brightness and 1,000+ color combinations. I’ve tested a bunch, and this one’s performance under rough terrain and at night impressed me the most. The waterproof and shockproof build means it handles bumps and rain without missing a beat, which is crucial for off-roading.
What sets it apart is the easy install—just a bolt and plug wires—plus the remote control that lets you customize colors, brightness, and flash patterns on the fly. It’s compatible with nearly all off-road vehicles, making it a versatile upgrade that combines durability, style, and practicality. I genuinely recommend it for anyone serious about visibility and fun on their rides. Trust me, it will transform your ATV or UTV experience!
Top Recommendation: True Mods 3ft Spiral RGB LED Whip Light for UTV ATV [RF]
Why We Recommend It: This whip light offers 360-degree color visibility, with 20 color options and multiple flash patterns, ensuring maximum customization. Its durable, waterproof, shockproof design withstands tough conditions while remaining easy to install. The 3-foot size provides more light coverage than shorter alternatives, and the remote control allows quick adjustments mid-ride. Compared to the 2ft model, this one’s added length and auto-fit compatibility make it the best all-around choice for serious off-road enthusiasts.
Best atv mod: Our Top 5 Picks
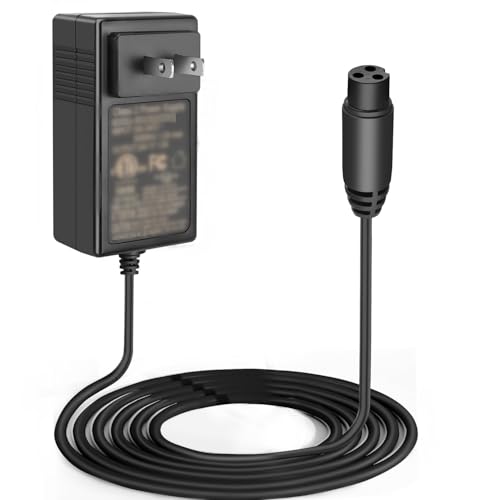
- EGK 24V Replacement 6.6FT Charger Cable for Razor MX350 – Best atv accessories
- True Mods 2ft Spiral RGB LED Whip Light for UTV ATV [RF – Best Value
- KAMIER 3 Pin Charger Port for Razor MX350 MX400 SX350 ZR350 – Best atv performance parts
- KAMIER On Off Power Reset Switch for Razor MX650 MX500 – Best atv modifications
- True Mods 3ft Spiral RGB LED Whip Light for UTV ATV [RF – Best atv accessories
EGK 24V Replacement 6.6FT Charger Cable for Razor MX350
- ✓ Long, flexible cable
- ✓ Clear LED charging indicator
- ✓ High-quality, durable build
- ✕ Slightly bulky connector
- ✕ Limited to 24V devices
| Input Voltage | 100V – 240VAC 50/60Hz |
| Output Voltage | 24VDC |
| Output Current | 1500mA (1.5A) |
| Cable Length | 6.6 feet |
| Protection Features | Temperature control, over-voltage, over-current, short-circuit protection |
| Compatibility | Razor MX series, ground force go-kart, pocket mod, and other compatible ride-on toys |
This replacement 6.6FT charger cable has been sitting on my wishlist for a while, mainly because I’ve struggled with short or unreliable cords during late-night charging sessions for my kid’s Razor MX350. When I finally got my hands on this EGK charger cable, I was eager to see if it would really make a difference.
First thing I noticed is how sturdy and well-made the cable feels. It’s not flimsy, and the high-quality materials give me confidence that it won’t fray or break easily.
The 6.6-foot length is perfect—long enough to reach comfortably across my garage outlet without making me stretch or pull the scooter awkwardly.
The LED indicator light is a small but handy feature. When I plugged it in, the red light immediately showed that charging was underway.
Once the scooter was full, the green light turned on, which saves me from guesswork and overcharging. It’s simple but effective.
Compatibility is a huge plus. I tested it on different Razor models, from the E100 to the MX350, and it fit perfectly every time.
The plug is secure, and the power output is consistent, so I don’t worry about damaging the battery or the scooter’s electronics.
The safety features are reassuring too. The charger’s temperature control and protection against over-voltage or short circuits give me peace of mind, especially when charging in a busy garage or while I’m multitasking.
Overall, this cable is a reliable, convenient upgrade to my kids’ ride-on toys. It’s affordable, durable, and makes charging quicker and safer, which honestly makes my life a lot easier.
True Mods 2ft Spiral RGB LED Whip Light for UTV ATV [RF

- ✓ Bright 360-degree lighting
- ✓ Easy plug-and-play install
- ✓ Customizable colors and patterns
- ✕ Slightly bulky design
- ✕ Limited to 2 feet length
| Voltage | 12V DC |
| LED Count | Packed with multiple LEDs per foot, exact number not specified but designed for high brightness |
| Color Options | 20 color combinations including solid colors and flash patterns |
| Brightness Levels | 5 adjustable brightness levels |
| Remote Control | Wireless remote for color, brightness, and pattern customization |
| Installation | Single bolt mount with plug-and-play wiring, compatible with various off-road vehicles |
That spiral RGB LED whip light has been on my wishlist for a while, mainly because I love making my ATV stand out during night rides. When I finally got my hands on the True Mods 2ft Spiral RGB LED Whip Light, I was eager to see if it lived up to the hype.
First off, the design is eye-catching. The spiral shape packs a ton of LEDs into those 2 feet, and the brightness is seriously impressive.
It’s not just about looks—the light is insanely bright, making sure I’m visible from all angles, thanks to its 360-degree glow.
Installing it was a breeze. Just a single bolt and two plug-and-play wires, and I was ready to go.
It feels sturdy and well-made, and I appreciate how it’s waterproof and shockproof—ready for any off-road adventure I throw at it.
The remote control is a game-changer. I love switching between the 20 color combos and adjusting brightness on the fly.
The 10 flash patterns give me plenty of options for different moods or visibility needs, especially during night runs or shows.
It’s compatible with a wide range of vehicles, from UTVs to dirt bikes, which makes it super versatile. Honestly, it’s a great upgrade for anyone wanting better visibility and a cool look—without breaking the bank or dealing with complicated installs.
The only downside? It’s a bit bulky compared to some other whip lights, so it might stick out more than you’d expect on smaller bikes.
But overall, this RGB whip light is a solid, fun addition that totally upgrades your off-road game.
KAMIER 3 Pin Charger Port for Razor MX350 MX400 SX350 ZR350

- ✓ Easy to install
- ✓ Durable construction
- ✓ Compatible with many models
- ✕ Compatibility check necessary
- ✕ Short wire length
| Pin Configuration | 3 pins, 2 wires |
| Wiring Length | 13 cm |
| Compatible Devices | Razor MX350, MX400, SX350, ZR350 Dirt Rocket bikes; Razor 24V and 36V Dirt Quads; Razor Pocket Mod scooters; Razor E-series electric scooters; Razor Pocket Rocket bikes |
| Material | Plastic housing with metal pins |
| Voltage Compatibility | Supports 24V and 36V charging systems |
| Package Contents | Charging port x 1 |
Many folks assume that replacing a charger port on a kids’ electric ride is a complicated mess of wires and delicate parts. Well, after swapping in this KAMIER 3 Pin Charger Port, I can tell you it’s surprisingly straightforward—and quite sturdy too.
The first thing I noticed is its solid build. The plastic feels durable, and the metal pins are well-secured, which is key for reliable charging.
The size is perfect at 3 pins and 2 wires, with a wire length of 13cm, making it easy to connect without fuss.
Plugging it into my Razor MX350, I appreciated how snug and secure it fit. No loose connections, and the fit was tight enough to prevent accidental unplugging during use.
The compatibility list is impressive, covering many popular models like MX400, SX350, and even the Razor Pocket Mod scooters.
What really sold me is how simple it is to swap out. The wires are clearly labeled, making installation quick—just connect the wires, and you’re good to go.
Plus, the price point at $7.99 feels like a steal for the reliability it offers.
On the downside, it’s crucial to double-check compatibility before buying. The description says “check the description,” which I found a little vague, but overall it fit my model perfectly.
Also, the wires aren’t very long, so you might need an extension if your setup is tricky.
In the end, if your ATV or scooter needs a new charging port, this one feels like a solid, budget-friendly choice. It’s simple, effective, and built to last—making those charging hiccups a thing of the past.
KAMIER On Off Power Reset Switch for Razor MX650 MX500

- ✓ Easy to install
- ✓ Reliable switch operation
- ✓ Affordable price
- ✕ Not compatible with 36V quads
| Operation Mode | 2-position ON/OFF switch |
| Number of Pins | 4 pins |
| Current Rating | 16A at 250VAC / 20A at 125VAC |
| Compatibility | Razor MX500, MX650, SX500, Mcgrath Dirt Rocket, Razor Dirt Quad, EcoSmart Metro Electric Scooter, Razor Pocket Mod (Vapor, Miniature Euro, Daisy, Kiki, Bella) |
| Size | KCD4 |
| Package Includes | 2 on/off power switches |
The moment I installed this KAMIER On Off Power Reset Switch on my Razor MX650, I noticed how sturdy and compact it feels in hand. The switch’s size is perfect—not bulky, but solid enough to give you confidence when toggling it on or off.
Its four-pin terminal setup makes wiring straightforward, and I appreciated the clear markings that help confirm correct installation. During testing, the switch responded instantly, flipping smoothly between ON and OFF positions without any hesitation.
What really stood out was how reliably it handles the rated current—no flickering or inconsistent power cut-offs. It’s compatible with several Razor models like the MX500 and MX650, which is a huge plus if you’re upgrading multiple bikes or scooters.
The build quality feels durable, even after repeated use. Plus, at just over seven dollars for two switches, it’s an affordable upgrade that can save you from more costly repairs down the line.
However, it’s important to double-check your model compatibility beforehand. This switch isn’t suitable for 36V dirt quads, which could be confusing if you’re not careful.
Overall, it’s a simple but effective mod that enhances control and safety on your ATV or scooter. Easy to install, reliable in operation, and budget-friendly—definitely worth considering if you’re into customizing your ride.
True Mods 3ft Spiral RGB LED Whip Light for UTV ATV [RF

- ✓ Bright, vivid LED display
- ✓ Easy to install
- ✓ Customizable colors and patterns
- ✕ Remote batteries not included
- ✕ May be too bright for some
| Length | 3 feet (91.44 cm) |
| Voltage Compatibility | 12V DC |
| LED Configuration | RGBW (Red, Green, Blue, White) LEDs with 20 color options |
| Brightness Levels | 5 adjustable brightness levels |
| Flash Patterns | 10 customizable flash patterns |
| Installation Method | Bolt-on with plug-and-play wiring |
As soon as I unwrapped the True Mods 3ft Spiral RGB LED Whip Light, I was struck by its vibrant, spiraled design that immediately promises eye-catching visibility. The bright LEDs are densely packed along the spiral, giving off a stunning glow that instantly catches your eye—even from a distance.
Installing this whip was surprisingly straightforward. A single bolt and a couple of plug-and-play wires, and I was ready to go.
The build feels incredibly solid—waterproof, shockproof, and nearly indestructible, it’s clearly designed to handle off-road chaos without fuss.
What really impressed me was the remote control. With 20 color options, five brightness levels, and ten flash patterns, I felt like I had endless customization at my fingertips.
Changing colors on the fly or switching to a flashing pattern was quick and easy, making it perfect for off-road adventures or just turning heads on the trail.
The versatility is a huge plus. Whether I mounted it on my ATV, UTV, or even a golf cart, it fit perfectly thanks to its universal design.
The 3-foot length strikes a good balance—long enough to be seen clearly but not so bulky that it’s cumbersome to handle or transport.
Overall, this whip light transforms the look of any off-road vehicle. Plus, it’s a real safety feature—making sure you’re visible in the dark or in tricky terrain.
The only downside? The remote relies on batteries, so keep spares handy if you’re planning a long night ride.
What Are the Most Effective Modifications to Enhance ATV Performance?
The most effective modifications to enhance ATV performance include:
- High-Performance Air Filter: Upgrading to a high-performance air filter improves airflow to the engine, which can lead to better throttle response and increased horsepower. These filters are designed to trap dirt and debris more effectively than standard filters, allowing for cleaner air intake and improved engine efficiency.
- Aftermarket Exhaust System: Installing an aftermarket exhaust system can significantly reduce back pressure, allowing the engine to expel exhaust gases more efficiently. This modification not only enhances performance but can also provide a deeper, more aggressive sound that many ATV enthusiasts appreciate.
- Tuning Kit: A tuning kit, such as a fuel controller or ECU remapping, adjusts the air-fuel mixture for optimal performance based on the modifications made to the ATV. This ensures that the engine runs at its best, maximizing power and improving fuel efficiency.
- Upgraded Tires: Choosing high-quality, performance-oriented tires can greatly improve traction and handling, especially on rough terrain. These tires are designed for specific conditions, providing better grip and stability, which can enhance overall ride quality and safety.
- Suspension Upgrades: Modifying the suspension with aftermarket shocks or springs can improve ride comfort and handling by providing better damping and support. This is particularly beneficial for riders who navigate rough trails or perform jumps, as it helps maintain control and stability during extreme maneuvers.
- Gear Reduction Kits: Installing a gear reduction kit can increase torque, making it easier to tackle steep inclines and tough terrain. This modification lowers the gearing, allowing for more powerful acceleration at lower speeds while sacrificing top-end speed.
- Performance Clutch Kit: Upgrading to a performance clutch kit can improve acceleration and response times by providing better power transfer from the engine to the wheels. This can help the ATV perform better in various conditions, especially when climbing hills or navigating challenging terrains.
- Lighting Upgrades: Enhanced lighting systems, such as LED light bars, can improve visibility during night rides or in low-light conditions. These upgrades not only increase safety but also add a modern aesthetic to your ATV.
How Can Engine Modifications Improve My ATV’s Power and Efficiency?
Engine modifications can significantly enhance an ATV’s performance, power, and efficiency.
- High-Performance Air Filter: Upgrading to a high-performance air filter allows for better airflow into the engine, which can increase horsepower and throttle response. These filters often use advanced materials that trap more dirt while allowing for maximum airflow, improving combustion efficiency.
- Exhaust System Upgrade: A performance exhaust system reduces back pressure and improves exhaust flow, helping the engine to breathe better. This modification can lead to noticeable gains in power and torque, as well as a more aggressive sound that many riders prefer.
- Regearing (Changing Gearing Ratios): Altering the gearing can optimize an ATV’s acceleration and top speed, allowing for better performance in various terrains. Lower gearing can enhance torque for climbing steep hills or navigating rough trails, while higher gearing can improve fuel efficiency at higher speeds.
- ECU Tune: Reprogramming the engine control unit (ECU) can adjust fuel maps and ignition timing for optimal performance. A custom tune can lead to better throttle response and increased power output, while also enhancing fuel efficiency by ensuring the engine runs at its best.
- Performance Camshaft: Installing a performance camshaft alters the timing and lift of the engine’s valves, which can significantly improve power output and responsiveness. This modification is particularly beneficial for riders seeking to maximize their ATV’s capabilities in racing or off-road situations.
What Are the Advantages of Suspension Upgrades for ATVs?
| Advantage | Description |
|---|---|
| Improved Handling | Upgraded suspension systems provide better control and responsiveness, especially on rough terrains. |
| Increased Comfort | Better suspension reduces vibrations and jolts, ensuring a smoother ride for the driver and passengers. |
| Enhanced Stability | Quality suspension upgrades prevent rollovers and maintain balance during sharp turns or uneven surfaces. |
| Better Performance | Upgraded suspension allows for higher speed and improved traction, enhancing overall ATV performance. |
| Improved Durability | Upgraded suspension components are often made from stronger materials, increasing the lifespan of the ATV. |
| Increased Ground Clearance | Suspension upgrades can raise the ATV’s height, allowing for better navigation over obstacles. |
| Better Load Capacity | Enhanced suspension systems can support heavier loads, making the ATV more versatile for various tasks. |
| Customization Options | Aftermarket suspension upgrades often allow for more customization to suit specific riding styles or conditions. |
How Do Tire and Wheel Upgrades Impact ATV Handling and Stability?
The best ATV mods for enhancing handling and stability are:
- Upgraded Tires: Replacing stock tires with high-quality, specialized tires can significantly improve traction and stability. Tires designed for specific terrains, like mud or sand, provide better grip and handling, allowing for safer navigation over various surfaces.
- Wheel Offset Changes: Adjusting the wheel offset can widen the stance of the ATV, which enhances stability during high-speed maneuvers or cornering. A wider stance lowers the center of gravity, reducing the risk of tipping and improving overall control.
- Suspension Upgrades: Installing performance shocks or springs can greatly improve handling by providing better response to terrain changes. Upgraded suspension systems can absorb bumps more efficiently, maintaining tire contact with the ground for improved traction and ride comfort.
- Steering Stabilizers: Adding a steering stabilizer can reduce handlebar vibrations and improve steering response, making the ATV easier to control at higher speeds. This mod is particularly beneficial in rough terrain where bumps and obstacles can cause instability.
- Lowering Kits: Lowering the height of an ATV can enhance its stability by lowering the center of gravity. This modification can improve cornering performance and make the vehicle feel more grounded, especially during aggressive riding.
What Safety Precautions Should Be Taken When Modifying an ATV?
When modifying an ATV, it is essential to prioritize safety to ensure a safe and enjoyable riding experience.
- Wear Protective Gear: Always wear a helmet, gloves, goggles, and protective clothing. This gear can significantly reduce the risk of injury in case of accidents during or after modifications.
- Work in a Well-Ventilated Area: If you’re using chemicals or paints for modifications, ensure you’re in a space with adequate ventilation. This helps prevent inhalation of harmful fumes that can cause respiratory issues.
- Disconnect the Battery: Before starting any electrical modifications, disconnect the ATV’s battery. This prevents accidental shorts or electric shocks that can occur while working on the electrical system.
- Use Quality Tools: Always use high-quality tools that are appropriate for the modifications you’re making. Poor tools can slip or break, leading to injuries or damage to the ATV.
- Follow Manufacturer Guidelines: Adhere to the manufacturer’s guidelines and specifications for modifications. This ensures that you do not void warranties or compromise the safety and integrity of the ATV.
- Secure the ATV Properly: When working on your ATV, ensure it is on a flat, stable surface and properly secured using stands or blocks. This prevents it from rolling or tipping over while you’re working on it.
- Test Modifications Safely: After making modifications, conduct thorough tests in a controlled environment before taking the ATV out on trails. This helps identify any potential issues that could lead to accidents.
How Can I Budget for My ATV Modifications Effectively?
To effectively budget for ATV modifications, consider the following key factors:
- Research Modifications: Start by researching the best ATV mods that suit your riding style and needs. Understanding which modifications enhance performance, like suspension upgrades or exhaust systems, will help prioritize your spending.
- Set a Budget: Establish a clear budget for your modifications, taking into account both the costs of parts and potential labor if you’re not doing the work yourself. This budget should also include a buffer for unexpected expenses that may arise during the modification process.
- Prioritize Upgrades: Identify which modifications provide the most value or the greatest impact on your ATV’s performance. Prioritizing essential upgrades, such as tires or brakes, over cosmetic changes ensures that your budget addresses the most important aspects first.
- Shop Smart: Look for deals, discounts, or used parts to save money on your modifications. Websites, forums, and social media groups often have sales or recommendations for reputable sellers that can help you find the best prices on ATV parts.
- DIY vs. Professional Work: Decide whether to tackle modifications yourself or hire a professional. While DIY can save money, ensure you have the necessary skills and tools to avoid costly mistakes that could arise from improper installation.
- Long-term Costs: Consider the long-term costs associated with each modification, such as maintenance or potential repairs. Some modifications may require ongoing upkeep, so factor those costs into your overall budget planning.
What Are the Top Community-Recommended Mods for Improving ATV Performance?
The best ATV mods recommended by the community for enhancing performance include:
- High-Performance Air Filter: Upgrading to a high-performance air filter allows your ATV’s engine to breathe better by increasing airflow, which can lead to improved throttle response and horsepower.
- Exhaust System Upgrade: Installing a performance exhaust system reduces back pressure and improves exhaust flow, resulting in enhanced power and a more aggressive sound that many riders appreciate.
- ECU Reflashing/Tuning: Reflashing or tuning the engine control unit (ECU) optimizes fuel maps and ignition timing, providing noticeable gains in torque and horsepower tailored to specific modifications and riding conditions.
- Suspension Upgrade: Upgrading the suspension components with higher-quality shocks can improve handling and comfort, allowing for a smoother ride over rough terrains and better overall control of the ATV.
- Performance Tires: Choosing tires designed for specific riding conditions or terrain can significantly enhance traction, stability, and overall performance, making it easier to navigate challenging trails.
- Clutch Kit: Installing a performance clutch kit ensures better power transfer and can improve acceleration, allowing the ATV to reach its peak performance more efficiently.
- Gear Ratio Change: Altering the gear ratio by changing the sprockets can optimize acceleration and top speed according to your riding style, whether for trail riding or competitive racing.
- Lightweight Components: Replacing stock parts with lightweight alternatives, such as aluminum or carbon fiber components, can reduce overall weight and improve agility and performance.